March 31, 2023 NHTSA CAMPAIGN NUMBER: 23E027000
Solar Panel Mounting Hardware May Loosen
Loose Hardware can cause the solar panels to detach from the vehicle during transit, increasing the risk of a crash.
NHTSA Campaign Number: 23E027
Manufacturer Lippert
Components EQUIPMENT
Potential Number of Units Affected 2,399
Summary
Lippert (Lippert) is recalling certain WAY Solar Panels with insufficient installation hardware, part number 2022302246, 2022302299, 2022449915, & 2022302362. The solar panel mounting hardware may become loose and pull through the slot in the panel.
Remedy
Lippert will work with the RV manufacturers and dealers to install additional hardware to the existing panel and install a secondary holding bracket, free of charge. RV manufacturer notifications are expected to begin April 7, 2023. Owners may contact Lippert customer service at 1-574-538-4514. Lippert’s number for this recall is 080-2023-001.
Notes
Owners may also contact the National Highway Traffic Safety Administration Vehicle Safety Hotline at 1-888-327-4236 (TTY 1-800-424-9153), or go to www.nhtsa.gov.
WAY SOLAR PANEL FIELD REWORK INSTRUCTIONS
Recall Number: 23E-027
Product: WAY Solar Panel
Date: April 13, 2023
Labor Rate: 0.7 Hours
Purpose
This document provides rework instructions for WAY solar panel mounting brackets. The corrective action for Recall 23E-027 includes installing additional brackets and hardware; the solar panel does NOT need to be removed from the unit.
NOTE: Please submit a photo of the serial tag on the top (glass) surface with completed work order/claim. If the serial tag is not present, please note this on the claim and submit without photo.
NOTE: If the solar panel has framing that is black in color (Fig. 1), there is no action needed. The VIN should be reported back to the manufacturer to remove from recall with it noted no action is required.
Identifying Products For Rework Kit (See Kit Information Section)
- Solar panel with a silver frame Dimensions of solar panels
- Two types of brackets used to mount the panel 100W – 40.1 x 26.3 x1.3 inches 195W – 58.2 x 26.3 x1.3 inches
Safety
This document provides general instructions. Many variables change the circumstances of any procedure, i.e. the degree of difficulty of the service and the ability of the individual performing the operation. This document cannot plot procedures for every possibility, but will provide general instructions for installing, removing or servicing the system. In the event the skill level required is too advanced or the procedure too difficult, a certified technician should be consulted before performing the operation. Failure to correctly install, remove or service the system may result in voiding the warranty, inflicting injury or even death.
Kit Information
Solar Panel Mounting Bracket Rework Kit, PN 2023020670, can be used on all solar panel part numbers listed in the table below.
| Items in the rework kit 2023020670 | Quantity |
| Add-on L-brackets with adhesive tape | 4 |
| Spacers with adhesive tape | 4 |
| #12 thread-cutting screws | 12 |
| 3/16″ HSS drill bit | 1 |
| Applicable products for the rework kit | ||
| Product Description | WAY SKU | Lippert SKU |
| Solar, Solar Panel, 195W with brackets installed, 106009, ET195PMP4B | 106009 | 2022302246 |
| Solar, Solar Panel, 100W with feet attached, 106040, ET100MP4B | 106040 | 2022302299 |
| Port, 100-watt 30ACC roof port w/MC-4, 7MMC-0100-K | 7MMC-0100-K | 2022449915 |
| 100W w/ branch connector expansion kit, 7MYY-0100-P | 7MYY-0100-P | 2022302362 |
Resources Required
- Appropriate kit as listed in the previous table Metric size #8 or Imperial size 5/16″ socket or nut
- Cordless or electric drill driver
- Cordless impact driver
Preparation
NOTE: Lippert does not require any advance contact or prior authorization be obtained by the repairing facility. The solar panel’s SKUs mentioned may be mounted on RV units with two different types of mounting brackets shown below. This rework kit can be used for both bracket types.
- Begin the rework process by identifying the type of bracket (A or B) used to mount a solar panel to the roof of an RV unit. Use the corresponding process shown below.
Procedures
For Type A Mounting Bracket
- Peel the adhesive backing on the small rectangular spacer piece and stick it to the add-on L-bracket centering it on the single mounting hole at the center of the bracket shown below.
- Peel the adhesive backing on the L-bracket and attach it to the panel, centering the add-on bracket to the pre-existing mounting bracket as shown below. Make sure the bracket is flush to the top and sides of the panel.
- Drill a hole (using the 3/16 size drill bit from the kit) through the L-bracket pilot hole and the solar panel. Drill into the panel as straight as possible. Drilling at an inclined angle could result in hitting the M6 fastener of the pre-existing bracket behind the panel frame.
- Use the impact driver tool with the recommended socket and drive one of the #12 thread-cutting screws into the above drilled hole and secure the add-on bracket to the panel.
NOTE: Be careful and drive the screw slowly into the thin panel wall to avoid stripping it out.
- Drill out the other two holes on the add-on bracket and through the pre-existing mounting bracket.
- Drive the other two #12 screws into the recently-drilled holes and secure the add-on bracket to the pre-existing bracket.
NOTE: Be careful and drive the screws slowly to avoid stripping them out.
- Repeat the process for the other brackets of the panel which completes the reworking process of the Type A mounting bracket.
For Type B Mounting Bracket
Identify how the Type B bracket is installed on the panel. It could be flush mount or somewhat recessed or protruding out compared to the side of the solar panel.
Case 1: Flush mount
- If the bracket front face is flush to the panel, then no spacer is required. Peel the adhesive on the L-bracket and stick it flush to the panel, centering on the pre-existing bracket.
- Drill the top hole of the bracket through the panel and install a #12 screw.
NOTE: Be careful and drive the screw slowly into the thin panel wall to avoid stripping it out.
- Follow the same process for drilling the other holes and secure the bracket with the other two screws.
Case 2: Bracket recessed
- If the bracket front face is recessed, the add-on bracket won’t align flush to the panel and creates a gap between the add-on bracket and the pre-existing bracket at the bottom.
- To fill the gap, stick the spacer piece using adhesive tape on the pre-existing bracket.
Case 3: Bracket protruding out
- If the bracket’s front face is protruding out, the add-on bracket won’t align flush to the panel and creates a gap between the add-on bracket and the panel.
- To fill the gap, stick the spacer piece on the bracket as shown below. Try to center the spacer on the top hole as much as possible.
- After installing the spacer piece in the corresponding location, peel the adhesive backing on the addon bracket and stick it flush to the panel.
- Drill the top hole first and thread a screw into the panel.
NOTE: Be careful and drive the screw slowly into the thin panel wall to avoid stripping it out.
- Drill the other two holes and secure the bracket with the two more #12 screws. NOTE: Be careful and drive the screws slowly to avoid stripping them out.
- Repeat the process for the other brackets which completes the reworking process of the Type B mounting bracket.
As a supplier of a broad array of highly-engineered components in the recreation and transportation product markets, safety, education and customer satisfaction are our primary concerns. Should you have any questions, please do not hesitate to contact us at 432-LIPPERT (432-547-7378) or by email at [email protected]. Self-help tips, technical documents, product videos and a training class schedule are available at lippert.com or by downloading the LippertNOW app.
Rev: 04.14.2023
CCD-0007291
Chronology :
03.08.2023 – Lippert Engineering was advised of an issue with a panel detaching from an RV roof. Initiated a quality review of the WAY solar panels & found multiple mounting methods used by WAY prior to our acquisition.
03.09.2023 – Met with RV Mfr who advised there were two similar occurrences reported.
03.09.23 – 03.13.23 – Lippert vibration testing comparing multiple mounting methods used by WAY initiated and in process.
03.13.23 – Inspected and determined solar panel provided from Way vendor, Delta Distribution, Inc., failed vibration testing. Other solar panels passed vibration testing.
03.10.2023 – 03.20.2023 – Developed a concept service solution for adding mounting robustness to solar panels. Began vibration testing of potential concept solutions.
03.17.2023 – Claim information was provided to Lippert from the RV Mfr. No photos and no parts held or recovered.
03.24.2023 – Field Rework kits finalized and vendor procurement initiated.
03.25.2023: Lippert Safety Committee reviewed incidents, details of concern, testing, field resolution and validation processes.
3.29-30.2023: Lippert reviewing and correcting local product at OEM production locations.
03.30.2023: Lippert Files 573 to launch Recall.
1 Affected Product
Equipment
| BRAND | PART NO. | PRODUCTION DATES |
| LIPPERT | WAY SOLAR PANEL | |
12 Associated Documents
Defect Notice 573 Report
RCLRPT-23E027-3782.PDF 236.736KB
Recall 573 Report – 4/10/2023
RCLRPT-23E027-3479.PDF 236.751KB
Recall Acknowledgement
RCAK-23E027-4956.pdf 740.581KB
Recall 573 Report – 3/31/2023
RCLRPT-23E027-4091.PDF 236.738KB
Recall 573 Report – 4/10/2023
RCLRPT-23E027-1887.PDF 236.809KB
Remedy Instructions and TSB
RCRIT-23E027-2877.pdf 5001.303KB
Recall 573 Report – 4/26/2023
RCLRPT-23E027-8636.PDF 236.964KB
Recall Quarterly Report #1, 2023-2
RCLQRT-23E027-7910.PDF 211.125KB
Recall 573 Report – 8/4/2023
RCLRPT-23E027-7478.PDF 237.638KB
Recall Quarterly Report #2, 2023-3
RCLQRT-23E027-4305.PDF 211.362KB
Recall Quarterly Report #3, 2023-4
RCLQRT-23E027-3951.PDF 211.454KB
Recall Quarterly Report #4, 2024-1
RCLQRT-23E027-9879.PDF 211.554KB
Latest Recalls Documents
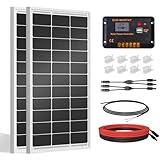
- [Wide Application]: Daily Output 800wh/day under 4 hours full sunshine condition. Perfect for RV, Caravan, Marine, Camper, Electric scooter, Golf Carts, Power wheels, Trolling motor, Tool trailer, Backup power supply for cabin shed home etc.
- [Excellent Performance]: ECO-WORTHY solar panels use high-performance monocrystalline solar cells, which can provide up to 21.5% higher efficiency sufficient light conditions.size:35.2*23.1.37in
- [Durable]: Corrosion-resistant aluminum alloy frame, so that the panel can be used for decades, and can withstand strong wind (2400Pa) and snow load (5400Pa), with a long service life. Ip65 rated junction box provides complete protection.:
- [Complete and Easy]: The back of the pre-drilled and plug-and-play cables allow quick installation, the kit can be connected in series (24V) or parallel (12V) if you need. What you will get: 2 pcs 100W mono solar panel + 2 set of Z mounting brackets + 30A solar controller + 1 pair of 16.4ft 10 awg solar cables + 1 pair of 2-in-1 connectors + 1 pair of 4.92ft tray cable.
- [Support]: 1 year with 24/7 tech support, if any problems or questions about the product,please do not hesitate to let us know through Amazon or call ECO-WORHTY hotline for solution.
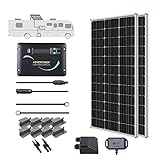
- [Wide Application] 800Wh daily output depends on the 4 hours sunlight availability. This panel is suited for applications that require a smaller footprint, making it a favorite for those with RVs, campers, caravan, boat, Green house and more.
- [Excellent Performance] 22% High solar cell efficiency; Corrosion-resistant aluminum frame for outdoor use, allowing the panels to last for decades as well as withstand high winds (2400Pa) and snow loads (5400Pa)
- [Multiple Protection] The Renogy Adventurer-Li 30A PWM charge controller is designed for aesthetically clean flush mounting on RV or camper walls; Protection against: overcharging, overload, short-circuit, and reverse polarity
- [Easy Installation] Pre-drilled holes and Plug&Play cables on the back allow for fast mounting, and it supports lithium batteries, lead-acid batteries, gel batteries; 3 pairs of Y branch connectors are newly added to meet your parallel requirements
- [VVarranty] 5 year vvarranty and 24/7 technical support team.


- 【High Conversion Rate】This 20W solar panel with monocrystalline A+ solar cell has an excellent cell efficiency of 21%-30%. Designed to charge and maintain 12V rechargeable batteries like LiFePO₄, Lithium Ion, AGM, SLA, GEL, EFB, MF, etc. Keep batteries in charged for trailer, tractor, truck, boat, motorcycle, RV, car, lawn mower, water pump, gate opener, electric fence, etc
- 【Built to Last】 Low-iron tempered glass surface and corrosion-resistant aluminum frame, make this solar panel 100% waterproof and rustproof, and provide the prolonged lifespan up to 25 years. This 12V solar panel can withstand all weather conditions such as sandstorm, strong wind, thunderstorm, blizzard, hail, etc. It can withstand up to 2400Pa wind pressure and 5400Pa snow load
- 【Smart Charge Controller】The charging efficiency of this upgraded 8A controller is 20%-30% higher than other controllers on the market. Its intelligent three-stage charging design effectively prevents the battery from overcharging, over-voltage and short circuit. It takes no power from the battery. You will clearly know the charging status of the battery through the two indicator lights on the controller
- 【Easy to Install & Angle Adjustable】- Equipped with a 360 degree angle adjustable mounting bracket. Helps solar panels always have the best angle to face the sun. It’s very easy to install this bracket on the solar panel with pre-drilled mounting holes and needed screws. All cable connections are plug and play
- 【What You Get】 1 solar panel + 1 charger controller + 1 mounting bracket +1 alligator clips +1 O-rings + 1 set of mounting pieces. We provide one year after-sale service and lifetime technical support. 7×24 hours After-sales service ensures that your question is answered within one day

- 【Efficient Performance】This Starter Kit can generate an average of 500Wh of electricity per day (varies with sunlight). The solar panel boasts a 22.5% cell efficiency, 1.3% higher than other counterparts. Each panel dispatched from our facility undergoes 100% EL testing, ensuring that your panel is completely free from any hidden cracks.
- 【Market-Leading Service Plan】Enjoy worry-free usage with our market-leading service plan, providing 10 years of coverage for solar panel material and workmanship, along with a 2-year plan for the charge controller. Additionally, benefit from a 25-year service plan for the power output of the panel.
- 【Exceptional Safety】Certified by UL 61730, CSA C22.2#61730, IEC 61730/IEC 61215, our solar panel withstands 2400Pa wind and 5400Pa snow loads. Featuring IP65-rated J-box and IP67-rated solar connectors, rest assured, it can tackle any weather challenge.
- 【Remote Monitoring】The Wanderer PWM Charge Controller features an RS232 Bluetooth port. By adding a Renogy BT-1 Bluetooth Module, you can remotely monitor your solar system on the Renogy DC Home app. Keep track of voltage and current at any time, and receive timely warnings for over-voltage, under-voltage, and over-discharge.
- 【Excellent Compatibility】The solar kit with the Wanderer 30A PWM Charge Controller, supports expansion up to 400W with additional solar panels and is compatible with AGM, Gel, Flooded, and Lithium batteries.

- Max Battery Voltage: 32V
SEOCONTENT-START
Rev: 04.14.2023 Page 1 CCD-0007291
WAY SOLAR PANEL FIELD
REWORK INSTRUCTIONS
Recall Number: 23E-027
Product: WAY Solar Panel
Date: April 13, 2023 Labor Rate: 0.7 Hours
Purpose
This document provides rework instructions for WAY solar panel mounting brackets. The corrective action
for Recall 23E-027 includes installing additional brackets and hardware; the solar panel does NOT need to be
removed from the unit.
Safety
This document provides general instructions. Many variables change the circumstances of any procedure,
i.e. the degree of difficulty of the service and the ability of the individual performing the operation. This
document cannot plot procedures for every possibility, but will provide general instructions for installing,
removing or servicing the system. In the event the skill level required is too advanced or the procedure too
difficult, a certified technician should be consulted before performing the operation. Failure to correctly
install, remove or service the system may result in voiding the warranty, inflicting injury or even death.
NOTE: If the solar panel has framing that is black in color (Fig. 1), there is no action needed. The VIN should
be reported back to the manufacturer to remove from recall with it noted no action is required.
Black Frame
Fig. 1
Identifying Products For Rework Kit (See Kit Information Section)
• Solar panel with a silver frame
• Two types of brackets used to mount the panel
• Dimensions of solar panels
100W – 40.1 x 26.3 x1.3 inches
195W – 58.2 x 26.3 x1.3 inches
NOTE: Please submit a photo of the serial tag on the top (glass) surface with completed work order/claim. If
the serial tag is not present, please note this on the claim and submit without photo.
Serial Tag
Rev: 04.14.2023 Page 2 CCD-0007291
WAY SOLAR PANEL FIELD
REWORK INSTRUCTIONS
Recall Number: 23E-027
Product: WAY Solar Panel
Date: April 13, 2023 Labor Rate: 0.7 Hours
Preparation
NOTE: Lippert does not require any advance contact or prior authorization be obtained by the repairing facility.
The solar panel’s SKUs mentioned may be mounted on RV units with two different types of mounting
brackets shown below. This rework kit can be used for both bracket types.
1. Begin the rework process by identifying the type of bracket (A or B) used to mount a solar panel to the
roof of an RV unit. Use the corresponding process shown below.
Type A Type B
Resources Required
• Appropriate kit as listed in the previous table
• Cordless or electric drill
• Cordless impact driver
• Metric size #8 or Imperial size 5/16″ socket or nut
driver
Applicable products for the rework kit
Product Description WAY SKU Lippert SKU
Solar, Solar Panel, 195W with brackets installed, 106009, ET195PMP4B 106009 2022302246
Solar, Solar Panel, 100W with feet attached, 106040, ET100MP4B 106040 2022302299
Port, 100-watt 30ACC roof port w/MC-4, 7MMC-0100-K 7MMC-0100-K 2022449915
100W w/ branch connector expansion kit, 7MYY-0100-P 7MYY-0100-P 2022302362
Items in the rework kit 2023020670 Quantity
Add-on L-brackets with adhesive tape 4
Spacers with adhesive tape 4
#12 thread-cutting screws 12
3/16″ HSS drill bit 1
Kit Information
Solar Panel Mounting Bracket Rework Kit, PN 2023020670, can be used on all solar panel part numbers listed
in the table below.
Rev: 04.14.2023 Page 3 CCD-0007291
WAY SOLAR PANEL FIELD
REWORK INSTRUCTIONS
Recall Number: 23E-027
Product: WAY Solar Panel
Date: April 13, 2023 Labor Rate: 0.7 Hours
Procedures
For Type A Mounting Bracket
1. Peel the adhesive backing on the small rectangular spacer piece and stick it to the add-on L-bracket
centering it on the single mounting hole at the center of the bracket shown below.
2. Peel the adhesive backing on the L-bracket and attach it to the panel, centering the add-on bracket to
the pre-existing mounting bracket as shown below. Make sure the bracket is flush to the top and sides
of the panel.
3. Drill a hole (using the 3/16 size drill bit from the kit) through the L-bracket pilot hole and the solar
panel. Drill into the panel as straight as possible. Drilling at an inclined angle could result in hitting the
M6 fastener of the pre-existing bracket behind the panel frame.
Rev: 04.14.2023 Page 4 CCD-0007291
WAY SOLAR PANEL FIELD
REWORK INSTRUCTIONS
Recall Number: 23E-027
Product: WAY Solar Panel
Date: April 13, 2023 Labor Rate: 0.7 Hours
6. Drive the other two #12 screws into the recently-drilled holes and secure the add-on bracket to the
pre-existing bracket.
NOTE: Be careful and drive the screws slowly to avoid stripping them out.
5. Drill out the other two holes on the add-on bracket and through the pre-existing mounting bracket.
4. Use the impact driver tool with the recommended socket and drive one of the #12 thread-cutting
screws into the above drilled hole and secure the add-on bracket to the panel.
NOTE: Be careful and drive the screw slowly into the thin panel wall to avoid stripping it out.
Rev: 04.14.2023 Page 5 CCD-0007291
WAY SOLAR PANEL FIELD
REWORK INSTRUCTIONS
Recall Number: 23E-027
Product: WAY Solar Panel
Date: April 13, 2023 Labor Rate: 0.7 Hours
7. Repeat the process for the other brackets of the panel which completes the reworking process of the
Type A mounting bracket.
For Type B Mounting Bracket
Identify how the Type B bracket is installed on the panel. It could be flush mount or somewhat recessed or
protruding out compared to the side of the solar panel.
Rev: 04.14.2023 Page 6 CCD-0007291
WAY SOLAR PANEL FIELD
REWORK INSTRUCTIONS
Recall Number: 23E-027
Product: WAY Solar Panel
Date: April 13, 2023 Labor Rate: 0.7 Hours
Case 2: Bracket recessed
1. If the bracket front face is recessed, the add-on bracket won’t align flush to the panel and creates a gap
between the add-on bracket and the pre-existing bracket at the bottom.
2. To fill the gap, stick the spacer piece using adhesive tape on the pre-existing bracket.
Case 1: Flush mount
1. If the bracket front face is flush to the panel, then no spacer is required. Peel the adhesive on the
L-bracket and stick it flush to the panel, centering on the pre-existing bracket.
2. Drill the top hole of the bracket through the panel and install a #12 screw.
NOTE: Be careful and drive the screw slowly into the thin panel wall to avoid stripping it out.
3. Follow the same process for drilling the other holes and secure the bracket with the other two screws.
Rev: 04.14.2023 Page 7 CCD-0007291
WAY SOLAR PANEL FIELD
REWORK INSTRUCTIONS
Recall Number: 23E-027
Product: WAY Solar Panel
Date: April 13, 2023 Labor Rate: 0.7 Hours
Case 3: Bracket protruding out
1. If the bracket’s front face is protruding out, the add-on bracket won’t align flush to the panel and
creates a gap between the add-on bracket and the panel.
2. To fill the gap, stick the spacer piece on the bracket as shown below. Try to center the spacer on the
top hole as much as possible.
3. After installing the spacer piece in the corresponding location, peel the adhesive backing on the addon
bracket and stick it flush to the panel.
4. Drill the top hole first and thread a screw into the panel.
NOTE: Be careful and drive the screw slowly into the thin panel wall to avoid stripping it out.
Rev: 04.14.2023 Page 8 CCD-0007291
WAY SOLAR PANEL FIELD
REWORK INSTRUCTIONS
Recall Number: 23E-027
Product: WAY Solar Panel
Date: April 13, 2023 Labor Rate: 0.7 Hours
As a supplier of a broad array of highly-engineered components in the recreation and transportation product markets, safety, education and customer satisfaction are
our primary concerns. Should you have any questions, please do not hesitate to contact us at 432-LIPPERT (432-547-7378) or by email at [email protected].
Self-help tips, technical documents, product videos and a training class schedule are available at lippert.com or by downloading the LippertNOW app.
6. Repeat the process for the other brackets which completes the reworking process of the Type B
mounting bracket.
5. Drill the other two holes and secure the bracket with the two more #12 screws.
NOTE: Be careful and drive the screws slowly to avoid stripping them out.
**************************************************************************************************************
OMB Control No.: 2127-0004
Part 573 Safety Recall Report 23E-027
The information contained in this report was submitted pursuant to 49 CFR §573
Manufacturer Name : Submission Date :
Lippert
APR 26, 2023 NHTSA Recall No. : 23E-027 Manufacturer Recall No. : 080-2023-001
Manufacturer Information :
Manufacturer Name : Lippert
Address : Attn: Pamela VanderMel
PO Box 2888 Elkhart IN 46515 Company phone : 5743126040
Population :
Number of potentially involved : 2,399 Estimated percentage with defect : 1 %
Equipment Information : Brand / Trade 1 :
Model : Lippert / RV
WAY Solar Panel installation & hardware only Part No. : 2022302246 & 99 Size : 195W 100W Function : Attachment
Descriptive Information : The recall population was determined based on vibration testing analysis of WAY branded solar panels installation and hardware components. The recalled population did not pass our testing. The products which were not included in the recall had installation and hardware components which passed our testing. Here are additional parts, 2022449915 and 2022302362.
Production Dates : AUG 01, 2022 – MAR 21, 2023
Description of Defect :
Description of the Defect : In transit, the mounting hardware holding the solar panel in place could become loose or pull through slots in the solar panel.
FMVSS 1 : NR FMVSS 2 : NR
Description of the Safety Risk : Solar Panels could separate from the bracket while the RV is in transit.
Description of the Cause : Contributing causes include:
• No Locking fasteners used to attach mounting bracket to solar panel
• Slot in Solar Panel and bracket potentially too large when compared to the bolt head size..
• Mounting brackets made of non-tempered aluminum that could allow
brackets to bend or tear. Part 573 Safety Recall Report 23E-027 Page 2 Identification of Any Warning
that can Occur : Loosening hardware attaching bracket to panel. Involved Components : Component Name : Way 195W & 100W Solar Panel hardware only.
Component Description : Installation bracket and hardware only solar panels installed on the roof of RV’s Component Part Number : 2022302246 & 2022302299, 2022449915, 2022302362 Supplier Identification : Component Manufacturer
Name : Delta Distribution LLC Address : 343 Lynnview Lane
New Castle Indiana 47362-1519
Country : United States Chronology :
03.08.2023 – Lippert Engineering was advised of an issue with a panel detaching from an RV roof. Initiated a quality review of the WAY solar panels & found multiple mounting methods used by WAY prior to our acquisition.
03.09.2023 – Met with RV Mfr who advised there were two similar occurrences reported.
03.09.23 – 03.13.23 – Lippert vibration testing comparing multiple mounting methods used by WAY initiated and in process.
03.13.23 – Inspected and determined solar panel provided from Way vendor, Delta Distribution, Inc., failed vibration testing. Other solar panels passed vibration testing.
03.10.2023 – 03.20.2023 – Developed a concept service solution for adding mounting robustness to solar panels. Began vibration testing of potential concept solutions.
03.17.2023 – Claim information was provided to Lippert from the RV Mfr. No photos and no parts held or recovered.
03.24.2023 – Field Rework kits finalized and vendor procurement initiated.
03.25.2023: Lippert Safety Committee reviewed incidents, details of concern, testing, field resolution and validation processes.
3.29-30.2023: Lippert reviewing and correcting local product at OEM production locations. 03.30.2023: Lippert Files 573 to launch Recall. The information contained in this report was submitted pursuant to 49 CFR §573 Part 573 Safety Recall Report 23E-027
Page 3
The information contained in this report was submitted pursuant to 49 CFR §573
Description of Remedy :
Description of Remedy Program : As an equipment supplier we will notify the OEM’s we have sold the solar
panel to. We will assist the OEM’s as needed in their notification to dealers and/or consumers. �The dates entered below in “dealer notification date” will be for our notifications. �Lippert will reimburse all related costs to OEM’s, dealers, and repair centers. The remedy will be to add hardware to the existing product by installing a secondary holding bracket made form tempered aluminum and mounting screws. How Remedy Component Differs from Recalled Component : Identify How/When Recall Condition was Corrected in Production : WAY solar panels produced by Delta and under this Recall are silver in color vs. product not under the recall that are black. Remedy hardware components include a secondary holding bracket made from tempered aluminum bracket and mounting screws. This solution provides twelve added screws holding the four added brackets to the RV.
All WAY Delta solar panels placed on hold 3.21.2023 and rework was initiated to change out hardware to a tempered aluminum bracket and improved hardware (M6Hex Bolt, M6 Hex Nut, M6 bolt Lock Washer and M6 Flat Washer). Recall Schedule :
Description of Recall Schedule : Lippert will notify our customers, RV Mfr’s (OEM’s) by 04/07/2023 Planned Dealer Notification Date : APR 10, 2023 – MAY 15, 2023
Planned Owner Notification Date : APR 10, 2023 – MAY 15, 2023 Purchaser Information :
The following manufacturers purchased this defective/noncompliant equipment for possible use or installation in new motor vehicles or new items of motor vehicle equipment:
Name : Forest River Address : 423 North Main street Middlebury IN 46550 Country : US
Company Phone : 5748258530 Name : RV Moblie Power Address : 1055 W 3RD AVE COLUMBUS OH 43212-3112 Country : US
Company Phone : 6144956688
* NR – Not Reported
**************************************************************************************************************
OMB Control No.: 2127-0004
Part 573 Safety Recall Report 23E-027
The information contained in this report was submitted pursuant to 49 CFR §573
Manufacturer Name : Submission Date :
Lippert
AUG 04, 2023 NHTSA Recall No. : 23E-027 Manufacturer Recall No. : 080-2023-001
Manufacturer Information :
Manufacturer Name : Lippert
Address : Attn: Pamela VanderMel
PO Box 2888 Elkhart IN 46515 Company phone : 5743126040
Population :
Number of potentially involved : 2,399 Estimated percentage with defect : 1 %
Equipment Information : Brand / Trade 1 :
Model : Lippert / RV
WAY Solar Panel installation & hardware only Part No. : 2022302246 & 99 Size : 195W 100W Function : Attachment
Descriptive Information : The recall population was determined based on vibration testing analysis of WAY branded solar panels installation and hardware components. The recalled population did not pass our testing. The products which were not included in the recall had installation and hardware components which passed our testing. Here are additional parts, 2022449915 and 2022302362.
Production Dates : AUG 01, 2022 – MAR 21, 2023
Description of Defect :
Description of the Defect : In transit, the mounting hardware holding the solar panel in place could become loose or pull through slots in the solar panel.
FMVSS 1 : NR FMVSS 2 : NR
Description of the Safety Risk : Solar Panels could separate from the bracket while the RV is in transit. A
Solar Panel separating from the vehicle can pose an increased risk of crash or injury.
Description of the Cause : Contributing causes include:
• No Locking fasteners used to attach mounting bracket to solar panel
• Slot in Solar Panel and bracket potentially too large when compared to the bolt head size..
• inum that could allow Part 573 Safety Recall Report 23E-027 Page 2 brackets to bend or tear. Identification of Any Warning
that can Occur : Loosening hardware attaching bracket to panel. Involved Components : Component Name : Way 195W & 100W Solar Panel hardware only.
Component Description : Installation bracket and hardware only solar panels installed on the roof of RV’s Component Part Number : 2022302246 & 2022302299, 2022449915, 2022302362 Supplier Identification : Component Manufacturer
Name : Delta Distribution LLC Address : 343 Lynnview Lane
New Castle Indiana 47362-1519
Country : United States Chronology :
03.08.2023 – Lippert Engineering was advised of an issue with a panel detaching from an RV roof. Initiated a quality review of the WAY solar panels & found multiple mounting methods used by WAY prior to our acquisition.
03.09.2023 – Met with RV Mfr who advised there were two similar occurrences reported.
03.09.23 – 03.13.23 – Lippert vibration testing comparing multiple mounting methods used by WAY initiated and in process.
03.13.23 – Inspected and determined solar panel provided from Way vendor, Delta Distribution, Inc., failed vibration testing. Other solar panels passed vibration testing.
03.10.2023 – 03.20.2023 – Developed a concept service solution for adding mounting robustness to solar panels. Began vibration testing of potential concept solutions.
03.17.2023 – Claim information was provided to Lippert from the RV Mfr. No photos and no parts held or recovered.
03.24.2023 – Field Rework kits finalized and vendor procurement initiated.
03.25.2023: Lippert Safety Committee reviewed incidents, details of concern, testing, field resolution and validation processes.
3.29-30.2023: Lippert reviewing and correcting local product at OEM production locations. The information contained in this report was submitted pursuant to 49 CFR §573 Part 573 Safety Recall Report 23E-027 Page 3 03.30.2023: Lippert Files 573 to launch Recall. Description of Remedy :
Description of Remedy Program : As an equipment supplier we will notify the OEM’s we have sold the solar
panel to. We will assist the OEM’s as needed in their notification to dealers and/or consumers. �The dates entered below in “dealer notification date” will be for our notifications. �Lippert will reimburse all related costs to OEM’s, dealers, and repair centers. The remedy will be to add hardware to the existing product by installing a secondary holding bracket made form tempered aluminum and mounting screws. How Remedy Component Differs from Recalled Component : Identify How/When Recall Condition was Corrected in Production : WAY solar panels produced by Delta and under this Recall are silver in color vs. product not under the recall that are black. Remedy hardware components include a secondary holding bracket made from tempered aluminum bracket and mounting screws. This solution provides twelve added screws holding the four added brackets to the RV.
All WAY Delta solar panels placed on hold 3.21.2023 and rework was initiated to change out hardware to a tempered aluminum bracket and improved hardware (M6Hex Bolt, M6 Hex Nut, M6 bolt Lock Washer and M6 Flat Washer). Recall Schedule :
Description of Recall Schedule : Lippert will notify our customers, RV Mfr’s (OEM’s) by 04/07/2023 Planned Dealer Notification Date : APR 10, 2023 – MAY 15, 2023
Planned Owner Notification Date : APR 10, 2023 – MAY 15, 2023 Purchaser Information :
The following manufacturers purchased this defective/noncompliant equipment for possible use or installation in new motor vehicles or new items of motor vehicle equipment: Name : Forest River Address : 423 North Main street Middlebury IN 46550 Country : US
Company Phone : 5748258530 The information contained in this report was submitted pursuant to 49 CFR §573 Part 573 Safety Recall Report 23E-027
Page 4
The information contained in this report was submitted pursuant to 49 CFR §573
Name : RV Moblie Power Address : 1055 W 3RD AVE COLUMBUS OH 43212-3112 Country : US
Company Phone : 6144956688
* NR – Not Reported
**************************************************************************************************************
OMB Control No.: 2127-0004
Part 573 Safety Recall Report 23E-027
The information contained in this report was submitted pursuant to 49 CFR §573
Manufacturer Name : Submission Date :
Lippert
MAR 31, 2023 NHTSA Recall No. : 23E-027 Manufacturer Recall No. : 080-2023-001
Manufacturer Information :
Manufacturer Name : Lippert
Address : Attn: Pamela VanderMel
PO Box 2888 Elkhart IN 46515 Company phone : 5743126040
Population :
Number of potentially involved : 3,394 Estimated percentage with defect : 1 %
Equipment Information : Brand / Trade 1 :
Model : Lippert / RV
WAY Solar Panel installation & hardware only Part No. : 2022302246 & 99 Size : 195W 100W Function : Attachment
Descriptive Information : The recall population was determined based on vibration testing analysis of WAY branded solar panels installation and hardware components. The recalled population did not pass our testing. The products which were not included in the recall had installation and hardware components which passed our testing.
Production Dates : AUG 01, 2022 – MAR 21, 2023
Description of Defect :
Description of the Defect : In transit, the mounting hardware holding the solar panel in place could become loose or pull through slots in the solar panel.
FMVSS 1 : NR FMVSS 2 : NR
Description of the Safety Risk : Solar Panels could separate from the bracket while the RV is in transit.
Description of the Cause : Contributing causes include:
• No Locking fasteners used to attach mounting bracket to solar panel
• Slot in Solar Panel and bracket potentially too large when compared to the bolt head size..
• Mounting brackets made of non-tempered aluminum that could allow brackets to bend or tear.
Identification of Any Warning
that can Occur :
Loosening hardware attaching bracket to panel. Part 573 Safety Recall Report 23E-027 Page 2 Involved Components : Component Name : Way 195W & 100W Solar Panel hardware only.
Component Description : Installation bracket and hardware only solar panels installed on the roof of RV’s Component Part Number : 2022302246 & 2022302299 Supplier Identification : Component Manufacturer
Name : Delta Distribution LLC Address : 343 Lynnview Lane
New Castle Indiana 47362-1519
Country : United States Chronology :
03.08.2023 – Lippert Engineering was advised of an issue with a panel detaching from an RV roof. Initiated a quality review of the WAY solar panels & found multiple mounting methods used by WAY prior to our acquisition.
03.09.2023 – Met with RV Mfr who advised there were two similar occurrences reported.
03.09.23 – 03.13.23 – Lippert vibration testing comparing multiple mounting methods used by WAY initiated and in process.
03.13.23 – Inspected and determined solar panel provided from Way vendor, Delta Distribution, Inc., failed vibration testing. Other solar panels passed vibration testing.
03.10.2023 – 03.20.2023 – Developed a concept service solution for adding mounting robustness to solar panels. Began vibration testing of potential concept solutions.
03.17.2023 – Claim information was provided to Lippert from the RV Mfr. No photos and no parts held or recovered.
03.24.2023 – Field Rework kits finalized and vendor procurement initiated.
03.25.2023: Lippert Safety Committee reviewed incidents, details of concern, testing, field resolution and validation processes.
3.29-30.2023: Lippert reviewing and correcting local product at OEM production locations. 03.30.2023: Lippert Files 573 to launch Recall. The information contained in this report was submitted pursuant to 49 CFR §573 Part 573 Safety Recall Report 23E-027
Page 3
The information contained in this report was submitted pursuant to 49 CFR §573
Description of Remedy :
Description of Remedy Program : As an equipment supplier we will notify the OEM’s we have sold the solar
panel to. We will assist the OEM’s as needed in their notification to dealers and/or consumers. �The dates entered below in “dealer notification date” will be for our notifications. �Lippert will reimburse all related costs to OEM’s, dealers, and repair centers. The remedy will be to add hardware to the existing product by installing a secondary holding bracket made form tempered aluminum and mounting screws. How Remedy Component Differs from Recalled Component : Identify How/When Recall Condition was Corrected in Production : WAY solar panels produced by Delta and under this Recall are silver in color vs. product not under the recall that are black. Remedy hardware components include a secondary holding bracket made from tempered aluminum bracket and mounting screws. This solution provides twelve added screws holding the four added brackets to the RV.
All WAY Delta solar panels placed on hold 3.21.2023 and rework was initiated to change out hardware to a tempered aluminum bracket and improved hardware (M6Hex Bolt, M6 Hex Nut, M6 bolt Lock Washer and M6 Flat Washer). Recall Schedule :
Description of Recall Schedule : Lippert will notify our customers, RV Mfr’s (OEM’s) by 04/07/2023 Planned Dealer Notification Date : APR 10, 2023 – MAY 15, 2023
Planned Owner Notification Date : NR – NR Purchaser Information :
The following manufacturers purchased this defective/noncompliant equipment for possible use or installation in new motor vehicles or new items of motor vehicle equipment:
Name : NR Address : NR
NR Country : NR Company Phone : NR
* NR – Not Reported
**************************************************************************************************************
OMB Control No.: 2127-0004
Part 573 Safety Recall Report 23E-027
The information contained in this report was submitted pursuant to 49 CFR §573
Manufacturer Name : Submission Date :
Lippert
MAR 31, 2023 NHTSA Recall No. : 23E-027 Manufacturer Recall No. : 080-2023-001
Manufacturer Information :
Manufacturer Name : Lippert
Address : Attn: Pamela VanderMel
PO Box 2888 Elkhart IN 46515 Company phone : 5743126040
Population :
Number of potentially involved : 3,394 Estimated percentage with defect : 1 %
Equipment Information : Brand / Trade 1 :
Model : Lippert / RV
WAY Solar Panel installation & hardware only Part No. : 2022302246 & 99 Size : 195W 100W Function : Attachment
Descriptive Information : The recall population was determined based on vibration testing analysis of WAY branded solar panels installation and hardware components. The recalled population did not pass our testing. The products which were not included in the recall had installation and hardware components which passed our testing.
Production Dates : AUG 01, 2022 – MAR 21, 2023
Description of Defect :
Description of the Defect : In transit, the mounting hardware holding the solar panel in place could become loose or pull through slots in the solar panel.
FMVSS 1 : NR FMVSS 2 : NR
Description of the Safety Risk : Solar Panels could separate from the bracket while the RV is in transit.
Description of the Cause : Contributing causes include:
• No Locking fasteners used to attach mounting bracket to solar panel
• Slot in Solar Panel and bracket potentially too large when compared to the bolt head size..
• Mounting brackets made of non-tempered aluminum that could allow brackets to bend or tear.
Identification of Any Warning
that can Occur :
Loosening hardware attaching bracket to panel. Part 573 Safety Recall Report 23E-027 Page 2 Involved Components : Component Name : Way 195W & 100W Solar Panel hardware only.
Component Description : Installation bracket and hardware only solar panels installed on the roof of RV’s Component Part Number : 2022302246 & 2022302299 Supplier Identification : Component Manufacturer
Name : Delta Distribution LLC Address : 343 Lynnview Lane
New Castle Indiana 47362-1519
Country : United States Chronology :
03.08.2023 – Lippert Engineering was advised of an issue with a panel detaching from an RV roof. Initiated a quality review of the WAY solar panels & found multiple mounting methods used by WAY prior to our acquisition.
03.09.2023 – Met with RV Mfr who advised there were two similar occurrences reported.
03.09.23 – 03.13.23 – Lippert vibration testing comparing multiple mounting methods used by WAY initiated and in process.
03.13.23 – Inspected and determined solar panel provided from Way vendor, Delta Distribution, Inc., failed vibration testing. Other solar panels passed vibration testing.
03.10.2023 – 03.20.2023 – Developed a concept service solution for adding mounting robustness to solar panels. Began vibration testing of potential concept solutions.
03.17.2023 – Claim information was provided to Lippert from the RV Mfr. No photos and no parts held or recovered.
03.24.2023 – Field Rework kits finalized and vendor procurement initiated.
03.25.2023: Lippert Safety Committee reviewed incidents, details of concern, testing, field resolution and validation processes.
3.29-30.2023: Lippert reviewing and correcting local product at OEM production locations. 03.30.2023: Lippert Files 573 to launch Recall. The information contained in this report was submitted pursuant to 49 CFR §573 Part 573 Safety Recall Report 23E-027
Page 3
The information contained in this report was submitted pursuant to 49 CFR §573
Description of Remedy :
Description of Remedy Program : As an equipment supplier we will notify the OEM’s we have sold the solar
panel to. We will assist the OEM’s as needed in their notification to dealers and/or consumers. �The dates entered below in “dealer notification date” will be for our notifications. �Lippert will reimburse all related costs to OEM’s, dealers, and repair centers. The remedy will be to add hardware to the existing product by installing a secondary holding bracket made form tempered aluminum and mounting screws. How Remedy Component Differs from Recalled Component : Identify How/When Recall Condition was Corrected in Production : WAY solar panels produced by Delta and under this Recall are silver in color vs. product not under the recall that are black. Remedy hardware components include a secondary holding bracket made from tempered aluminum bracket and mounting screws. This solution provides twelve added screws holding the four added brackets to the RV.
All WAY Delta solar panels placed on hold 3.21.2023 and rework was initiated to change out hardware to a tempered aluminum bracket and improved hardware (M6Hex Bolt, M6 Hex Nut, M6 bolt Lock Washer and M6 Flat Washer). Recall Schedule :
Description of Recall Schedule : Lippert will notify our customers, RV Mfr’s (OEM’s) by 04/07/2023 Planned Dealer Notification Date : APR 10, 2023 – MAY 15, 2023
Planned Owner Notification Date : NR – NR Purchaser Information :
The following manufacturers purchased this defective/noncompliant equipment for possible use or installation in new motor vehicles or new items of motor vehicle equipment:
Name : NR Address : NR
NR Country : NR Company Phone : NR
* NR – Not Reported
**************************************************************************************************************
OMB Control No.: 2127-0004
Part 573 Safety Recall Report 23E-027
The information contained in this report was submitted pursuant to 49 CFR §573
Manufacturer Name : Submission Date :
Lippert
APR 10, 2023 NHTSA Recall No. : 23E-027 Manufacturer Recall No. : 080-2023-001
Manufacturer Information :
Manufacturer Name : Lippert
Address : Attn: Pamela VanderMel
PO Box 2888 Elkhart IN 46515 Company phone : 5743126040
Population :
Number of potentially involved : 2,399 Estimated percentage with defect : 1 %
Equipment Information : Brand / Trade 1 :
Model : Lippert / RV
WAY Solar Panel installation & hardware only Part No. : 2022302246 & 99 Size : 195W 100W Function : Attachment
Descriptive Information : The recall population was determined based on vibration testing analysis of WAY branded solar panels installation and hardware components. The recalled population did not pass our testing. The products which were not included in the recall had installation and hardware components which passed our testing.
Production Dates : AUG 01, 2022 – MAR 21, 2023
Description of Defect :
Description of the Defect : In transit, the mounting hardware holding the solar panel in place could become loose or pull through slots in the solar panel.
FMVSS 1 : NR FMVSS 2 : NR
Description of the Safety Risk : Solar Panels could separate from the bracket while the RV is in transit.
Description of the Cause : Contributing causes include:
• No Locking fasteners used to attach mounting bracket to solar panel
• Slot in Solar Panel and bracket potentially too large when compared to the bolt head size..
• Mounting brackets made of non-tempered aluminum that could allow brackets to bend or tear.
Identification of Any Warning
that can Occur :
Loosening hardware attaching bracket to panel. Part 573 Safety Recall Report 23E-027 Page 2 Involved Components : Component Name : Way 195W & 100W Solar Panel hardware only.
Component Description : Installation bracket and hardware only solar panels installed on the roof of RV’s Component Part Number : 2022302246 & 2022302299, 2022449915, 2022302362 Supplier Identification : Component Manufacturer
Name : Delta Distribution LLC Address : 343 Lynnview Lane
New Castle Indiana 47362-1519
Country : United States Chronology :
03.08.2023 – Lippert Engineering was advised of an issue with a panel detaching from an RV roof. Initiated a quality review of the WAY solar panels & found multiple mounting methods used by WAY prior to our acquisition.
03.09.2023 – Met with RV Mfr who advised there were two similar occurrences reported.
03.09.23 – 03.13.23 – Lippert vibration testing comparing multiple mounting methods used by WAY initiated and in process.
03.13.23 – Inspected and determined solar panel provided from Way vendor, Delta Distribution, Inc., failed vibration testing. Other solar panels passed vibration testing.
03.10.2023 – 03.20.2023 – Developed a concept service solution for adding mounting robustness to solar panels. Began vibration testing of potential concept solutions.
03.17.2023 – Claim information was provided to Lippert from the RV Mfr. No photos and no parts held or recovered.
03.24.2023 – Field Rework kits finalized and vendor procurement initiated.
03.25.2023: Lippert Safety Committee reviewed incidents, details of concern, testing, field resolution and validation processes.
3.29-30.2023: Lippert reviewing and correcting local product at OEM production locations. 03.30.2023: Lippert Files 573 to launch Recall. The information contained in this report was submitted pursuant to 49 CFR §573 Part 573 Safety Recall Report 23E-027
Page 3
The information contained in this report was submitted pursuant to 49 CFR §573
Description of Remedy :
Description of Remedy Program : As an equipment supplier we will notify the OEM’s we have sold the solar
panel to. We will assist the OEM’s as needed in their notification to dealers and/or consumers. �The dates entered below in “dealer notification date” will be for our notifications. �Lippert will reimburse all related costs to OEM’s, dealers, and repair centers. The remedy will be to add hardware to the existing product by installing a secondary holding bracket made form tempered aluminum and mounting screws. How Remedy Component Differs from Recalled Component : Identify How/When Recall Condition was Corrected in Production : WAY solar panels produced by Delta and under this Recall are silver in color vs. product not under the recall that are black. Remedy hardware components include a secondary holding bracket made from tempered aluminum bracket and mounting screws. This solution provides twelve added screws holding the four added brackets to the RV.
All WAY Delta solar panels placed on hold 3.21.2023 and rework was initiated to change out hardware to a tempered aluminum bracket and improved hardware (M6Hex Bolt, M6 Hex Nut, M6 bolt Lock Washer and M6 Flat Washer). Recall Schedule :
Description of Recall Schedule : Lippert will notify our customers, RV Mfr’s (OEM’s) by 04/07/2023 Planned Dealer Notification Date : APR 10, 2023 – MAY 15, 2023
Planned Owner Notification Date : NR – NR Purchaser Information :
The following manufacturers purchased this defective/noncompliant equipment for possible use or installation in new motor vehicles or new items of motor vehicle equipment:
Name : NR Address : NR
NR Country : NR Company Phone : NR
* NR – Not Reported
**************************************************************************************************************
OMB Control No.: 2127-0004
Part 573 Safety Recall Report 23E-027
The information contained in this report was submitted pursuant to 49 CFR §573
Manufacturer Name : Submission Date :
Lippert
APR 10, 2023 NHTSA Recall No. : 23E-027 Manufacturer Recall No. : 080-2023-001
Manufacturer Information :
Manufacturer Name : Lippert
Address : Attn: Pamela VanderMel
PO Box 2888 Elkhart IN 46515 Company phone : 5743126040
Population :
Number of potentially involved : 2,399 Estimated percentage with defect : 1 %
Equipment Information : Brand / Trade 1 :
Model : Lippert / RV
WAY Solar Panel installation & hardware only Part No. : 2022302246 & 99 Size : 195W 100W Function : Attachment
Descriptive Information : The recall population was determined based on vibration testing analysis of WAY branded solar panels installation and hardware components. The recalled population did not pass our testing. The products which were not included in the recall had installation and hardware components which passed our testing. Here are additional parts, 2022449915 and 2022302362.
Production Dates : AUG 01, 2022 – MAR 21, 2023
Description of Defect :
Description of the Defect : In transit, the mounting hardware holding the solar panel in place could become loose or pull through slots in the solar panel.
FMVSS 1 : NR FMVSS 2 : NR
Description of the Safety Risk : Solar Panels could separate from the bracket while the RV is in transit.
Description of the Cause : Contributing causes include:
• No Locking fasteners used to attach mounting bracket to solar panel
• Slot in Solar Panel and bracket potentially too large when compared to the bolt head size..
• Mounting brackets made of non-tempered aluminum that could allow
brackets to bend or tear. Part 573 Safety Recall Report 23E-027 Page 2 Identification of Any Warning
that can Occur : Loosening hardware attaching bracket to panel. Involved Components : Component Name : Way 195W & 100W Solar Panel hardware only.
Component Description : Installation bracket and hardware only solar panels installed on the roof of RV’s Component Part Number : 2022302246 & 2022302299, 2022449915, 2022302362 Supplier Identification : Component Manufacturer
Name : Delta Distribution LLC Address : 343 Lynnview Lane
New Castle Indiana 47362-1519
Country : United States Chronology :
03.08.2023 – Lippert Engineering was advised of an issue with a panel detaching from an RV roof. Initiated a quality review of the WAY solar panels & found multiple mounting methods used by WAY prior to our acquisition.
03.09.2023 – Met with RV Mfr who advised there were two similar occurrences reported.
03.09.23 – 03.13.23 – Lippert vibration testing comparing multiple mounting methods used by WAY initiated and in process.
03.13.23 – Inspected and determined solar panel provided from Way vendor, Delta Distribution, Inc., failed vibration testing. Other solar panels passed vibration testing.
03.10.2023 – 03.20.2023 – Developed a concept service solution for adding mounting robustness to solar panels. Began vibration testing of potential concept solutions.
03.17.2023 – Claim information was provided to Lippert from the RV Mfr. No photos and no parts held or recovered.
03.24.2023 – Field Rework kits finalized and vendor procurement initiated.
03.25.2023: Lippert Safety Committee reviewed incidents, details of concern, testing, field resolution and validation processes.
3.29-30.2023: Lippert reviewing and correcting local product at OEM production locations. 03.30.2023: Lippert Files 573 to launch Recall. The information contained in this report was submitted pursuant to 49 CFR §573 Part 573 Safety Recall Report 23E-027
Page 3
The information contained in this report was submitted pursuant to 49 CFR §573
Description of Remedy :
Description of Remedy Program : As an equipment supplier we will notify the OEM’s we have sold the solar
panel to. We will assist the OEM’s as needed in their notification to dealers and/or consumers. �The dates entered below in “dealer notification date” will be for our notifications. �Lippert will reimburse all related costs to OEM’s, dealers, and repair centers. The remedy will be to add hardware to the existing product by installing a secondary holding bracket made form tempered aluminum and mounting screws. How Remedy Component Differs from Recalled Component : Identify How/When Recall Condition was Corrected in Production : WAY solar panels produced by Delta and under this Recall are silver in color vs. product not under the recall that are black. Remedy hardware components include a secondary holding bracket made from tempered aluminum bracket and mounting screws. This solution provides twelve added screws holding the four added brackets to the RV.
All WAY Delta solar panels placed on hold 3.21.2023 and rework was initiated to change out hardware to a tempered aluminum bracket and improved hardware (M6Hex Bolt, M6 Hex Nut, M6 bolt Lock Washer and M6 Flat Washer). Recall Schedule :
Description of Recall Schedule : Lippert will notify our customers, RV Mfr’s (OEM’s) by 04/07/2023 Planned Dealer Notification Date : APR 10, 2023 – MAY 15, 2023
Planned Owner Notification Date : NR – NR Purchaser Information :
The following manufacturers purchased this defective/noncompliant equipment for possible use or installation in new motor vehicles or new items of motor vehicle equipment:
Name : NR Address : NR
NR Country : NR Company Phone : NR
* NR – Not Reported
**************************************************************************************************************
SEOCONTENT-END
This product presentation was made with AAWP plugin.