
April 15, 2019 NHTSA CAMPAIGN NUMBER: 19E029000
Fairing may Damage Wiring, causing Stall
An engine stall or a loss of the headlight or turn signals can increase the risk of a crash.
NHTSA Campaign Number: 19E029
Manufacturer Triumph Motorcycles America, LTD
Components ELECTRICAL SYSTEM
Potential Number of Units Affected 1,201
Summary
Triumph Motorcycles America, LTD (Triumph) is recalling certain accessory fairing kits, part numbers A9708301, A9708412, A9938255, A9938257, A9938265, A9938267, A9938323, and A9938325 sold for accessory installation on 2016-2018 Thruxton 1200, Thruxton 1200R, Thruxton 1200 Dual Seat and Thruxton 1200R Dual Seat motorcycles. Insufficient clearance for the wiring may result in damage to the harnesses causing a loss of headlights, turn signals or possibly a stall.
Remedy
Triumph will notify owners, and dealers will replace the wire covering (conduits) free of charge. The recall began May 24, 2019. Owners may contact Triumph customer service at 1-678-854-2010. Triumph’s number for this recall is SRAN566.
Notes
Owners may also contact the National Highway Traffic Safety Administration Vehicle Safety Hotline at 1-888-327-4236 (TTY 1-800-424-9153), or go to www.safercar.gov.
TOL NOTICE (US&CAN) – May 14, 2019
TOL Ref. # 10763-SVC
IMPORTANT: Safety Recall Action Notice 566
Accessory Café Racer Fairing
Triumph Motorcycles has initiated a voluntary safety recall affecting the specific Thruxton 1200 and Thruxton 1200R models in the VIN ranges listed below fitted with an Accessory Café Racer Fairing. Safety Recall Action Notice 566 requires your immediate attention to rectify the following motorcycles:
| Accessory Café Racer Fairing | ||
| Bulletin Number | Models Affected | VIN Range |
| 566 | Thruxton 1200 | From 743684 to 957335 |
| Thruxton 1200R | From 740405 to 958219 | |
| Thruxton 1200 Dual Seat | From 766764 to 895179 | |
| Thruxton 1200R Dual Seat | From 766510 to 895892 | |
Internal investigations have identified the need to replace the conduits positioning the harness within the Accessory Café Racer fairing on the above models. Additionally, Thruxton 1200 and Thruxton 1200R models up to VIN 749070 fitted with an Accessory Café Racer fairing will need a new lock set.
We require your immediate attention to rectify the above machines. Please refer the attached Safety Recall Action Notice 566 PDF for complete recall instructions.
What is the Problem?
Triumph is recalling certain Thruxton 1200 and Thruxton 1200 R motorcycles fitted with an optional Accessory front fairing kit. The kit includes 2 x conduits to conceal wiring. The conduits have insufficient clearance and can damage wiring. Damaged wiring may cause the engine to stall or cause the loss of the headlight or turn signals increasing the risk of a crash.
What Will Triumph Do?
To address this condition, Triumph is launching a new recall as described in the attached Safety Recall Action Notice 566 PDF. All arrangements for updating our computer systems have now been completed.
Notification letters to current customers will be mailed commencing on May 16, 2019 explaining the action and advising them to contact their local Triumph dealer and returning their bike if necessary to have the modification carried out free of charge to the owner.
What Should You Do?
All affected motorcycles are to be repaired in accordance with Safety Recall Action Notice 566.
Dealers who have previously sold the affected machine must contact every owner and verify whether their motorcycle is equipped with the Accessory Café Racer Fairing. Upon confirmation of a fitted Accessory Café Racer Fairing, dealers will arrange for the necessary repairs to be carried out as soon as possible.
Triumph Dealers should take the following actions:
- You must quarantine all unsold stock and arrange modification as per Safety Recall Action Notice 566 prior to any further deliveries to customers. You can check those machines in your unsold stock that require modification by using TriumphOnLine.Net. Do this by undertaking the following simple steps:
- Once signed into the site, select Motorcycle Sales and then Inventory Management (this will provide you a display summary of your unsold machines by model).
- Select the affected model to view the individual VIN details of your unsold machines. We strongly recommend you check this listing against your physical stock and advise us of any discrepancies. Machines containing a symbol of a ‘spanner’ (indicating Bulletin or Safety Recall Action Notice outstanding) will require attention. Select the VIN to open a dialogue window. Details of all outstanding bulletin(s) and Safety Recall Action Notices are contained in the bottom half of the screen. To view the bulletin content, click on the Union Jack “flag” to open an English language PDF document or alternative flags for other language options (when available). This can be read and/or printed off as required.
- Owners of machines outside of the affected VIN range are not connected with this action and may therefore require reassurance.
- Some VINs affected by this Safety Recall Action Notice may also require other bulletin or Safety Recall Action Notice work to be carried out. Please use the above-described system tools to identify all outstanding bulletins or notices and make arrangements to carry out these repairs at the same time.
- Read, download and circulate the above-mentioned Safety Recall Action Notice 566 to relevant staff and ensure all Sales and Service staff are aware of this action.
- This action is likely to increase visitor traffic to your showroom and service areas. Please ensure all arrangements are made to best accommodate them.
U.S. law prohibits the delivery of a recalled motorcycle under a sale or lease until the remedy has been performed.
We apologize for the inconvenience this may cause, but we are taking this action in the interest of our customers’ personal safety and satisfaction with our products. We thank you in advance for your anticipated cooperation.
If you have any questions, please contact Triumph Customer Support at (888) 284-6288.
24 May 2019
! IMPORTANT SAFETY RECALL !
REPLACEMENT OF FRONT FAIRING CONDUITS
Safety Recall: SRAN566
NHTSA Recall: 19E029
This notice applies to your motorcycle:
| Model: | (2016 – 2020) Thruxton 1200 and Thruxton 1200R |
| (2016 – 2018) Thruxton 1200 Dual Seat and Thruxton 1200R Dual Seat | |
| VIN: | [VIN] |
Dear [NAME]:
This notice is sent to you in accordance with the requirements of the National Traffic and Motor Vehicle Safety Act.
Triumph Motorcycles Ltd. has decided that a defect which relates to motor vehicle safety exists in certain optional/aftermarket Café Racer front fairings intended for installation on 2016-2020 model year Triumph Thruxton 1200, Thruxton 1200R and 2016-2018 model year Thruxton 1200 Dual Seat, Thruxton 1200R Dual Seat models. Accordingly, Triumph Motorcycles America Ltd. is conducting a safety recall to address the condition.
Because our records indicate that you own one of these motorcycle models, with the VIN shown above, we are notifying you of this recall in the event that you may own one of the affected aftermarket Café Racer front fairings. If you purchased, or if your motorcycle is fitted with, any of the fairing part numbers listed below, please review this Recall Notice carefully for further instructions:
| Part Number | Description |
| A9708301- DG/HN/NK/PG | COCKPIT FAIRING |
| A9708412- CW/HN/MP/NW/PS | COCKPIT FAIRING |
| A9938255- HN/NK/PG | ACCPACK TRACKRACER EU, INSPAK INSPIRATION PACKS |
| A9938257- CW/HN/MP/NW/PS | ACCPACK TRACKRACER EU, INSPAK INSPIRATION PACKS |
| A9938265-HN/NK/PG | ACC PACK TRACK RCR, INSPAK INSPIRATION PACKS |
| A9938267- CW/MP/PS | ACC PACK TRACK RCR, INSPAK INSPIRATION PACKS |
| A9938323- HN/PG | TRACK RACER US |
| A9938325- CW/MP/PS | TRACK RACER PK |
| The reason for this recall notice: | The two wire conduits in these aftermarket fairing kits have insufficient clearance and may cause damage to the wiring. Damaged wiring may lead to an engine stall or loss of the headlight or turn signals, increasing the risk of a crash. |
| What Triumph & your dealer will do: | Triumph Motorcycles America Ltd. has authorized your dealer to replace the original conduits free of charge (parts and labour) to you. This repair should take less than 60 minutes. However, depending upon the dealer’s work schedule, it may be necessary to make your motorcycle available for a longer period of time. |
| What you must do to ensure your safety: | Please make an appointment with your authorized Triumph motorcycles dealer to have this important remedy performed on your motorcycle as soon as possible.
Federal regulations require that any vehicle lessor receiving this recall notice must forward a copy of this notice to the lessee within 10 days. |
| If you need help: | Please contact your authorized Triumph dealer should you have any questions or encounter any difficulty regarding this recall. In the event your dealer is unable to remedy your motorcycle, please contact Triumph Motorcycles America at 1-678-854-2010.
If an authorized Triumph If you have previously paid for this repair to be performed prior to receiving this letter, you may be eligible to receive reimbursement for the cost of obtaining a pre-notification remedy of the problem associated with this recall. For more information, please contact Triumph |
If you no longer own the motorcycle listed above or the affected Café Fairing, please contact Triumph at 1-678-854-2010 and provide any information you can furnish that will assist us in locating the new owner.
We apologise for any inconvenience this may cause you. However, we have taken this course of action in the best interest of your safety and your continued satisfaction with your Triumph motorcycle. We appreciate your attention and cooperation in this important matter.
Sincerely
Triumph Motorcycles America Ltd.
Safety Recall Action Notice 566
Issue 1 – 05.2019
| Subject: Café Racer Fairing Conduits | ||||
| Notice Number | Models Affected | VIN Range | Markets Affected | |
| 566 | Thruxton 1200 | From 743684 | to 957335 | All Markets |
| 566 | Thruxton 1200R | From 740405 | to 958219 | All Markets |
| 566 | Thruxton 1200
Dual Seat | From 766764 | to 895179 | All Markets |
| 566 | Thruxton 1200R
Dual Seat | From 766510 | to 895892 | All Markets |
Background Information
Internal investigations have identified the need to replace the conduits positioning the harness within the Accessory Café Racer fairing on the above models. Additionally, Thruxton 1200 and Thruxton 1200R models up to VIN 749070 fitted with an Accessory Café Racer fairing will need a new lock set.
Dealers are requested to replace the conduits, and the lock set if required, with the ones supplied in the kits as described in the procedure below.
Customer Contact Instructions
| Notice |
| STOP DELIVERY OF AFFECTED MOTORCYCLES IMMEDIATELY.
DO NOT deliver a motorcycle affected by this Safety Recall Action Notice to a customer until you have completed, or confirmed completion of, the procedures described in this Safety Recall Action Notice. Delivering a motorcycle subject to an outstanding Safety Recall Action Notice may contravene local or national laws in your market, territory or country. |
Triumph subsidiaries and distributors must instigate a Safety Recall Action in their country in accordance with the national recall code of practice. For vehicles in dealer stock, the safety recall MUST be actioned before delivery to the customer.
Dealers are to prioritise repair of customer owned motorcycles before any unsold motorcycles.
Identification of Affected Motorcycles
Thruxton 1200 and Thruxton 1200R models in the above VIN ranges, fitted with the Accessory Café Racer fairing.
Warranty Claim Instructions
| Notice Number | Model | Fault Code | Repair Code | Description | Repair Time Allowance |
| 566 | All affected models. | 039002995
(Up to VIN 749070) | 995661 | SB566 – Check for Café Racer Fairing Installation | 0.01 Hours |
| 039002994
(From VIN 749071) | |||||
| 566 | Thruxton 1200 and Thruxton 1200R up to VIN 749070 | 039002995 | 995663 | SB566 – Remove and Replace Café Racer Fairing Conduits and Lock Set | 2.2 Hours |
| 566 | Thruxton 1200 and 1200 R models from VIN 749071 (including Dual Seat models) | 039002994 | 995662 | SB566 – Remove and Replace Café Racer Fairing Conduits | 0.5 hours |
Genuine Parts Information
| Notice Number | Model | Part Number | Description | Quantity |
| 566 | All affected models from VIN
749071 | A9701458 | Kit, Conduit Consisting of:
Conduit, Fairing, LH, Routed – Qty 1 Conduit, Fairing, RH – Qty 1 | 1 |
| 566 | Thruxton 1200 up to VIN 749070 | A9701031 | Parts Kit, Conduits and Lockset Consisting of:
Conduit, Fairing, LH, Routed – Qty 1 Conduit, Fairing, RH – Qty 1 Clip, Ratchet, Rivet, 5.9-7.5 – Qty 4 Lock set – Qty 1 Screw, Pan/Hd, Tx, M6 x 16 – Qty 1 Bolt, Shear, M6 x 22 – Qty 2 Bolt, RHHF, M5 x 20 – Qty 2 Locknut, Flanged, M6 x 1.0 – Qty 2 Screw, Pan/Hd, Tx, M6 x 25 – Qty 2 Washer, M6, Elongated – Qty 2 | 1 |
| 566 | Thruxton 1200R up to VIN 749070 | A9701032 | Parts Kit, Conduits and Lockset Consisting of:
Conduit, Fairing, LH, Routed – Qty 1 Conduit, Fairing, RH – Qty 1 Clip, Ratchet, Rivet, 5.9-7.5 – Qty 4 Lock set – Qty 1 Screw, Pan/Hd, Tx, M6 x 16 – Qty 1 Bolt, Shear, M6 x 22 – Qty 2 Bolt, RHHF, M5 x 20 – Qty 2 Locknut, Flanged, M6 x 1.0 – Qty 2 Screw, Pan/Hd, Tx, M6 x 25 – Qty 2 Washer, M6, Elongated – Qty 2 | 1 |
Parts Ordering Instructions
For Triumph Subsidiary and Overseas Distributor dealers using Triumph Warranty On-Line with Parts Auto Ordering Flag switched on: Order all repair parts by submitting a New Prior through the Warranty OnLine system. Entering the above repair code in a New Prior will automatically add the parts required and labour times for this Safety Recall Action Notice.
For Overseas Distributor dealers NOT using Triumph Warranty On-Line or for Overseas Distributor dealers using Triumph Warranty On-Line with Parts Auto Ordering Flag switched off: Orders should be placed using the normal parts ordering procedure.
Genuine Parts Return
Dealer to retain parts for 90 days. All parts must be stored in a secure, non-public accessed area and correctly identified with a completed warranty label. Thereafter the parts must be rendered unusable prior to scrapping.
Other Instructions
Once completed, please mark the Service Record Book that the requirements of this Safety Recall Action Notice have been complied with.
Before returning the motorcycle to the customer, download the latest calibration to the engine control module using the current version of the Triumph diagnostic software.
| Warning |
| Before starting work, make sure the motorcycle is stabilised and adequately supported. This will help prevent it from falling and causing injury to the operator or damage to the motorcycle. |
Check Only Claim
Dealers are requested to contact all potentially affected customers to ascertain if an Accessory Café Racer fairing is fitted to their motorcycle. If an Accessory Café Racer fairing is not fitted, a check only claim must be submitted and no further action is required.
Café Racer Fairing Conduit Replacement
Fairing and Conduit Removal – All Models fitted with an Accessory Café Racer fairing
1. Remove the seat as described in the Service Manual.
2. Disconnect the battery as described in the Service Manual.
3. Remove the fixings securing the fairing to the front subframe.
4. Remove the lower front fixing from the fairing assembly.
5. Supporting the fairing assembly, remove the two central fixings from either side of the windscreen. Remove the fairing assembly. The windscreen will stay attached to the fairing assembly with the other four fixings.
6. Release the two fixings and detach the headlight from the headlight bowl.
7. Disconnect the electrical connector from the headlight bulb, detach the position light and remove the headlight.
8. Release the fixings and detach the harness bracket from the headlight bowl.
Note:
- Note the position of the electrical connectors on the back of the harness bracket for installation.
9. On the back of the harness bracket, detach all the electrical connectors and remove the harness bracket.
10. Remove the headlight mounting fixings and remove the headlight bowl while feeding the harnesses out of the headlight bowl.
11. Remove the left and right hand conduits and retain the fixings. Discard the ratchet rivet clips.
Lock Set Replacement – All Models fitted with an Accessory Café Racer fairing up to VIN 749070 only. For models from VIN 749071 the lock set replacement is not required, continue from Conduit and Fairing Installation – All Models, on page 16.
Ignition Switch Removal
Note:
- Note the position and the routing of the ignition switch harness for installation.
1. Follow the routing of the ignition switch harness and disconnect it from the main harness.
2. Remove the two fixings and detach the instruments and mounting bracket assembly from the upper yoke.
3. Remove the fixing and washer securing the handlebar riser to the upper yoke.
4. Loosen the upper yoke pinch bolts.
5. Remove the upper yoke centre nut from the steering stem and remove the upper yoke.
| Warning |
| When using a drill, ensure suitable protective equipment including eye, ear and hand protection is worn. Do not wear loose clothing or jewellery. Failure to wear suitable protective equipment may result in serious injury. |
| Caution |
| Ensure the drill is central and level when drilling the shear bolts. Drilling the bolts at an angle or off centre may result in damage to the upper yoke. |
Note:
- It is recommended that the shear bolts are drilled out. Use a centre punch to mark the centre of the bolt and, using a smaller drill first, drill the head of the bolt off.
6. Remove the shear bolts then remove the ignition switch.
Seat Lock Removal – All Models fitted with an Accessory Café Racer fairing up to VIN 749070 only
1. Remove the left and right side panels as described in the Service Manual.
2. Remove the engine ECM as described in the Service Manual.
3. Remove the rear mudguard as described in the Service Manual. Note the routing of the seat lock cable for installation.
4. Remove the fixing and remove the air intake duct on the left hand side of the airbox.
5. Remove the two fixings and their shouldered washers from under the rear of the airbox.
6. Remove the fixing and shouldered washer from both sides of the airbox.
7. Release the fixing securing the seat lock latch to the frame.
8. Remove the seat lock protection bracket from the battery tray.
Battery tray
Seat lock protection bracket
9. Lower the airbox sufficiently to allow access to the seat lock barrel.
10. Remove the lock plate from the seat lock barrel.
11. Remove the guide plate from the seat lock barrel and cable.
12. Rotate the seat lock barrel assembly to route through the frame and remove from the motorcycle, noting its position for installation.
Fuel Filler Cap Lock Replace – All Models fitted with an Accessory Café Racer fairing up to VIN 749070 only
1. Lift the fuel filler cap flap.
2. Remove the original fuel filler cap with an original key.
3. Install the new fuel filler cap from the lock set kit with a new key.
Seat Lock Installation – All Models fitted with an Accessory Café Racer fairing up to VIN 749070 only
1. Route the seat lock cable through the aperture in the frame and position the seat lock as noted during removal.
2. Fit the guide plate to the rear of the seat lock barrel and clip the cable in place.
3. Install the lock plate to the seat lock barrel.
4. Raise the airbox to its correct position.
5. Secure the airbox with the four shouldered washers and fixings, tighten the fixings to 6 Nm.
6. Refit the air intake duct to the airbox and tighten its fixing to 1.5 Nm.
7. Fit the seat lock protection bracket to the battery tray.
8. Fit the seat lock latch to the frame with a new fixing and tighten to 9 Nm.
9. Refit the rear mudguard as described in the Service Manual. Ensure the seat lock cable is routed as noted during removal.
10. Refit the engine ECM as described in the Service Manual.
11 Refit the left and right side panels as described in the Service Manual.
Ignition Switch Installation – All Models fitted with an Accessory Café Racer fairing up to VIN 749070 only
1. Fit the ignition switch to the upper yoke.
Note:
- The torx head section on top of the bolt snaps off when fully tightened, leaving a tamper-proof dome.
2. Fit new washers and shear bolts and tighten until the heads shear off.
3. Refit the upper yoke and tighten the upper yoke centre nut to 90 Nm.
4. Tighten the upper yoke pinch bolts to 20 Nm.
Note:
- Up to half of the clamp slot overlap is acceptable.
- If over half of the clamp slot is overlapped, the handlebar riser will require adjustment.
5. Visually check the alignment of the upper yoke clamp slot to the handlebar clamp line.
Note:
- Refer to the Service Manual if the handlebar riser requires adjustment.
6. Refit the instruments and bracket assembly to the upper yoke. Tighten the new fixings to 8 Nm.
7. Route the ignition switch harness and connect it to the main harness as noted for removal.
Conduit and Fairing Installation – All Models fitted with an Accessory Café Racer fairing
| Warning |
| A wiring harness which becomes trapped or kinked during installation, or general motorcycle operation, may result in wiring harness damage and electrical problems. This could give rise to a dangerous riding condition resulting in a fire, loss of motorcycle control and an accident. |
1. Install the new left hand conduit from the kit, routing the instrument harness through the recess, and tighten the fixing to 1.5 Nm.
2. Install the new right hand conduit from the kit, ensuring the ignition switch harness is routed through the recess in the front of the cover as shown. Tighten the fixing to 1.5 Nm.
3. Install the ratchet rivet clips provided in the kit to the front of the conduits.
4. Install the headlight and headlight bowl as described in the Service Manual.
5. Refit the headlight bowl while feeding the harnesses into the headlight bowl. Do not fully tighten the fixings at this stage.
6. Fit the wiring harness electrical connectors to the back of the harness bracket as noted during removal.
7. Fit the harness bracket to the headlight bowl and tighten the fixings to 1.5 Nm.
8. Reconnect the headlight electrical connector and refit the position light.
9. Refit the headlight, tightening the fixings to 4 Nm.
10. Reconnect the battery as described in the Service Manual.
11. For models fitted with an Accessory Café Racer fairing up to VIN 749070 only: Add the new keys to the immobiliser system using the Triumph Diagnostic Tool using the Re-register all keys Delete the original keys.
Note:
- When changing the lock set, a new set of keys are supplied. The new key numbers must be recorded in the Owner’s Handbook for future reference and the customer informed.
12. Note the new key number in the Owner’s Handbook.
13. All models fitted with an Accessory Café Racer fairing: Start the engine.
| Warning |
| Move the handlebars to left and right full lock while checking that cables and harnesses do not bind. Cables or harnesses that bind will restrict the steering and will cause loss of control and an accident. |
14. With the engine running, turn the handlebars lock to lock, and check that all switch housing functions, headlight, direction indicators, rear lights and brake lights operate as intended in all steering positions, and that the engine continues to idle.
15. Adjust the headlight as described in the service manual. Tighten the headlight fixings to 10 Nm.
16. Switch off the engine.
17. Ensure the well nuts are located correctly in the front subframe.
18. Position the fairing and windscreen assembly to the front subframe and locate the rear fixing pegs to the rear mounting bracket grommets. Secure with the four fixings and tighten to 1.5 Nm.
19. Fit the front lower fixing to the fairing assembly and tighten to 3 Nm.
20. Install the two fixings securing the fairing to the front subframe and tighten to 3 Nm.
| Warning |
| Move the handlebar to the left and right full lock while checking that the handlebars do not restrict the steering by contacting the fairing assembly. Operation of the motorcycle with restricted steering will result in loss of motorcycle control and an accident. |
| Warning |
| Move the handlebars to left and right full lock while checking that cables and harnesses do not bind. Cables or harnesses that bind will restrict the steering and will cause loss of control and an accident. |
21. Check the handlebars do not contact the fairing assembly and that the cables and harnesses do not bind.
22. Refit the seat as described in the Service Manual.
6 Affected Products
Vehicles
15 Associated Documents
Recall 573 Report – AMENDMENT 2
RCLRPT-19E029-5942.PDF 215.523KB
Recall 573 Report – AMENDMENT 3
RCLRPT-19E029-1554.PDF 215.565KB
Safety Bulletin
RCSB-19E029-9654.pdf 376.213KB
ISSUED Owner Notification Letter(Part 577)
RONE-19E029-3185.pdf 110.355KB
Manufacturer Notices(to Dealers,etc)- IMPORTANT: SAFETY RECALL ACTION NOTICE 566
RCMN-19E029-8893.pdf 166.572KB
Defect Notice 573 Report
RCLRPT-19E029-2931.PDF 213.757KB
Recall Acknowledgement
RCAK-19E029-8222.pdf 245.843KB
Recall 573 Report – AMENDMENT 1
RCLRPT-19E029-8691.PDF 215.504KB
Recall Quarterly Report #4, 2020-1
RCLQRT-19E029-9901.PDF 211.44KB
Recall Quarterly Report #5, 2020-2
RCLQRT-19E029-8759.PDF 211.549KB
Recall Quarterly Report #1, 2019-2
RCLQRT-19E029-9908.PDF 211.145KB
Recall Quarterly Report #3, 2019-4
RCLQRT-19E029-4330.PDF 211.331KB
Recall Quarterly Report #2, 2019-3
RCLQRT-19E029-0970.PDF 211.249KB
Recall Quarterly Report #6, 2020-3
RCLQRT-19E029-8109.PDF 211.637KB
Miscellaneous Document – Email Campaign
RMISC-19E029-9905.pdf 195.597KB
Latest Recalls Documents

- Package Included: 50 pcs red waterproof wiring connectors for 22, 20, 18, 16 gauge wires, 40 pcs blue waterproof wiring connectors for 16, 14 gauge wires, 10 pcs yellow waterproof wiring connectors for 12, 10 gauge wires—total 100 pcs
- Premium Copper Core: The butt splice terminals use seamless and high-quality thick copper tubular, which makes the connection project safer! Fix the wire firmly, increase current flow, and decrease voltage drop
- Wide Usage: Our heat shrink wire connector is ideal for marine, automobile, industry, electrical and electronics. Whether working on boat, vehicle, RC car, home, scientific project, car stereo, or electrical DIY, the crimp connectors will work well
- 3:1 Heatshrink Ratio: The heat shrink butt connector has dual-wall shrinking tube and inside hot melt glue, providing a fully safe seal and wire corrosion. Its dual wall insulation seals against moisture corrosion, air leakage, and can be used underground
- AIRIC Brand Advantages: As a professional manufacturer of electrical accessories, we own a large leading wire connectors factory and get UL, CE, ROHS, SGS, and ISO9001-2005 international quality system certification

- Solid Crimp: Seamless tinned copper barrel grips each wire without splitting, giving these butt connectors a strong hold that helps reduce the risk of short circuits; The thick copper barrel helps reduce voltage drop, supports high current flow, and minimizes heat buildup for dependable electrical connectors
- Watertight Seal: These heat shrink butt connectors feature dual-wall tubing with a 3:1 shrink ratio and a heat-activated adhesive lining, creating a secure 360-degree seal around each crimp; The dual-wall tubing helps seal out moisture and reduce corrosion, making these heat shrink wire connectors suitable for underground conduit, engine bays, and other demanding environments
- Color-Coded Sizing: Color-coded tubing lets you quickly identify the right butt splice connectors by wire gauge, with red for AWG 22–16, blue for AWG 16–14, yellow for AWG 12–10, black for AWG 14–12, and white for AWG 24–22; Strip, insert, and crimp with a standard tool, then apply heat to create secure wire connectors for a wide range of wiring projects
- Wide Applications: Ideal for marine, automotive, home, trailer, and outdoor wiring projects; These marine butt connectors provide dependable connections for boat consoles, bilge pumps, vehicle wiring, outdoor speakers, and other electrical installations where moisture protection is important
- Available Options: This assortment includes red, blue, and yellow waterproof butt connectors for wire sizes from AWG 22–10; Choose the appropriate color-coded connector to match your wire gauge for marine wire connectors, vehicle harnesses, home electrical wiring, and other electrical applications
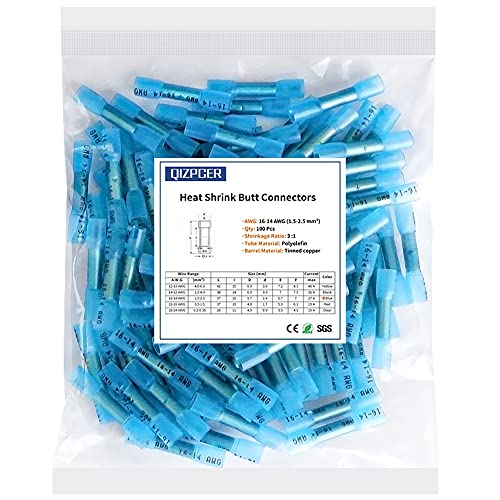
- Tinned Copper Core: Butt connectors use a heavy-duty copper core, strong crimp, higher conductivity
- Package Includes: 100Pcs Blue heat shrink butt connectors that can be used on wire AWG from 16 to 14
- Solderless Crimping: Insert the wires to be connected, crimp both sides with crimping pliers, and then heat with a heat gun
- 3:1 Shrink Ratio: Marine grade heat shrink tubing provides high tensile strength and enough hot melt adhesive inside the tubing to ensure waterproof performance, your wires will never slip out of the wire connectors
- Wide Application: Wire connectors are waterproof, stable, and corrosion resistant and are used in the automotive, marine, electrical, and electronic industries

- [EXECELLENT QUALITY] : Direct factory with excellent quality control, STRONG & DURABLE. The copper core of our heat shrinkable joints is made of high quality tinned copper, in addition to being extremely conductive, it is easier to flatten and grip the wire
- [EASY USE] : Take two wires you wish to join. Remove the wire insulator, pick the terminal color you want. Insert the wire into the terminal one at the time and crimp by crimping tool, insert another terminal and crimp. Use air gun to apply heat on the heat shrink connectors.
- [PRACTICAL DESIGN] : Double-wall design, outer layer of polyolefin tube, inner layer of hot melt adhesive, precise crimping and good contact. Electrical butt connectors provide high tensile strength and adequate hot melt adhesive inside the tube. After shrinking, the wiring is firm and not loose, and it can ensure that the current continues to flow smoothly.
- [WIDE APPLICATIONS] : Our waterproof terminals are perfect for marine, automobile applications, electrical and electronics industries. Whether working on your Boat, Vehicle, Home, or Scientific project, the electrical crimp connector will ensure a strong waterproof seal to make sure everything bonds correctly.
- [PACKAGE INCLUDED] : 25 pcs red connector ( 22-16 AWG ), 15 pcs blue connector ( 16-14 AWG ), 10 pcs yellow connector ( 12-10 AWG ).

- COMPLIANT WITH ALL RELEVANT STANDARDS:With Haisstronica 330PCS( A.W.G.:22-16 150 PCS,16-14 100 PCS,12-10 32 PCS,26-24 48 PCS) heat shrink waterproof wire connectors are compliant with ROHS, ISO 9001:2008, SGS, and CE standards
- HIGH-QUALITY COPPER CORE:Heat shrink butt connectors use a copper core with a higher thickness rating.This makes your connection project safer and better meets our customers’ quality needs
- HIGH-QUALITY HEAT SHRINK:Translucent heat shrink tubing provides high tensile strength and resistance to stretch and minimize mechanical damage.The thick barrel ensures a strong crimp every time.The inner wall of the heat-shrinkable tube has enough hot melt adhesive to ensure waterproof performance reliability.Your wire will never slip out of these heat shrink wire connectors
- RECOGNIZABLE:Tubings of varying colors with easily recognizable wire gauge markings. Simply measure the wiring, and by checking the mark of wire gauge of the polyolefin tubing, then you can quickly choose the right connector
- WIDE APPLICATIONS: High quality 3:1 shrinkage tubing has a heat-activated sealant lining to provide complete secure seal. It's flame-retardant, waterproof, and can be used underground. Compliant with all electrical standards, Perfect for marine and automobile applications, whether you are working on your boat, Vehicle, Home or scientific project
This product presentation was made with AAWP plugin.