
NHTSA ID Number: 10161756
Manufacturer Communication Number: 19-011
Summary
Front docking light switch at front of trailer may stick and rubber boot may melt – Replace switch
1 Affected Product
Vehicle
JAYCO | WHITE HAWK | 2017 |
Incident:
Front docking light switch on trailer sticks and rubber boot may be melted. Replace switch.
Affected Units:
Various Jayco White Hawks
SEOCONTENT-START
SRP 19-011 – Front Light Switch May 2019 Page 1 of 7
Front Docking Light Switch
Incident:
Front docking light switch on trailer sticks and rubber boot may be melted. Replace switch.
Affected Units:
Various Jayco White Hawks
Parts:
1 – Exterior Light Switch with square mounting hole (#0700300)
4 – Screw – pan quad #8 x 1”
Bulletin Type:
SRP
Bulletin #(s):
19-011
Job Code(s):
**
Flat Rate(s):
**
** If affected unit has warranty remaining, submit your claim following the normal process.
Publication Date:
May 2019
Make(s):
Jayco
Model(s):
White Hawk
Model Year(s):
2017
Screw #8 x 1 inch
Switch (#0700300)
SRP 19-011 – Front Light Switch May 2019 Page 2 of 7
Misc. Tools &
Supplies:
Screw gun w/#2 square drive bit
Air saw with metal cutting blade
Putty stick tool & putty knife
Hammer and a tapered punch
Tape measure & tape
Utility Knife
Gloves – Nitrile (not Latex)
S-solvent blend (S-1693)
Isopropyl alcohol & clean rags
4 x 6” cardboard template with rectangular hole in center measuring 1-7/8” Long X 1-1/8 Wide
Tube Sealant – Geocel 2300 black (or equivalent)
INSTRUCTIONS
Disconnect power from the trailer before repairing.
FIG 1:
Switch is located on the front diamond plate (arrow).
FIG 2:
Close up of the switch that must be replaced.
4 x 6” cardboard template with rectangular hole in center measuring 1-7/8” Long X 1-1/8” Wide
Tools
FIG 2 FIG 2FIG 2
FIG 1 FIG 1FIG 1
Geocel 2300 black (0402835)
SRP 19-011 – Front Light Switch May 2019 Page 3 of 7
FIG 3:
Remove the two screws from the switch
FIG 4:
Use the putty knife to GENTLY pry the switch bezel from the diamond plate.
Putty tape is holding the bezel to the diamond plate.
FIG 5:
Use the putty stick tool to GENTLY scrape away any excess putty tape.
Make sure you push the tool in the direction of the hole, to prevent putting a dent or scratch in the diamond plate which may be visible after the new switch is installed.
FIG 6:
Wear safety glasses and Nitrile gloves (not Latex) as the S-1693 solvent will destroy the Latex gloves.
This solvent is very harmful to the skin.
FIG 3 FIG 3FIG 3
FIG 4 FIG 4FIG 4
FIG 5 FIG 5FIG 5
FIG 6 FIG 6FIG 6
SRP 19-011 – Front Light Switch May 2019 Page 4 of 7
FIG 7:
Use a clean rag with the S-1693 solvent to clean all around the switch location.
Then clean the area again with isopropyl alcohol and a clean rag to remove traces of the solvent.
FIG 8:
Unplug the wires from the old switch and tuck the wires into the hole.
FIG 9:
Apply tape around the hole as shown. Apply enough tape that the template will fit on it.
FIG 10:
Measure down 1-1/2” from the top of the diamond plate to the top of the cardboard template.
FIG 7 FIG 7FIG 7
FIG 8 FIG 8FIG 8
FIG 9 FIG 9FIG 9
FIG 10 FIG 10FIG 10FIG 10
1-1/2” 1/2” 1/2” 1/2”
SRP 19-011 – Front Light Switch May 2019 Page 5 of 7
FIG 11:
Trace the rectangular hole in the center of the template onto the tape as shown.
FIG 12:
The rectangular hole is closer to the top of the existing hole than the bottom.
FIG 13:
Use the air saw with a metal cutting blade and CAREFULLY enlarge the hole to the size of the rectangular hole drawn on the tape.
DO NOT PULL THE SAW TOO FAR OUT OF THE HOLE while cutting or the blade could easily jump and cut or gouge the diamond plate under the tape or next to the taped area.
Make sure you move the wires out of the way as you enlarge the hole. DO NOT CUT THE WIRES!
FIG 14:
There is a plywood backer that will need to be cut out also deeper in the hole.
FIG 11 FIG 11FIG 11FIG 11
FIG 12 FIG 12FIG 12FIG 12
Top of the Top of the Top of the Top of the Top of the Top of the Top of the existing holeexisting hole existing hole existing holeexisting holeexisting hole existing holeexisting hole
FIG 13 FIG 13FIG 13FIG 13
Plywood Plywood Plywood Plywood Plywood Plywood Plywood backerbackerbackerbacker backer
FIG 14 FIG 14FIG 14FIG 14
SRP 19-011 – Front Light Switch May 2019 Page 6 of 7
FIG 15:
This is the switch hole completely cut out.
Test fit the new switch to make sure it fits correctly in the hole. Trim further if necessary.
FIG 16:
Remove all the tape, pull the wires out of the hole and plug the wires onto the new switch.
It makes no difference which wire goes to which terminal.
FIG 17:
Use a hammer and the tapered punch and tap the screw holes from the previous switch to push them in.
Holes should be pushed in so that the new switch will fit flush to the diamond plate.
FIG 18:
Apply Geocel sealant in both the old screw holes.
FIG 15 FIG 15FIG 15FIG 15
FIG 16 FIG 16FIG 16FIG 16
FIG 17 FIG 17FIG 17FIG 17
FIG 18 FIG 18FIG 18FIG 18
SRP 19-011 – Front Light Switch May 2019 Page 7 of 7
FIG 19:
Apply Geocel sealant around the back of the switch gasket and over each screw hole (4).
FIG 20:
Install the switch with the closed end at the top (to guard against water intrusion).
Make sure the switch is lined up square and install the 4 screws.
Use the putty stick tool to clean up excess around the switch.
Clean with the isopropyl alcohol and clean rag.
TEST THE SWITCH:
Turn power back on to the trailer.
Flip the switch and the front cap docking lights (2) should light.
Flip the switch again and they should go out.
Jayco’s sole obligation under our limited warranty is to repair or replace defective materials and/or workmanship deemed our responsibility as determined by Jayco in our sole discretion. Jayco reserves the right to use new and/or remanufactured parts or materials of similar quality to complete any work, and to make parts and/or design changes as appropriate without notice to anyone. Jayco designs and/or materials changes are done without obligation to incorporate such changes in previously manufactured product. Jayco makes every reasonable effort to ensure field remedies will not adversely affect performance and/or safety of the unit. This field remedy is not intended to extend to future performance of this RV, or any of its materials, components or parts beyond the standard warranty period. The RV owner’s obligation to notify Jayco, or one of its independent, authorized dealers, of a claimed defect does not modify any obligation placed on the RV owner to contact Jayco directly when attempting to pursue remedies under state or federal law. Jan. 2019.
903 South Main Street • P.O. Box 460 • Middlebury, IN 46540
FIG 19 FIG 19FIG 19FIG 19
FIG 20 FIG 20FIG 20FIG 20
Closed end Closed end Closed end Closed end Closed end Closed end Closed end Closed end Closed end UP
SRP 19-011 – Front Light Switch
May 2019

- 【Specifications】: DC 12-24V Outdoor Inline Power Switch, connecting 30cm 10AWG cable with copper rings at both ends.
- 【performance】: Waterproof Inline Switch, rating: IP67 With red waterproof switch button, the cable wire is made of copper ring terminal, easy and quick installation.
- 【 Features】:waterproof in-line rocker switch the ,is made of high quality silicone cable thick wire diameter, good flexibility, high temperature resistance
- 【Application Scope】: DPST On Off Toggle Switch Suitable for such as automobiles, RVs courtyard light strings lighting, and equipment home inverters, agricultural machinery, etc appliances.
- 【Product packaging】: 1 × inline power switch (30 cm cable on each side with wiring loops)

- IP67 Waterproof & Dust‑Proof Construction: Our 12v switch has been upgraded to IP67 waterproof level, using professional electronic component sealant, so that the switch can be better used in outdoor rainy conditions. Protects internal circuit from rain, splash, dust and moisture, safe for outdoor wet‑location use, prevents short‑circuit caused by water ingress.
- Clear Red LED Indicator Rocker Switch: Built‑in red indicator light shows power status at a glance. Quickly tell ON/OFF status even at night or dim environment. Sturdy rocker button delivers crisp click action for easy inline power control, no need to unplug devices frequently. Special attention: Light only connect to DC 12V can light up.
- Integrated Junction Box with PG9 Cable Glands: Comes with two PG9 waterproof cable connectors for fast cable entry and secure wire locking. All‑in‑one inline switch box saves extra junction box, simplifies field wiring. Pre‑mounted fixing lugs allow stable wall‑mount installation for neat wiring layout.
- Wide Application for Multiple Scenarios: Perfect inline power control for garden lights, LED strip, fountain pump, farm greenhouse equipment, RV exterior lights, boat cabin light, outdoor advertising signs and small outdoor machinery. Ideal replacement for exposed inline power switches.
- Product content: 1 x red light rocker switch + 1 x shell + 2 x waterproof head + 6 x screw

- Blue Indicator Light ON OFF Switch: On/off push button switch with blue indicator light is 3 pin ON OFF SPST design (single pole single throw), "O I" marked on the button, with 10A 125V AC and 20A 12V DC Rating. Lifetime can up to 500,000 cycles, durable and antirust.
- Safety Protection: This truck rocker switch control uses copper-plated silver contacts, has good electrical conductivity, and uses high-quality materials and flame-retardant casing for high safety. IP65 Waterproof toggle switch is protected against dust and low-pressure water jets. It is fully sealed to prevent water from flowing in.
- Rocker Switch Holder: The Round Shell with nut makes the 12V rocker switch install or remove much easier. And the panel mounting hole diameter of Round Rocker Switch Shell is 29mm. come with 5 sets of wires included, you can connect the Round Rocker Switch to device more conveniently.
- Widely Application: Our switch can be used as a switch for various additional electric equipment, inside and outside the car. AC or DC enviroment. It is widely used to control LEDs and circuits on Car, RV, Marine Boats, Trucks, Households, Coffee Machine, Industrial Equipment and Medical Equipment. Can also use these on water dispenser, running machine, electromobile and other household appliances modification
- Package Includes: 5 x Round rocker switches, 10 x Red wires, 5x Black wires, 1x user manual

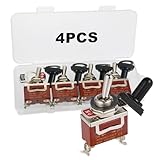
- 【Durable 12V Toggle Switch】 With a 2-pin SPST ON/OFF design, it's easy to operate—simply flip the handle to switch power on or off. this toggle switch 12v is built for performance and reliability. Ideal for use as a marine toggle switch or automotive accessory
- 【Waterproof Protection】 Each waterproof toggle switch comes with a sealed rubber boot cap to resist water, dust, and debris. perfect for marine switches for boats, trucks, RVs, and outdoor equipment exposed to harsh environments
- 【Heavy Duty Performance】 This heavy duty toggle switch supports a wide range of high-power electrical setups. rated 30A at 12V DC, 20A at 125V AC, and 15A at 250V AC, long mechanical life over 100,000 cycles ensures stable operation over time
- 【Quick and Easy Installation】 Designed with a standard 12mm (0.47") mounting hole and screw terminals,the brass terminals provide superior conductivity and corrosion resistance. this 12v toggle switch allows for secure wiring in minutes
- 【Wide Applications】 These waterproof toggle switches are widely used in cars, trucks, boats, yachts, and off-grid DIY setups. Ideal for controlling lights, fog lamps, chassis lights, or any 12v accessory system
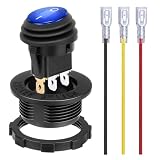
- Special Design:The round Rocker switches is designed for 12V applications and features a SPST ON/OFF design with 3 pins. It includes a waterproof cover, making it suitable for marine, automotive, RV, and boat use. The switch is easy to install, requiring a 20mm panel cutout
- Lighted LED Indicator:This 12V toggle switch comes with a blue LED light that illuminates when the switch is turned on, providing a clear indication of the switch’s status. This feature is especially useful in low-light conditions and enhances the overall visibility
- High-Quality Material:Made with durable plastic and brass terminals, the rocker switch ensures long-lasting performance. The switch is also waterproof and dustproof, providing reliable operation in various environments. It meets automotive and marine-grade standards for quality and safety
- Easy Installation:The round switch includes a keyhole slot to prevent unwanted rotation and comes with pre-soldered wires for hassle-free installation. Simply insert the switch into a 20mm hole and connect the wires to complete the setup
- Wide Application:This versatile switch is suitable for a variety of applications, including cars, trucks, boats, ATVs, UTVs, RVs, and other 12V electrical systems. It can also be used for household appliances and electronic modifications, making it a practical accessory for any project
This product presentation was made with AAWP plugin.