
NHTSA ID Number: 10127059
Manufacturer Communication Number: SMB177
Summary
This Service Manual Bulletin provides new inspection and replacement requirements for the coolant hoses located above the SDS enclosure on specifically equipped buses.
64 Affected Products
Vehicles
NEW FLYER | XD35 | 2010-2017 |
| NEW FLYER | XD40 | 2010-2017 |
| NEW FLYER | XD60 | 2012-2017 |
| NEW FLYER | XDE35 | 2010-2017 |
| NEW FLYER | XDE40 | 2009-2017 |
| NEW FLYER | XDE60 | 2013-2017 |
| NEW FLYER | XN35 | 2013-2017 |
| NEW FLYER | XN40 | 2011-2017 |
| NEW FLYER | XN60 | 2010-2017 |
SMB-177
ISSUE DATE: Dec 06 2017
HVAC Coolant Hose Inspection
PM – PREVENTIVE MAINTENANCE
This bulletin provides new inspection and replacement requirements for the coolant hoses located above the SDS enclosure installed on your New Flyer vehicle.
This bulletin applies to all Xcelsior® models fitted with a front rooftop HVAC unit manufactured by Thermo King or MCC.
Make this Service Bulletin available to service personnel to inform them of changed information.
SEOCONTENT-START
SMB-177 1 of 5
SERVICE MANUAL BULLETIN
This Service Manual Bulletin is prepared by the Publications Department of New Flyer Industries
Canada ULC. Refer to details below.
The New Flyer vehicles described in this manual may be protected by one or more
patents and design applications or registrations in the United States and Canada,
and in other countries. Refer to “Vehicle Patent Information” in this manual.
Copyright © 2017 New Flyer Industries Canada ULC
ISSUE DATE: Dec 06 2017
SMB-177
APPLICABILITY
VEHICLE LENGTH 30ft. 35ft. 40ft. 60ft. ALL
VEHICLE TYPE
Xcelsior® MiDi® Invero®
ALL
Low Floor High Floor
FUEL TYPE
Diesel Diesel/Electric CNG LNG
ALL
Fuel Cell Trolley/Electric Battery/Electric
SUBJECT HVAC Coolant Hose Inspection
SECTION TITLE PM – PREVENTIVE MAINTENANCE
DETAILS This bulletin provides new inspection and replacement requirements for
the coolant hoses located above the SDS enclosure installed on your
New Flyer vehicle.
This bulletin applies to all Xcelsior® models fitted with a front rooftop
HVAC unit manufactured by Thermo King or MCC.
Make this Service Bulletin available to service personnel to inform them
of changed information.
2 of 5 SMB-177
SERVICE MANUAL BULLETIN
SMB-177
The New Flyer vehicles described in this manual may be protected by one or more
patents and design applications or registrations in the United States and Canada,
and in other countries. Refer to “Vehicle Patent Information” in this manual.
Copyright © 2017 New Flyer Industries Canada ULC
1. Quarterly Preventive
Maintenance
1.1. HVAC Coolant Hose Inspection
Inspect the overhead HVAC coolant hoses
on a quarterly basis as follows:
1. Open the SDS enclosure and locate the
two coolant hoses above the SDS upper
shelf. See “Fig. 1: HVAC Coolant Hoses”
on page 2.
Fig. 1: HVAC Coolant Hoses
2. Open the center aisle HVAC access door
and locate the opposite ends of the two
coolant hoses. See “Fig. 2: Coolant Hoses
Access” on page 2.
3. Inspect hoses for any evidence of leakage
or weeping at the end fittings. Replace
both hoses if leakage or weeping is evident.
Refer to 2.1. “HVAC Coolant Hose
Replacement” on page 3 in this bulletin for
replacement procedure.
Fig. 2: Coolant Hoses Access
s0700442b.svg
????????????
????????????????????????????????????
????????????????
????????????????????????????
????????????????????
????????????????????????
????????????????????????????
????????????????????
????????????????????????????????????????
????????????????
s0700451a.svg
????????????????
????????????????????????????
????????????????????
????????????????????????????????????????????
????????????????
SMB-177 3 of 5
SERVICE MANUAL BULLETIN
SMB-177
The New Flyer vehicles described in this manual may be protected by one or more
patents and design applications or registrations in the United States and Canada,
and in other countries. Refer to “Vehicle Patent Information” in this manual.
Copyright © 2017 New Flyer Industries Canada ULC
2. Four Year Preventive
Maintenance
Open the SDS access door and confirm
whether a spill tank assembly is installed
above the SDS enclosure.
❒ Refer to 2.1. “HVAC Coolant Hose
Replacement” on page 3 of this bulletin if a
spill tank assembly is not installed.
❒ Refer to 2.2. “HVAC Coolant Hose
Replacement with Spill Tank Assembly” on
page 4 of this bulletin if a spill tank assembly
is installed.
2.1. HVAC Coolant Hose Replacement
Allow heating system to cool and
relieve system pressure. Keep away
from hot coolant and surfaces to avoid
injury.
Replace the HVAC coolant hoses, located
above the SDS enclosure, every four
years.
1. Set the Battery Disconnect switch to the
OFF position.
2. Close the coolant supply and return
valves, located under the driver’s platform
and at the booster pump location in the
engine compartment.
3. Drain the coolant from the rooftop HVAC
unit by disconnecting the coolant hoses
under the driver’s platform and drain into a
suitable container.
DO NOT allow coolant to drip onto electronic
equipment in the SDS enclosure
when removing the HVAC coolant
hoses. Use plastic sheets or similar
means to protect any electronic equipment
located beneath the HVAC coolant
hoses.
4. Open the SDS enclosure and locate the
two coolant hoses above the SDS upper
shelf. See “Fig. 1: HVAC Coolant Hoses”
on page 2.
5. Loosen the coolant hoses at the connection
to the copper lines and drain into a
suitable container. Disconnect the hoses
from copper line once coolant has completely
drained.
6. Open the center aisle HVAC access door
and locate the opposite ends of the two
coolant hoses.
7. Use a backup wrench and loosen each
coolant hose fitting from the HVAC unit and
allow any coolant to drain into a suitable
container.
8. Disconnect and remove both hoses from
the SDS enclosure. Discard hoses.
9. Install new hoses, ensuring threads on
mating fittings are dry. Torque hoses, using
a backup wrench, to 108 to 113 ft-lb. (146
to 153 Nm).
10.Reinstall the coolant hoses under the
driver’s platform. Torque hose clamps to 80
in-lb. and torque again to 80 in-lb. after 30
minutes.
☞NOTE:
If using power torque driver, ensure tool
RPM does not exceed 75 RPM.
11.Open the coolant supply and return shutoff
valves located below the driver’s platform
and at the booster pump location in the
engine compartment.
12.Set the Battery Disconnect switch to the
ON position.
13.Fill and deaerate the cooling/heating system.
Refer to Section 6 & 10 of your New
Flyer Service Manual for fill and deaeration
procedure.
14.Check for leaks and repair as required.
4 of 5 SMB-177
SERVICE MANUAL BULLETIN
SMB-177
The New Flyer vehicles described in this manual may be protected by one or more
patents and design applications or registrations in the United States and Canada,
and in other countries. Refer to “Vehicle Patent Information” in this manual.
Copyright © 2017 New Flyer Industries Canada ULC
2.2. HVAC Coolant Hose Replacement
with Spill Tank Assembly
Allow heating system to cool and
relieve system pressure. Keep away
from hot coolant and surfaces to avoid
injury.
Replace the HVAC coolant hoses, located
above the SDS enclosure, every four
years.
1. Set the Battery Disconnect switch to the
OFF position.
2. Close the coolant supply and return
valves, located under the driver’s platform
and at the booster pump location in the
engine compartment.
3. Drain the coolant from the rooftop HVAC
unit by disconnecting the coolant hoses
under the driver’s platform and drain into a
suitable container.
DO NOT allow coolant to drip onto electronic
equipment in the SDS enclosure
when removing the HVAC coolant
hoses. Use plastic sheets or similar
means to protect any electronic equipment
located beneath the HVAC coolant
hoses.
4. Locate the drain hose and shutoff valve at
the lower front section of the SDS enclosure.
See “Fig. 3: HVAC Coolant Hoses”
on page 5.
5. Open the shutoff valve at the end of the
hose and drain any coolant from the primary
collection tank. Close the shutoff
valve once all coolant has been drained.
6. Open the SDS enclosure and locate the
two coolant hoses above the SDS upper
shelf.
7. Loosen the hose clamps and disconnect
the two coolant hoses connected to the
90° fittings on the spill tank assembly.
8. Remove the fasteners that attach the spill
tank assembly to the SDS rack structure
and remove the spill tank assembly.
9. Locate the two coolant hoses that pass
through the funnel and skirt assembly.
10.Loosen the coolant hoses at the connection
to the copper lines and drain into a
suitable container. Disconnect the hoses
from copper line once coolant has completely
drained.
11.Open the center aisle HVAC access door
and locate the opposite ends of the two
coolant hoses.
12.Use a backup wrench and loosen each
coolant hose fitting from the HVAC unit and
allow any coolant to drain into a suitable
container.
13.Disconnect and pull both hoses out
through the rubber skirt on the funnel
assembly. Discard hoses.
SMB-177 5 of 5
SERVICE MANUAL BULLETIN
SMB-177
The New Flyer vehicles described in this manual may be protected by one or more
patents and design applications or registrations in the United States and Canada,
and in other countries. Refer to “Vehicle Patent Information” in this manual.
Copyright © 2017 New Flyer Industries Canada ULC
14.Install new hoses, ensuring threads on
mating fittings are dry. Torque hoses, using
a backup wrench, to 108 to 113 ft-lb. (146
to 153 Nm).
15.Replace the spill tank assembly, using
original fasteners.
16.Reinstall coolant hoses on the 90° fittings
on the spill tank assembly. Torque hose
clamps to 80 in-lb. wait 30 minutes, then
torque again to 80 in-lb.
☞NOTE:
If using power torque driver, ensure tool
RPM does not exceed 75 RPM.
17.Reinstall the coolant hoses under the
driver’s platform. Torque hose clamps to 80
in-lb. and torque again to 80 in-lb. after 30
minutes.
☞NOTE:
If using power torque driver, ensure tool
RPM does not exceed 75 RPM.
18.Open the coolant supply and return shutoff
valves located below the driver’s platform
and at the booster pump location in the
engine compartment.
19.Set the Battery Disconnect switch to the
ON position.
20.Fill and deaerate the cooling/heating system.
Refer to Section 6 & 10 of your New
Flyer Service Manual for fill and deaeration
procedure.
21.Check for leaks and repair as required.
Fig. 3: HVAC Coolant Hoses
????????????????????????????????????????
????????????????
????????????????????????
????????????????????
????????????????????????????????????????
????????????????????????????????
????????????????????????
????????????????????????????????
????????????????????????????
????????????????????????????????????????
????????????????
????????????????????????????
????????????????????????????
????????????????????
????????????????????????????????????????
????????????????????????????????????????????????????
????????????????????????
????????????????????????????
????????????????????
s0700440b.svg
SMB177
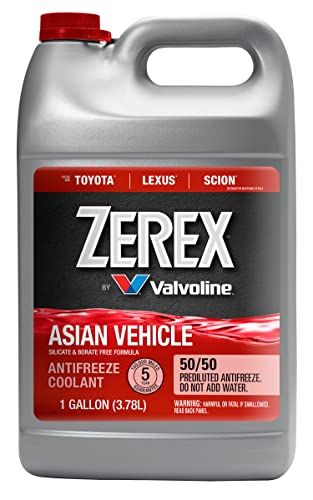
- Formulated to replace the OEM fluid in Asian make vehicles such as Toyota , Lexus , Scion and others requiring a red, silicate free HOAT antifreeze/coolant
- 5 year/150, 000 mile . Silicate-free, long-life, phosphate Hybrid Organic Acid Technology chemistry
- The long life formula provides protection for all cooling system metals from rust and corrosion. The silicate free, borate free formula helps protect against harmful scale and deposits
- Meets the following OEM and industry specifications: JIS K 2234-1994, Hyundai/KIA MS 591-08, Mitsubishi ES-64217, Ford WSS-M97B55-A, ASTM 3306, ASTM D4985, Federal Specification A-A-870A
- Note: Please check the vehicle specification before purchasing the item.


- 5 year/150, 000 mile . Silicate-free, long-life, phosphate Hybrid Organic Acid Technology chemistry
- Formulated to replace the OEM fluid in Asian make vehicles such as Honda, Nissan, KIA, Hyundai and others requiring a blue, silicate free HOAT antifreeze/coolant
- The long life formula provides protection for all cooling system metals from rust and corrosion. The silicate free, borate free formula helps protect against harmful scale and deposits
- Meets the following OEM and industry specifications: Hyundai/KIA MS 591-08, Mitsubishi ES-64217, JIS K 2234-1994, Ford WSS-M97B55-A, ASTM 3306, ASTM D4985, Federal Specification A-A-870A
- Contains 30 – 50 ppm of denatonium benzoate as a bittering agent

- Genuine Honda Type 2 Long-Life Blue Coolant, pre-mixed 50/50 (ready to use)
- Protects metal and non-metal cooling system parts against corrosion and rust
- Freeze protection and boil-over resistance for extreme temperature performance
- Replaces part number OL999-9011 - matches factory fill for Honda systems requiring Type 2 coolant
- Long service life — up to 5 years or ~60,000 miles under normal conditions
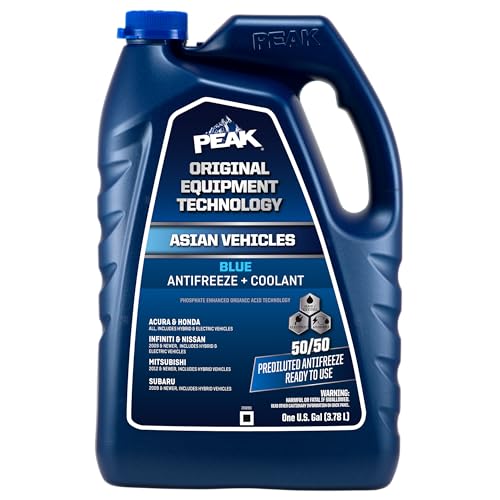
- 1 GALLON ENGINE ANTIFREEZE/COOLANT: Fully compatible with other extended life antifreeze/coolants. This item contains a bittering agent called Denatonium Benzoate.
- PROTECTS: Advanced formulation prevents rust & corrosion protecting all engine cooling system components
- DESIGNED FOR ASIAN VEHICLES: Recommended for use with Acura, Honda, Infiniti, Mitsubishi, Nissan, Subaru, and Suzuki vehicles that require a BLUE Phosphate-enhanced Organic Acid Technology (POAT) formula
- GUARANTEED: When installed as part of a complete flush and fill, PEAK guarantees this coolant will provide service life protection of up to 150,000 miles or 5 years.
- 50/50 PREDILUTED FOR QUICK TOP OFFS: Already diluted to make topping off your cooling system a breeze

- CONCENTRATE ANTIFREEZE AND COOLANT: Efficient formula is compatible with all vehicle cooling systems, providing fast-acting and long-lasting protection on all cooling system metals against rust and corrosion
- NON-ABRASIVE FORMULA: Created with Organic Acid Technology, this ethylene glycol-based coolant formula is compatible with other antifreeze and coolant formulations. This item contains a bittering agent called Denatonium Benzoate.
- ALL VEHICLE: Versatile and formulated for use in all American, Asian, and European automobiles including cars and low/medium to heavy duty trucks of all makes, models, and years
- SAFE FOR FILLS AND TOP-OFFS: The amber color will not effect the antifreeze currently in your cooling system
- LIFETIME PERFORMANCE: Provides cooling system protection for your automobile's entire lifetime with proper maintenance
This product presentation was made with AAWP plugin.