
May 27, 2020 NHTSA CAMPAIGN NUMBER: 20V307000
Damaged Air Suction Valves May Cause Fire
Damaged air suction valves may allow high temperature exhaust gas to blow back through and melt surrounding parts, increasing the risk of a fire.
NHTSA Campaign Number: 20V307
Manufacturer Kawasaki Motors Corp., U.S.A.
Components ENGINE AND ENGINE COOLING, ELECTRICAL SYSTEM
Potential Number of Units Affected 1,529
Summary
Kawasaki Motors Corp., U.S.A. (Kawasaki) is recalling certain 2019-2020 NINJA ZX-10R, NINJA ZX-10R ABS, and NINJA ZX-10R ABS KRT EDITION motorcycles. The engine control unit (ECU) programming may cause the engine to backfire when the quick shift function is used under high engine load, possibly resulting in damage to the air suction valves.
Remedy
Kawasaki will notify owners, and dealers will reprogram the ECU and inspect the air suction valves and surrounding parts, replacing them as necessary. All repairs will be performed free of charge. This recall began June 8, 2020. Owners may contact Kawasaki customer service at 1-866-802-9381. Kawasaki’s number for this recall is MC20-02.
Notes
Owners may also contact the National Highway Traffic Safety Administration Vehicle Safety Hotline at 1-888-327-4236 (TTY 1-800-424-9153), or go to www.safercar.gov.
SERVICE
MC 20-02
June 5, 2020
TITLE: ENGINE BACKFIRE
RECALL
THIS BULLETIN IS OF THE HIGHEST PRIORITY AND MUST BE ACTED UPON IMMEDIATELY TO ENSURE CUSTOMER SAFETY.
Eligibility
Eligible Units
| Year | Model | Model Codes |
| 2019 | NINJA® ZX™-10R ABS
NINJA ZX-10R ABS KRT Edition NINJA ZX-10R ABS KRT Edition NINJA ZX-10R ABS NINJA ZX-10R NINJA ZX-10R KRT Edition NINJA ZX-10R KRT Edition NINJA ZX-10R NINJA ZX-10RR | ZX1002EKF
ZX1002EKFA ZX1002EKFAL ZX1002EKFL ZX1002FKF ZX1002FKFA ZX1002FKFAL ZX1002FKFL ZX1002GKFL |
| 2020 | NINJA ZX-10R ABS
NINJA ZX-10R ABS KRT Edition NINJA ZX-10R ABS NINJA ZX-10R KRT Edition NINJA ZX-10R KRT Edition | ZX1002ELF
ZX1002ELFAL ZX1002ELFL ZX1002FLFA ZX1002FLFAL |
Verify eligibility using VIP in K-Dealer before starting the repair.
Please check VIP (Vehicle Information Portal) in K-Dealer for other possible repair campaigns for eligible units.
Subject
On affected units, the engine could backfire while shifting under high engine loads when KQS (Kawasaki Quick Shifter) is activated, potentially resulting in damage to the air suction valve(s). Continued use could result in additional damage to surrounding parts caused by blow back of high temperature exhaust gas and creating the potential for a fire.
Kawasaki Action
Initiate Campaign:
Kawasaki has initiated a Recall campaign to repair all eligible units. The repair consists of reprogramming the ECU and replacing the air suction valve(s). A physical inspection of the area around the air suction valve assembly must also be carried out and repairs completed if required.
Notify Registered Owners:
Kawasaki is sending a Recall letter to all registered owners of eligible units. A copy of the letter is printed on page 21 of this bulletin.
Dealer Action
Repair Eligible Units:
Repair all eligible units including sold units in the field and unsold units in your dealership inventory prior to delivery to the retail purchaser. It is the obligation of authorized Kawasaki retail Dealers to repair eligible units in Dealer’s possession prior to retail sale. Failure to comply with this obligation to repair all units eligible for Recall or FDM campaigns by the Dealer constitutes a breach of the Dealer Sales and Service Agreement. Refer to Service Policies bulletin SP 08-01. Refer to the Repair Procedure section of this bulletin for details.
IMPORTANT NOTE:
- It’s the law! Under the U.S. National Highway Traffic Safety Administration (NHTSA), Federal Law 49 U.S.C. Section 30120(i) requires dealers to perform Recall repairs before delivering any vehicle affected by the Recall to a purchaser.
Document Completed Repairs:
Federal law requires manufacturers to maintain accurate follow-up records on repairs performed on eligible units. Dealers MUST submit a Warranty Claim for each repair. Refer to the Warranty Information section of this bulletin for details.
NOTE:
- If you fail to submit a Warranty Claim for a new unit that is subsequently sold and registered, the new owner will receive the Recall letter requesting the return of the vehicle to you for repair.
Submit Product Registration:
Submit the product registration to Kawasaki via K-Dealer immediately after retail sale of any eligible unit. Be sure to supply the correct customer name and mailing address. Kawasaki uses the product registration information for customer notification. Also, if you know that the customer has moved, please submit a Customer Update via K-Dealer.
Parts Information
| Kit, Reed Valve, MC20-02 P/N 99999-0766 | ||
| Ref | Contents | Qty |
| 1 | Bolt | 4 |
| 2 | Valve | 2 |
Repair Kit Part Number:
Install repair parts only on vehicles that have been ridden. Unsold units that have not been ridden do not need repair parts
Order parts to complete the Recall through K-Dealer as outlined in Service Bulletin SP15-03.
REPAIRS REQUIRED BASED ON RIDING HISTORY OF VEHICLE
- If the unit has never been ridden, perform the ECU reprogramming only.
- If the unit has been ridden, perform the ECU reprogramming, valve replacement and inspection.
Special Tool Requirements
This repair procedure requires the following special tools
- KVCS Kit
- Computer or laptop with KVCS installed
- Internet connection
ECU Reprogramming Sequence
Reprogramming consists of four steps. All steps must be completed to successfully reprogram the ECU:
- Saving the ECU Data
- Downloading the reprogramming data from the server
- Writing the Program data to the ECU
- Reporting the Reprogramming to the Server
ECU Reprogramming
ECU REPROGRAMMING VIDEO TUTORIAL:
|
IMPORTANT NOTES:
- The vehicle’s battery voltage must be greater than 10.5 Volts to perform this procedure. Do not attempt to reprogram the ECU if the battery voltage is below 10.5 Volts. Charge the battery as required.
- This procedure requires an internet connection and a computer with KVCS installed.
Save Vehicle ECU Data
- Connect cable 57001-1843 to the KVCI device.
NOTE:
-
- Only the KVCI device and the vehicle will be connected to each other while saving the vehicle ECU data.
- Confirm the power switch on the KVCI device to the OFF position.
- Connect KVCI device to vehicle’s white, six pin coupler, using cable 57001-1843.
- Turn the ignition switch ON but do not start the vehicle.
- Slide the power switch on the KVCI device to the ON position.
- Wait 10 seconds for the KVCI device to power up and connect with the vehicle ECU
- Press the A button to open the Main Menu on the KVCI device.
The Main Menu appears.
- Press the A button to select Reflash.
- Press the A button again.
- The Battery Terminal Voltage screen will appear.
- Press the A button again when the Menu screen appears with Save vehicle ECU data as the option.
- Verify that the message Downloading Vehicle ECU Data is displayed.
- If the “Downloading Vechicle ECU Data” screen does not appear shut down and start over.
- Confirm the downloaded vehicle ECU data on the Completion of Vehicle ECU Data screen.
| ECU # | 21175-XXXX |
| Cal ID | 49245-XXXX |
| VIN | FRAME NUMBER |
-
- If the ECU VIN is different from the FRAME VIN, use the FRAME VIN in the warranty request.
Slide the mode switch of KVCI device to the OFF position.
- Turn the ignition switch to the OFF position and wait ten seconds before proceding to the next step,
| NOTICE |
| Turn the ignition switch of the vehicle to the OFF position, wait for around 10 seconds, and then release the connection between the KVCI device and the vehicle. If you release the connection while power is still being supplied the KVCI device may fail |
- Remove KVCI device from the vehicle.
Download Reprogramming Data
- Connect KVCI device to your KVCS equipped computer with USB cable 57001-1844.
NOTE:
-
- Only the KVCI device and the computer running KVCS will be connected to each other while downloading the reprogramming data from the server.
- Slide the power switch on the KVCI device to the ON position.
- Launch the KVCS program from the laptop or PC.
- Select ECU Reflash.
- Confirm ECU data in the “Vehicle ECU Data” field.
- Click on the Search Reprogramming Data button.
- Select United States as the Region.
- Enter your KVCS Dealer Code and Password then click the Login (Call Kawasaki Dealer Care at (800) 854-3800 if you do not have your dealer code and password.)
- Verify the reprogramming data for the vehicle based on the following tables:
ZX1002E/F
| ECU P/N | CalID | Note |
| 21175-1426 | 49245-1757 | USA |
| 21175-1427 | 49245-1758 | L Model |
ZX1002G
| ECU P/N | CalID | Note |
| 21175-1434 | 49245-1766 | USA |
| 21175-1435 | 49245-1767 | L Model |
- Click on the DL button to download the vehicle data.
- When the download is complete, the Confirm Download screen will appear.
- Enter the VIN on the vehicle frame in the VIN field.
- Click on the Continue button.
- The Proceed to VIN Verification message will appear if the correct VIN is entered.
- Click on the OK button.
- Proceed to page 8 of this bulletin and resume at the Activation Code step.
The following screens will only appear if the VIN was entered incorrectly or the wrong VIN was entered. Proceed to ACTIVATION CODE on page 8 if the VIN is correct.
- If VIN is not entered or VIN format is Incorrect, error message is displayed. Please enter VIN stamped on the vehicle frame and click Continue again.
- If VIN entered does not match with ECU VIN, error message is displayed. If entered VIN is mistake, please enter correct VIN stamped on the vehicle frame and click Verify again.
- If VIN entered is correct, please click VIN entered is correct. Reprogramming can be done even if the VINs do not match.
- If the message The VIN entered does not match the ECU VIN. Proceed to download the reprogramming data with the VIN entered? is displayed, click on the OK button.
Activation Code
- A new screen will appear that has a field to enter the Activation Code.
- Enter Activation Code DAJ883A then click on the Certification (Activation code DAJ883A is used for all vehicles for this step.)
- After the checkmark symbol appears to the right of the activation code, click on the Download button to begin downloading the reprogramming data from the server.
- A confirmation dialog box will appear asking if you would like to authenticate the Activation Code. Click on the OK button.
- A progress bar will indicate the progress of the download. It may take a few seconds before the progress bar begins to display in green.
- When the download is complete, the bar will disappear and information of reprogramming data will be displayed in the Reprogramming Data field.
- Click on the button next to the image of the KVCI device.
- Slide the power switch on the KVCI device to the OFF position.
- Disconnect the KVCI device from the PC.
Write Reprogramming Data to ECU
- Connect cable 57001-1843 to the KVCI device.
NOTE:
-
- Only the KVCI device and the vehicle will be connected to each other while saving the vehicle ECU data.
- Slide the power switch on the KVCI device to the OFF position.
- Connect KVCI device to vehicle’s white, six pin coupler, using cable 57001-1843.
- Turn the ignition switch ON but do not start the vehicle.
- Slide the power switch on the KVCI device to the ON position and wait approximately 10 seconds for the device to connect with vehicle ECU.
- Press the A button on the KVCI device.
- The Battery Terminal Voltage screen will appear.
- Press the A button to open the KVCI Menu.
- The KVCI Menu is displayed.
- Use the down arrow key on the KVCI device to select Reprogram Vehicle ECU.
- Press the A button.
- Confirm the downloaded Reprogramming data for rewriting.
- Press the A button.
| Name | Description |
| ECU P/No | 21175-XXXX |
| Cal ID | 49245-XXXX |
| Remarks | Displayed reference information such as contents of program. |
| VIN | Frame Number |
ZX1002E/F
| ECU P/N | CalID | Remarks |
| 21175-1426 | 49245-1757 | USA |
| 21175-1427 | 49245-1758 | L Model |
ZX1002G
| ECU P/N | CalID | Remarks |
| 21175-1434 | 49245-1766 | USA |
| 21175-1435 | 49245-1767 | L Model |
- During the reprogramming, the Reprogamming in Progress status is displayed as a percentage and the green light under the symbol on the KVCI device illuminates.
NOTE:
-
- The ECU will not be recognized during reprogramming and the warning lamp will be blinking. It will return to its original display state when the reprogramming is complete.
- When the reprogramming is complete, the Completion of Reprogramming window opens.
- Don’t press any buttons.
-
- If you receive a message on the KVCI device with the message “There is a possibility that the previous reprogramming did not finish properly. Would you like to run the recovery process?” you will need to perform the recovery process. Select YES then press the A button to perform the recovery process. Otherwise, proceed to the next step below.
IMPORTANT NOTE:
-
- WAIT FOR THE Completion of Reprogramming SCREEN TO APPEAR BEFORE TURNNING OFF THE KVCI DEVICE OR THE VEHICLE IGNITION SWITCH. TURNING THE POWER OFF TOO SOON WILL RESULT IN INCOMPLETE REPROGRAMMING.
- Slide the mode switch of Kawasaki Smart VCI to the OFF position only when the Completion of Reprogramming screen is displayed.
| NOTICE |
| Turn the ignition switch of the vehicle to the OFF position, wait for around 10 seconds, and then release the connection between Kawasaki Smart VCI and the vehicle. If you release the connection while power is still being supplied, Kawasaki Smart VCI may fail. |
- Turn the ignition switch to the OFF position.
- Remove Kawasaki Smart VCI from the vehicle.
- Start the vehicle and verify that the engine light is not flashing.
Reporting the Vehicle ECU Reprogramming to the Server
- Launch the KVCS software.
NOTE:
-
- Only the KVCI device and the computer running KVCS will be connected to each other while downloading the reprogramming data from the server.
- Select ECU Reflash.
- Connect the KVCI device to the computer with the USB cable.
- Slide the power KVCI device power switch to the ON position.
- On the KVCS software select Report on the Reprogramming Completion Report
- If the Unreported 0 Items is displayed on the Reprogramming Completion Report column, ECU reprogramming is not finished completely. Please perform the reprogramming process again. By selecting Search History, the reported vehicle ECU data lists will be displayed.
- If the Unreported 1 Items is displayed on the Reprogramming Completion Report column, ECU reprogramming is complete.
- Click on the Report button only if Unreported 1 Items is displayed.
- Enter MC20-02 in the Remarks field
- Click on the Report button to report the unreported item.
- Click on the OK button on the Would you like to report the results? screen.
- Click on the button at the bottom of the page displaying “Reported to server”.
- Confirm Unreported 0 Items is displayed on the Reprogramming Completion Report column.
- If Unreported 1 item is displayed on the Reprogramming Completion Report, Reporting is not finished completely. Please report the download vehicle ECU Data to the server again.
NOTE:
-
- If there are unreported vehicle ECU data, you cannot download another reprogramming data. After reporting the downloaded vehicle ECU data to the server, please download other unit’s reprograming data and write the reprograming data.
- Slide the mode switch of KVCI device to the OFF position.
- Remove KVCI device from the PC.
ECU REPROGRAMMING IS NOW COMPLETE
- Proceed to the Warranty Section on page 19 if the vehicle has never been ridden.
- Proceed to the Remove & Replace Reed Valve section on page 15 if the vehcle has been ridden.
Remove & Replace Reed Valves
REMOVE & REPLACE REED VALVES ONLY ON VEHICLES THAT HAVE BEEN RIDDEN.
- Remove the seat, tail cover, tank cover and fuel tank as outlined in service manual 99832-0011-01.
Remove Air Cleaner Housing
- Disconnect:
-Secondary Fuel Hose
-Intake Air Temp Sensor Connector [A]
-IMU Connector [B]
-Secondary Fuel Injector Connectors [C]
- Remove :
-Turn signal relay [D],
-ESD (Electronic Steering Damper) ECU [F]
- Free the clamps [G] from the air cleaner housing.
- Remove Connector Bracket [A]
- Slide the clamps.
- Disconnect:
-Air Cleaner Drain Hose [B]
-Breather Hose [C]
- Loosen air cleaner housing clamp bolts [D].
- Remove bolts [A].
- Free bracket [B].
- Remove bolt [C] and washer.
- Disconnect the air switching valve hose [A].
- Remove the air cleaner housing.
Remove Air Switching Valve
| NOTICE |
| Never drop the air switching valve especially on a hard surface. Such a shock to the air switching valve can damage it. |
- Disconnect connector [A].
- Disconnect hoses [B] from the air suction valve covers.
- Remove the air switching valve [C]
Remove Air Suction Valve
- Open clamps [A].
- Roll up the front side of the heat insulation rubber plate [B].
- Remove and discard air suction valve cover bolts [A].
- Remove and retain air suction valve cover [B]
- Repeat for valve on the other side of the engine.
- Remove and discard air suction valves from both sides of the engine.
- Install new air suction valves [A] on both sides of the engine with the reed stopper facing downwards and the white mark [B] toward the rear.
- Install the air suction valve covers [A] on the air suction valve [B].
- Remove the locking agent from the air suction valve cover bolt holes with a thread chaser or a tap
- Install new air suction valve cover bolts [C], and tighten to 89 in·lb (1.0 kgf·m, 10 N·m).
| Description | Part No. |
| Air Suction Valve [A] | Call Dealer Care for Authorization to Replace Parts |
| Tube [B] | |
| Tube [C] | |
| Tube [D] |
Remove Air Suction Valve
- Inspect Parts around the Air Switching Valve and hoses.
- Visually inspect Air Switching Valve [A] and Tubes [B], [C], [D], to include inner and outer areas of the tube.
- If any of these parts have heat or fire damage, replace them with new parts.
| Description | Part No. |
| Radiator Assembly | Call Dealer Care for Authorization to Replace Parts |
| Front Brake Switch | |
| Right-Housing-Assy-Control | |
| Coil-Assembly-Ignition | |
| Heat Insulation Rubber Plate | |
| Harness | |
| Other Parts not Listed |
- Visually inspect the following parts:
-Radiator Fan Motor Lead Connector [A],
-Front Brake Switch Lead Connector [B],
-Right Housing Assy Control Lead Connector [C],
-Ignition Coil [D],
-Harness, Heat Insulation Rubber Plate…etc
- If any of these parts have heat or fire damage, replace them with new parts.
| Description | Part No. |
| Air Cleaner Housing | Call Dealer Care for Authorization to Replace Parts |
| Pad | |
| Secondary Fuel Injector |
- Visually inspect the following for damage:
-Front side of Air Cleaner Housing [A]
-installation point of air switching valve hose [B]
-Secondary Fuel Injector [C] for any damage.
- If any of these parts have heat or fire damage, replace them with new parts.
Air Switching Valve Installation
- Install air switching valve [A] with hose [B] as shown.
-Front [C]
-Left Side View [D]
-Yellow Paint [E]
Air Cleaner Housing Installation
- Be sure to install the pad [A].
- Install the air cleaner housing clamps [A] so that their bolt heads [B] face inward.
- Install the air cleaner housing [C] to the throttle body assy.
-Collar [D]
-Damper [E]
-Washer [F]
- Be sure the air cleaner housing is inserted to the throttle body assy securely.
- Be sure the hoses are routed correctly and properly installed.
- Tighten air cleaner housing clamp bolts [B] & [G] to 18 in·lb (0.20 kgf·m, 2.0 N·m).
- Run the leads and hoses correctly. (See Cable, Wire, and Hose Routing)
-Rubber Cover (Wrap the turn signal relay and radiator fan relay.) [1]
-Turn Signal Relay and Radiator Fan Relay [2]
-Clamps (Hold the secondary fuel injector connector. Install them to the air cleaner housing.) [3]
-IMU [4]
-Fuel Tank Breather Hose [5]
-Clamp (Hold the main harness. Close it after installing the fuel tank breather hose.) [6]
-Run the fuel tank breather hose in outside of the main harness. [7]
-Run the fuel tank drain hose to the inside of the breather hose. Run it in front of the fuel hose. [8]
-Clamp (Hold the fuel hose. After holding the hose with the clamp, take the hose forward and install the fuel tank.) [9] -Breather Hose [10]
-Fuel Tank Drain Hose [11]
-Fuel Hose [12]
-Clamp (Hold the secondary fuel injector leads and fuel tank breather hose. Position the hose joint under the clamp. Run the fuel tank breather hose in front of the main harness.) [13]
-Position the corrugate tube in the clamp. [14]
-Run the fuel tank breather hose between the rubber boot and air cleaner housing. [15]
-US and L Models [16]
- Install removed parts.
- Start the engine to verify that the engine light is not flashing after completing all repairs.
CALL KAWASAKI DEALER CARE AT (800) 854-3800 FOR AUTHORIZATION OF ADDITIONAL TIME REQUIRED TO COMPLETE REMOVAL AND REPLACEMENT OF DAMAGED PARTS.
Warranty Information
This is a safety Recall campaign. Repair is authorized regardless of ownership or warranty status.
Repairs MUST BE PERFORMED IMMEDIATELY ON ALL ELIGIBLE UNITS in the field and during initial assembly and preparation if the inspection reveals a damaged brake hose or sensor wire.
See the Warranty Policies and Procedures Manual (claim type 3 information) for detailed instructions when submitting the Warranty Claim.
| Reprogram Only | Reprogram & Replace Reed Valves | Reprogram & Replace Reed Valves & Replace Heat Damaged Parts | |
| Job Code | 22527 | 22528 | 22529 |
| Flat Rate Time | 0.3 | 1.4 | 1.4 |
| Claim Type | 3 | 3 | 3 |
| Part Number | 99999-0766 | 99999-0766 | 99999-0766 |
| Description | Kit, Reed Valve MC20-02 | Kit, Reed Valve MC20-02 | Kit, Reed Valve MC20-02 |
| Quantity | 0 | 1 | 1 |
| Additional Parts | N/A | N/A | Call Dealer Care at
(800) 854-3800 for additional time authorization to remove and replace heat damaged parts |
Repair Verification
- Make a white paint mark on the rear edge of the ECU found under the tool kit as shown below to serve as repair verification.
NOTE:
- Repair verification is an essential part of the repair procedure. Along with the physical repair verification, check VIP (Vehicle Information Portal) in K-Dealer for other possible repair campaigns for eligible units.
NOTE:
- ECU removed for clarity only. Do not remove from vehicle.
2019 & 2020 NINJA® ZX™-10R, 10RR, 10R ABS, & 10R ABS, & 10R KRT EDITION, ABS KRT EDITION ENGINE BACKFIRE
IMPORTANT SAFETY RECALL
NHTSA RECALL NO. 20V-307
Dear Kawasaki Motorcycle Owner:
This notice is sent to you in accordance with the National Traffic and Motor Vehicle Safety Act. Kawasaki Motors Corp., U.S.A., has decided that a defect which relates to motor vehicle safety exists in certain 2019 & 2020 NINJA® ZX™-10R, 10RR, 10R ABS, & 10R KRT EDITION, ABS KRT EDITION models.
The reason for this notice:
On affected units, the engine could backfire while shifting under high engine loads when KQS (Kawasaki Quick Shifter) is activated, potentially resulting in damage to the air suction valve(s). Continued use could result in additional damage to surrounding parts caused by blow back of high temperature exhaust gas and creating the potential for a fire. Our records indicate that you have purchased one of these units.
What Kawasaki and your dealer will do:
Kawasaki has authorized your dealer to reprogram the ECU (Engine Control Unit) on your motorcycle and replace the air suction valve(s). A physical inspection of the area around the air suction valve assembly will also be carried out and repairs completed if required. All repairs will be performed free of charge. The actual repair will take up to one and a half hours but may take longer due to scheduling at the dealership and the time needed to obtain required parts.
What should you do to ensure your safety?
Please call your Kawasaki dealer to schedule an appointment to have your motorcycle inspected and repaired as required. Please have your Vehicle Identification Number (VIN) ready when calling. To locate the nearest authorized Kawasaki motorcycle dealer, please visit www.kawasaki.com and click on the “LOCATE DEALER” link.
If you need help:
If you have questions or concerns that your dealer is not able to resolve, please contact Kawasaki Customer Care at (866) 8029381 (toll-free) between 7:00 a.m. and 4:00 p.m. PT Monday through Friday. Please have your Vehicle Identification Number ready when calling.
If your dealer fails or is unable to remedy this defect without charge within a reasonable amount of time (60 days after your first attempt to obtain remedy), you may submit a written complaint to the Administrator, National Highway Traffic Safety Administration,
1200 New Jersey Ave. S.E., Washington, D.C. 20590, or call the toll-free Vehicle Safety Hotline at 1(888) 327-4236 (TTY: 1-800-4249153); or go to https://www.safercar.gov.
If you received this notice in error:
Our records indicate you are the current owner of the motorcycle described in this letter. If you no longer have the vehicle described in this letter, please help us to update our records at www.kawasaki.com by clicking on “OWNER CENTER => OWNER SUPPORT => UPDATE OWNER INFO” or by calling Kawasaki toll free at (866) 802-9381. Federal regulation requires that any vehicle lessor receiving this recall notice must forward a copy of this notice to the lessee within ten days.
Reimbursement:
If you have experienced the failure described above prior to receiving this letter and have paid to have it corrected, you may be eligible for full or partial reimbursement for your documented cost of repair(s). To apply for reimbursement, please send copies of current owner and VIN information along with copies of repair orders and payment confirmation to the following address:
Kawasaki Motors Corp., U.S.A.
ATTN: Customer Care
P.O. Box 25252
Santa Ana, California 92799-5252
Please note the following conditions for reimbursement:
Claims may be excluded if proper documentation is not included. Current owner and VIN information along with copies of repair orders and payment confirmation must be provided.
We are sorry for any inconvenience this may cause, but we have taken this action in the interest of your safety and your continued satisfaction with your Kawasaki motorcycle.
Sincerely,
Kawasaki Motors Corp., U.S.A.
6 Affected Products
Vehicles
9 Associated Documents
ISSUED Owner Notification Letter(Part 577)
RCONL-20V307-1666.pdf 624.254KB
Recall Quarterly Report #1, 2020-2
RCLQRT-20V307-0417.PDF 211.142KB
Recall 573 Report – Amendment 1
RCLRPT-20V307-1429.PDF 218.614KB
Remedy Instructions and TSB
RCRIT-20V307-7196.pdf 6465.034KB
Defect Notice 573 Report
RCLRPT-20V307-9877.PDF 218.545KB
Recall Acknowledgement
Recall Quarterly Report #2, 2020-3
RCLQRT-20V307-9170.PDF 211.249KB
Recall Quarterly Report #3, 2020-4
RCLQRT-20V307-1654.PDF 211.336KB
Recall Quarterly Report #4, 2021-1
RCLQRT-20V307-8769.PDF 211.447KB
Latest Recalls Documents
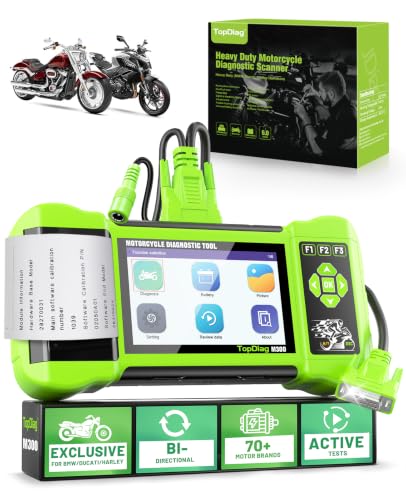
- [Full System Diagnostics] M300 professional scan tool can request information from motorcycle or send commands to the autocycle modules. It allows the technician to perform factory service procedures such as ABS system test, Freezing data, Actuator testing, DTC enquiry, Troubleshooting, CO idle speed adjustment, Adjusting the throttle valve position sensor(TPS)
- [17+ Services] M300 Diagnostic Scanner Tool is designed for home mechanics and workshops, garages. Support almost all the most popular functions of motorcycles, including Engine, ABS, TPMS, Suspensions, Ignition, EPS, Traction control, Radio, LED headlight. Battery detection, Start test, Charging test, etc. Help you handle all kinds of complex maintenance problems easily.
- [With Print Function] The tester is equipped with a built-in printer that can generate printed test reports. These reports typically include the battery test results, including voltage, CCA, SOC, and any additional measurements or diagnostic information. The printed report serves as documentation and can be used for reference or for sharing the results with customers or technicians.
- [Battery Tester] Allows you to assess motorcycle battery health and performance.Voltage measurement, include charging test, start test. By performing a battery test using a motorcycle diagnostic tool, you can identify any battery-related problems early on and take appropriate action.
- [Wide Compatibility] Support the diagnosis of Asian, European and American multi-brand motorcycles, Supports 9 languages, M300 Motocycle diagnostic tool Support Turkic,Spanish,Thai,French,English,Vietnamese,Portuguese, Indonesia,German.

- Full System Diagnostics for BMW Motorcycles: Specifically designed as a BMW motorcycle scanner with 10-pin, compatible with BMW C, F, G, K, R, S, and HP series motorcycles. Performs full system diagnostics including Engine, ABS, TPMS, IMMO, Body Control, and Instrument Cluster, with one-touch QuickTest to read and clear fault codes quickly and efficiently
- BMW Advanced Reset & Maintenance: Supports advanced BMW service functions including ECU reset, ABS bleeding, throttle valve reset, idle actuator calibration, electronic traction control reset, gear position adaptation, service reset, control module reset, windscreen calibration, and emergency call service reset. Unlock dealership-level maintenance at home
- ABS Bleeding & Advanced Actuation Tests: Allows ABS pump activation for complete brake fluid bleeding and safety system maintenance. Supports actuator tests for fuel pump, cooling fan, relays, and electronic components for BMW motorcycle brake service and system troubleshooting
- Dual Battery Voltage Test & 17 Language: Performs battery voltage testing via diagnostic port or battery clamps, with real-time waveform, max/min recording, and 3.2-inch color TFT display. Features shockproof casing, shortcut function keys, and support for 17 languages for global riders and professional mechanics
- No subscription required, 3-Year Warranty & No VIN Limits: Includes main unit, 10-pin & 16-pin cables, battery clamps, Type-C cable, storage bag, and manual. No VIN restrictions. Backed by 3-year warranty and lifetime software updates. Also reads basic engine codes on OBD2-compliant vehicles.
- Full System Diagnostics for Harley-Davidson: Specifically designed for Harley-Davidson motorcycles with 4-pin and 6-pin diagnostic ports, covering Touring, Softail, Dyna, Sportster, Street, Trike, VRSC, and CVO models. Supports one-key quick test to scan major Harley-Davidson control systems including ECM, ABS, BCM, EHCU, Instrument Cluster, Speedometer, Security, and other modules on supported models, allowing efficient fault code reading/clearing and vehicle status monitoring.
- Professional Harley-Davidson Diagnostics & Special Functions: Go beyond basic code reading with full-system diagnostics, live data monitoring, and active tests for ECM, ABS, BCM, EHCU, and other modules. Support advanced functions including AFV reset, idle speed adjustment, throttle actuator testing, exhaust flap service, and multiple actuator tests to help technicians diagnose, maintain, and repair Harley-Davidson motorcycles with confidence.
- ABS Bleeding & Actuator Testing: ABS bleeding is supported on most models up to MY2023. Perform advanced actuator tests for ABS pump motors, front/rear apply and release solenoid valves, and EHCU-related functions. Also supports active tests for fuel pumps, cooling fans, relays, and other vehicle components.Note: Service reset functions are not supported.
- 17 languages & OBD2 Support: Features a 3.2" color display with F1/F2/F3 shortcut keys, built-in battery voltage testing via diagnostic port or battery clamps, and supports 17 languages. Includes an OBD2 16-pin cable for basic engine diagnostics on OBD2-compliant vehicles, supporting fault code reading/clearing and live data. Vehicle diagnostics are limited to engine systems only.
- Free Updates, Unlimited VIN Input & 3-Year Warranty: Lifetime free software updates with no subscription fees. Supports unlimited VIN input for efficient motorcycle diagnostics, making it ideal for professional technicians and DIY riders in repair shops, garages, or home workshops. Backed by a 3-year warranty for long-term reliability.
- 【Dual Car & Motorcycle Diagnostic Scanner】Support independent diagnosis for automobiles and motorcycles, compatible with 97% standard OBDII protocol vehicles. Cover cars, motorbikes and ATVs, suitable for DIY vehicle owners and professional repair technicians to solve engine faults independently.
- 【Full Standard OBD Diagnostic Functions】Read & erase stored/pending DTC codes to turn off the check engine light. Built-in I/M readiness inspection, O2 sensor test and EVAP leak test, helping you pass vehicle emission smog inspection
- 【Save Time & Cost on Vehicle Maintenance】No frequent expensive visits to auto repair shops for simple engine alarms. Acquire accurate fault data by yourself, judge repair difficulty and avoid unnecessary over-maintenance charges.
- 【Multidimensional Real-Time Data Analysis】Capture full engine live parameters including RPM, coolant temperature and fuel trim. Support data review, recording & playback with freeze frame function to locate hidden vehicle failure causes.
- 【Complete Auxiliary Test Tools】Equipped with ECU reset function for motorcycle modules and full battery test system (startup/charge/load test). Integrated offline DTC lookup library to quickly interpret the meaning of all fault codes.
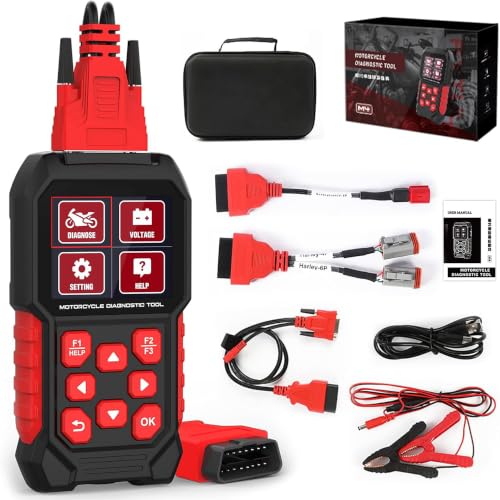
- Harley-specific compatibility: Designed only for compatible Harley-Davidson motorcycles with a round 4-pin or 6-pin diagnostic port; verify the connector, model year and required function before purchase
- Full-system diagnostics: Read and clear supported fault codes, view live data and ECU information, and access available systems; coverage varies by motorcycle model, year and ECU
- Resets, active tests and ABS bleeding: Perform supported service resets, active tests and adjustments; ABS bleeding is available on compatible models through 2023 only and unavailable for 2024 or newer models
- Two cables, different functions: Use the Harley 4P/6P cable for supported motorcycle diagnostics, resets, tests and ABS bleeding; the OBD2 16P cable supports basic car engine code reading, clearing and live data only
- Standalone multilingual operation: Use the 2.8-inch display in 17 selectable languages; the tool has no internal battery and requires 12 V bike power; update with the official package and a FAT32 SD card without disconnecting power
This product presentation was made with AAWP plugin.