
July 24, 2020 NHTSA CAMPAIGN NUMBER: 20E050000
Seat Belts Do Not Extend/FMVSS 209
A seat belt that doesn’t function properly can increase the risk of injury in the event of a crash.
NHTSA Campaign Number: 20E050
Manufacturer Kiel N.A., L.L.C
Components SEAT BELTS
Potential Number of Units Affected 1,492
Summary
Kiel N.A. LLC., (Kiel) is recalling certain Avance coach seats, part numbers 2025 and 2050. The automatic locking retractor (ALR) mode of the seat belts supplied with these seats cannot be activated. As such, these seats fail to comply with the requirements of Federal Motor Vehicle Safety Standard (FMVSS) number 209, “Seat Belt Assemblies”.
Remedy
Kiel will notify the coach bus manufacturers that purchased the seat belts, and dealers for those manufacturers will replace the affected belts, free of charge. The manufacturer has not yet provided a schedule for recall notification. Owners may contact Kiel customer service at 1-574-293-3600.
Notes
Owners may also contact the National Highway Traffic Safety Administration Vehicle Safety Hotline at 1-888-327-4236 (TTY 1-800-424-9153), or go to www.safercar.gov.
Kiel NA
Procedure: 3-Point Lab and Shoulder Belt Function
Rev. 0
Procedure: 3-Point Lap and Shoulder Belt Function
1. SUMMARY
1.1. The purpose of this procedure is to explain proper usage of 3-point lap and shoulder belt function on Kiel seating.
1.2. Kiel engineering department is responsible for implementation and management of this procedure.
2. REVISION AND APPROVAL
| Rev. | Date | Nature of Changes | Approved By |
| 0 | 7/16/2020 | Original issue. | J Rebman |
3. PROCEDURE:
3.1 Proper belt operation and usage:
3.1.1 ELR / ALR functionality
3.1.1.1 ELR (Emergency Locking Retractor). Primary function of belt.
3.1.1.2 Pull webbing out towards female buckle receiver – as if a body is in the seat. Release webbing and allow to return into retractor with no assistance.
3.1.1.3 ALR (Automatic Locking Retractor). Secondary function of belt.
3.1.1.4 Pull shoulder belt webbing all the way out of retractor from shoulder point.
3.1.1.5 Retractor mechanism must switch to ALR functionality for child seat securement. Belt now works as a ratchet and webbing will ONLY feed in, not out.
3.1.1.6 Release and allow webbing to feed completely back into retractor. Webbing return results in mechanism switching back to ELR functionality.
4. MAINTENANCE INFORMATION AND RECOMMENDATIONS
4.1. Important: Never disassemble retractor housing. This constitutes a safety hazard and should only be performed by belt manufacturer.
4.2. Service and maintenance should be performed by qualified personnel only.
4.3. Use of safety equipment and personal protective according to relevant guidelines.
4.4. Procedure document 3-point Lap and Shoulder Belt Function is designed as a training document. If applicable, training videos are available upon request. Training is supported by Kiel NA. Please call 574-327-2050 or email [email protected] to request additional materials.
Kiel NA
Procedure: Remove Reverse Lock-up from 3 Point Lab and Shoulder Belt
Rev. 0
Procedure: Remove Reverse Lock-up from 3-Point Lap and Shoulder Belt
1. SUMMARY
1.1. The purpose of this procedure is instruction of steps to follow in event of reverse lock-up occurrence on 3-point lap and shoulder belt.
1.2. Engineering dept. is responsible for implementation and management of this procedure.
2. REVISION AND APPROVAL
| Rev. | Date | Nature of Changes | Approved By |
| 0 | 7/16/2020 | Original issue. | J Rebman |
3. PROCEDURE:
3.1 In event of reverse lock up occurrence on 3-point lap and shoulder belt, the following items should be reviewed: webbing and hardware.
3.1.1 Webbing:
3.1.1.1 Pull webbing out towards female buckle receiver – as if a body is in the seat. Release webbing and allow to return into retractor with no assistance. If belt returns into retractor, procedure is complete. If not, continue to section 3.1.1.2.
3.1.1.2 Inspect webbing for fraying, tears or wear. If conditions are present, retractor requires replacement.
3.1.1.3 Inspect webbing ensuring it is not rolled or folded at upper D ring location. If conditions are present, unroll or unfold.
3.1.1.4 Remove seat cushion by lifting at front. Inspect webbing at retractor for rolling. Unroll webbing if this has occurred.
3.1.2 Hardware:
3.1.2.1 Inspect retractor position. Retractor should be at approximate 20° angle with horizontal frame tube. If angle is correct continue to section 3.2. If angle adjustment is required, re-torque to 24Nm or 18ft lbs. Retest belt. If condition is resolved procedure is complete.
3.2 Unlock:
3.2.1 Pull webbing up at retractor exit location with some force to tighten webbing on spool to allow for more webbing to feed back onto spool.
Red arrow retractor exit location
Blue arrow shows pull direction
3.2.2 Feed the loose webbing back into the retractor. If needed webbing can be aided back onto spool manually. Upon completion, re-test belt. (see 3.1.1.)
3.2.3 If belt still exhibits reverse lock up position, contact Kiel NA Field Service, 574-327-2051.
4. MAINTENANCE INFORMATION AND RECOMMENDATIONS
4.1. Important: Never disassemble retractor housing. This constitutes a safety hazard and should only be performed by belt manufacturer.
4.2. Service and maintenance should be performed by qualified personnel only.
4.3. Use of safety equipment and personal protective equipment according to relevant guidelines.
4.4. Procedure document 3-point Lap and Shoulder Belt Function is designed as a training document. If applicable, training videos are available upon request. Training is supported by Kiel NA. Please call 574-327-2050 or email [email protected] to request additional materials
Kiel NA
Procedure: 3-Point Lap and Shoulder Belt Removal and Re-Installation
Rev. 0
Procedure: 3-Point Lap and Shoulder Belt Removal and Re-Installation
1. SUMMARY
1.1. The purpose of this procedure is to explain proper removal and re-installation of 3-point lap and shoulder belt on Kiel seating.
1.2. Kiel engineering department is responsible for implementation and management of this procedure.
2. REVISION AND APPROVAL
| Rev. | Date | Nature of Changes | Approved By |
| 0 | 8/05/2020 | Original issue. | J. Rebman |
3. PROCEDURE:
3.1 Proper 3-point belt removal:
Removal of belt with ELR / ALR (Emergency Locking Retractor) (Automatic Locking Retractor) function.
3.1.1 Remove seat cushion by lifting at front.
3.1.2 IMPORTANT: Prior to belt removal, webbing route/direction should be noted for seat. Re-installation must follow exact webbing route. Cell photo record prior to removal is recommended.
3.1.3 Remove and save the D-ring cap. DO NOT remove D-ring at shoulder position.
3.1.4 Disconnect 3-point belt webbing from chassis as shown below. Save all hardware and note hardware sequence. Cell photo record recommended. Mounting is same for each seat position. Do not remove female buckle unless it is damaged or requires replacement.
3.1.5 Route webbing, male tongue, and belt end bracket through the D-ring. Allow it to lay out off to side.
Male tongue:
Belt end bracket:
3.1.6 Disconnect 3-point belt retractor under seat chassis mounting point as shown below. Save all hardware and note hardware sequence. Cell photo record recommended.
3.1.7 While holding retractor, pull webbing out between the wall mount and the seat chassis.
3.1.8 SAVE belt and permanently mark with coach number, seat number, and date. Belt(s) should be bagged separately for return to Kiel NA. Kiel NA requires retractor return within 10 days of removal. Please call Kiel NA Customer Service Dept. for Return Authorization documents prior to return shipment.
Date:
Coach Number
Seat Number
3.2 Proper 3-point belt installation:
Installing belt with ELR / ALR (Emergency Locking Retractor) (Automatic Locking Retractor) function. Installation is in reverse steps of removal as described in previous section.
3.2.1 Install 3-point belt retractor at under seat chassis mounting point. Place in same mounting hole.
3.2.2 Hand tighten hardware. Ensure retractor is at approximately 20° to horizontal chassis frame tube. Use Loctite number 242 on bolt.
3.2.3 When retractor is at 20°, torque nut to 28 Nm or 21 ft. lbs.
3.2.4 Thread webbing between wall mount and seat chassis, as shown below. Do not roll or twist
3.2.5 Route webbing, belt end bracket and male tongue through D-ring, and allow to lay out off to side.
Male tongue:
Belt end bracket:
3.2.6 Allow webbing to lay vertically without twisting.
3.2.7 Install belt end bracket to side of chassis as shown, noting hardware sequence. Bracket should be at an approximately 15° angle. Torque nut to 22 Nm or 16 ft. lbs.
15°
3.2.8 Reinstall D ring cap.
3.2.9 Test belt through operational / functional ELR / ALR procedure. See Document “Procedure – 3-Point Lap and Shoulder Belt Function”.
4. MAINTENANCE INFORMATION AND RECOMMENDATIONS
4.1. Important: Never disassemble retractor housing. This constitutes a safety hazard and should only be performed by belt manufacturer.
4.2. Service and maintenance should be performed by qualified personnel only.
4.3. Use of safety equipment and personal protective (PPE) according to relevant guidelines.
4.4. Procedure document 3-Point Lap and Shoulder Belt Removal and Re-Installation is designed as a training document. Training is supported by Kiel NA. Please call 574-3272050 or email [email protected] to request additional materials.
1 Affected Product
Equipment
| BRAND | PART NO. | PRODUCTION DATES |
| KIEL | AVANCE | |
9 Associated Documents
Non Compliance Notice 573 Report
RCLRPT-20E050-5499.PDF 214.686KB
Recall Acknowledgement
RCAK-20E050-5830.pdf 246.066KB
Recall 573 Report – Amendment 2
RCLRPT-20E050-4818.PDF 214.833KB
Remedy Instructions and TSB
RCRIT-20E050-2551.pdf 3349.798KB
Recall 573 Report-Amendment 1
RCLRPT-20E050-7035.PDF 214.769KB
Miscellaneous Document- Remove Reverse Lock-up 3-Point Lap and Shoulder Belt
RMISC-20E050-7656.pdf 358.955KB
Miscellaneous Document- 3-Point Lap and Shoulder Belt Function
RMISC-20E050-3802.pdf 201.836KB
Recall Quarterly Report #1, 2020-3
RCLQRT-20E050-0371.PDF 211.121KB
Miscellaneous Document-Procedure – 3-Point Lap and Shoulder Belt Installation
RMISC-20E050-2551.pdf 3349.798KB
Latest Recalls Documents
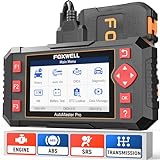
- [Easy to Use—Work Out of the Box] + [FOXWELL 2026 New Version] FOXWELL NT604 Elite scan tool is the 2026 new version from FOXWELL, designed for car owners who want to figure out the cause of issues before fixing car problems by scanning common systems like ABS, SRS, engine, and transmission. The NT604 Elite obd2 scanner diagnostic tool comes with the latest software—no need to waste time downloading software first. Plug the scanner into the OBDII port with OBDII cable to start the diagnosis.
- [Affordable] + [Reliable Car Health Monitor] Will you be confused what happens when the warning light of ABS/SRS/transmission/check engine flashes? Instead of taking your cars to dealership, this FOXWELL scanner will help you do a thorough scanning and detection for your cars and pinpoint the root cause. Note:The device is a diagnostic tool, not a repair tool. To turn off a warning light, you must first physically repair the issue causing it. Only then can the scanner be used to clear the corresponding fault code.
- [5 in 1 Car Diagnostic Scanner] Compared with obd scanners (50-100), NT604 Elite code scanner not only includes their OBDII diagnosis but also serves as ABS/SRS scanner, transmission and check engine code reader. When it’s an odb2 scanner, you can use it to check if your car is ready for annual test through I/M readiness menu. In addition, live data stream, built-in DTC library, data play back and print, all these features are a big plus for it. Note: doesn't support maintenance functions like reset or relearn. For the SRS system, NT604 Elite can read and clear common fault codes not caused by a crash, but crash/collision data cannot be cleared.
- [Fantastic AUTOVIN] + [No extra software fee] Through the AUTOVIN menu, this NT604 Elite car scanner allows you to get your V-IN and vehicle info rapidly, no need to take time to find your V-IN and input one by one. What's more, the NT604 Elite ABS SRS scanner supports 60+ car brands from worldwide (America/Asia/Europe). You don’t need to pay extra software fee. AUTOVIN may not work on some older vehicles or certain vehicle brands. If AUTOVIN fails, please input the vin code manually or go to the Diagnostic Menu to select your vehicle model.
- [Solid protective case KO plastic carrying bag] + [Lifetime update] Almost all same price-level car scanner diagnostic tool only offers plastic bag to hold the scanner.However, NT604 Elite automotive scanner is equipped with solid protective case, preventing your obd2 scanner from damage. Then you don’t need to pay extra money to buy a solid toolbox.

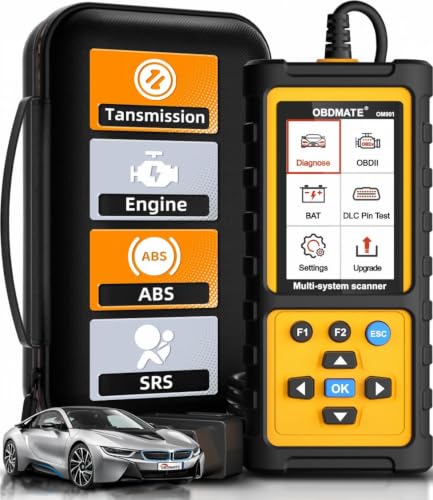
- 【Reset ABS/SRS/Transmission/Engine Lights】 More than an check engine code reader, OBDMATE OM901 obd2 scanner performs comprehensive diagnostics for the 4 most-used systems (ABS/SRS/Engine/Transmission). It quickly clears fault codes, turns off warning lights, read data stream and auto VIN.
- 【3.5" Handheld Scanner with 4 System Diagnose】 3.5" Super large TFT screen equipped displays an intuitive menu and clear readings of various sensors from ABS, SRS, ECM and TCM systems. It arrived with a silicone protective case and hard-shell carrying case, ensuring long-lived durability and drop resistance. The car diagnostic tool is plug-to-play designed, plug it and get diagnosis started without any batteries or updates required.
- 【One-Click I/M Readines&Full OBD2 Functions】 Press F1 to get an intuitive corloured form about whether various emissions-related systems on the vehicle are operating properly. Help you get smog-check ready quickly. OM901 car scanner supports all essential OBD2 functions you need: read & clear codes, view freeze frame, read I/M readiness, retrieve VIN, live data stream (with graphing display), O2 sensor test, onboard monitoring mode, and EVAP leak test.
- 【Battery Voltage Check&DLC Pin Test】 It allows you to monitor battery health by testing current battery voltage. Plus, this obd2 diagnostic tool features DLC 16-PIN test to check current voltage of every pin.
- 【Automotive Scanner Diagnostic Kit】 The package comes with 1 car scanner, 1 USB-type c cable, 1 hard storage bag and 1 user manual(en). Free to update without any hidden fees. 5 languanges available in setting including English, French, Italian, German and Espanish. Valuable and Portable, making it a great tool kit for car owners, DIY enthusiasts, and professional mechanics.
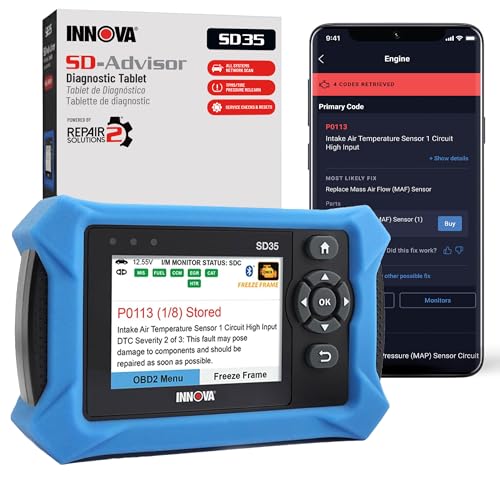
- OBD2 SCANNER FOR ALL SYSTEMS – The INNOVA SD35 is a tablet-based OBD2 scanner designed for advanced diagnostics. Read and clear check engine light, ABS, SRS, and TPMS codes, plus test your car battery and alternator to prevent unexpected failures. Vehicle coverage may vary. Please use Innova’s Coverage Checker to verify compatibility.
- ALL-SYSTEM DIAGNOSTICS & LIVE DATA – Unlike basic code readers, this OBD2 scanner for all vehicles scans engine, transmission, ABS, SRS, and more. Get real-time live data, including RPM, fuel trims, temperature readings, and oxygen sensor performance.
- OBD2 TABLET WITH USER-FRIENDLY INTERFACE – This automotive scan tool features a high-resolution display, making vehicle diagnostics faster and easier.
- ADVANCED TPMS, OIL RESET & SERVICE FUNCTIONS – Perform TPMS sensor checks, oil light reset, and other service resets with ease This professional diagnostic tool provides comprehensive vehicle maintenance capabilities in one device.
- WIDE VEHICLE COVERAGE (1996 & NEWER CARS & TRUCKS) – This OBD2 scanner Bluetooth tablet is compatible with Toyota, Ford, Honda, Chevrolet, Nissan, Dodge, and more. However, feature coverage may vary. Please use Innova's Coverage Checker to verify coverage.
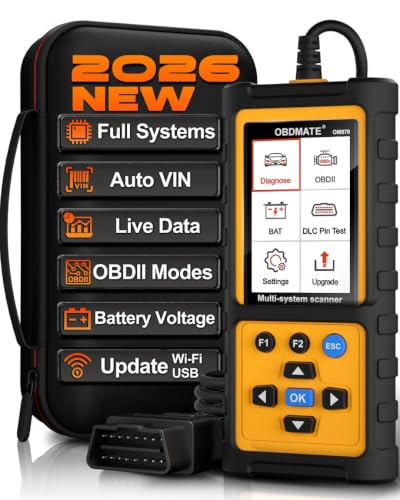
- 【Full Systems Automotive Diagnostic】 More than checking engine, ABS and SRS, OBDMATE OM970 obd2 scanner performs comprehensive diagnostics on all electric modules. It quickly scans and clears fault codes, turns off warning lights, reads live data, and features Auto-VIN technology.
- 【Live Datastream&4-in-1 Graph】 Easily view live sensor data such as RPM, fuel trims, ATF temperature, wheel speed sensor, battery voltage and so on. OM970 scan tool also supports 4-in-1 trend graphing. Spend just 3 minutes to check – and you'll know exactly what's going wrong, helping you avoid hundreds in dealership diagnostic fees.
- 【One-Click I/M Readiness&Full OBD2 Functions】 Press F1 to get an intuitive corloured form about whether your vehicle's emissions-related systems are operating properly. Help you get smog-check ready quickly. OM970 obd2 diagnostic tool supports all essential OBD2 functions you need. Plus, it features battery voltage test and DLC 16-PIN test.
- 【Straightforward Menus with Easy Navigation】 All functions are easy to understand without obscure decriptions. 3.5" Large screen delivers clear readings while keeping one-hand operation. The car diagnostic tool comes with a silicone protective case and a hard-shell carrying case, ensuring long-lived durability and drop resistance.
- 【Budget-Friendly, No Subscriptions, Free Software Updates】 Plug and play: no bluetooth pairing, monthly fees, Wi-Fi connection, or any other troublesome initial settings. OM970 obd2 scanner works out of the box with the latest software. Lifetime free upgrade.
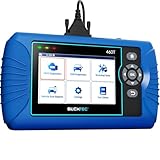
- [All System Diagnostics, Professional-Level Scanner] - BLCKTEC 460T is the ultimate OBD2 diagnostic tool for home mechanics and professionals. It supports all 10 OBD2 modes, reads and clears Engine/Transmission/ABS/SRS codes, performs All-System Diagnostics, offers workshop reset tools, and provides real-time live data. It helps you pinpoint issues, assess your car's condition, and prepare for SMOG checks with ease. NOTE: Function availability depends on your vehicle. Before you buy, be sure to use the Compatibility Checker on BLCKTEC website or contact our customer support to verify that the features you need are supported for your vehicle’s specific year, make, and model.
- [12+ Most Popular Reset Functions] - BLCKTEC 460T OBD2 scanner offers 12+ dealer-level service functions, including Oil Maintenance Reset, ABS Bleeding, EPB Reset, SAS(Steering Angle Sensor) Recalibration, DPF(Diesel Particulate Filter) Reset, Throttle Body Relearn, Battery Reset/Initialization, TPMS Relearn, Transmission Reset, Fluid Change Reset, Maintenance Reset and more, enabling you to perform workshop services like a pro. NOTE: Function availability depends on your vehicle. Be sure to use the Compatibility Checker on BLCKTEC website to verify that the features you need are supported for your vehicle.
- [Real-Time OBD2 and OEM Live Data, Freeze Frame Data] - BLCKTEC 460T helps diagnose vehicle issues when warning lights like Check Engine Light or ABS/SRS Light appear. It offers detailed DTC info, ECU Freeze Frame Data, and real-time OBD2 and advanced OEM live data, including Engine, Transmission, ABS, SRS, and more, making it easy to diagnose and resolve vehicle problems. You can view, graph, record, replay, and overlay up to four live data streams in a single graph for better analysis.
- [AutoVIN, AutoReLink, AutoScan, 3X Faster] - Equipped with AutoVIN technology, 460T automatically retrieves the VIN to save you time. Its AutoScan and AutoReLink features scan all of the vehicle's ECUs and detect any fault codes immediately after you plug the scanner into the vehicle's OBD2 port - no button presses required. Additionally, it regathers DTC and I/M readiness information every 30 seconds, simplifying monitor tests. 460T's advanced technology makes it 3X faster than other products.
- [Get RepairSolutions2, the #1 Auto Repair App for Free] - When paired with RepairSolutions2(RS2) App, 460T becomes even more powerful. RS2's Verified Fix Database built by master technicians, provides the parts needed for the repair. Additionally, RS2 gives you access to OEM warranty info, maintenance schedules, TSB, and dealership recall info, making car care easier than ever. RS2 is free with no subscription fees and it stores your car scan reports in the cloud, allowing you to access, share, or print them anytime and anywhere.
This product presentation was made with AAWP plugin.