
May 12, 2021 NHTSA CAMPAIGN NUMBER: 21V345000
Stove Top Burner Flame May Enter Cabinet
A draft can cause the flame to enter the non-sealed cabinet, increasing the risk of a fire.
NHTSA Campaign Number: 21V345
Manufacturer Airstream , Inc.
Components EQUIPMENT
Potential Number of Units Affected 591
Summary
Airstream, Inc. (Airstream) is recalling certain 2020-2021 25RB Flying Cloud, 28RB Flying Cloud, 30RB Flying Cloud, 25RB International, 28RB International, and 30RB International trailers. The stove top range was incorrectly installed in a non-sealed cabinet.
Remedy
Dealers will install panels/baffling in the cabinet to isolate negative airflow and prevent flame inversion, free of charge. Owner notification letters were mailed July 7, 2021. Owners may contact Airstream customer service at 1-877-596-6505 or 1-937-596-6111 ext. 7401 or 7411.
Notes
Owners may also contact the National Highway Traffic Safety Administration Vehicle Safety Hotline at 1-888-327-4236 (TTY 1-800-424-9153), or go to www.safercar.gov.
Airstream Recall
Bulletin Number: NHTSA Recall 21V-345
Product Line: Flying Cloud and International
Subject: Furrion Stove Top and Oven Panel Install
Operation code: TTSBR8392100
Labor rate will be: 1.5 hours
It has come to our attention, in certain scenarios, when the Furrion stove top is being used and the furnace turns on, the flames from the stove top burners can be pulled down under the burner. If this should occur, there is a potential for an increased risk of a fire, personal injury and/or property damage. The following steps are to install a back panel, to close off the stove and oven area, to stop the flame from being pulled down from the furnace.
Please contact the Airstream Customer Service Department at 877-344-1076 ext. 7491 if parts are needed. They will be sent at no charge.
RANGE OF VEHICLES INVOLVED:
Airstream’s built between: 5/7/2019 through 5/5/2021
Serial number range: 549415 – 558555
Note: Because our VINs do not run in a contiguous series, there will be units in the VIN range which will not be affected by this Service Bulletin.
Equipment needed:
Drill/driver with a Phillips bit
Box knife
3/4″ wrench
Manometer
Parts Needed:
30 RB cooktop, 30 RB oven, 28RB oven, 26 U oven, 25RB and 23 FB
1 ea. Panel 24-7/8″ x 20-1/8″
2 ea. Wood batts 19½”
4 ea. 1¼” screws
4 ea. ¾” screws
1 ea. Grommet
8′ Foil tape
28 RB and 26 U cooktop
1 ea. Panel 24-7/8″ x 20-1/8″
1 ea. Panel 24-1/8″ x 12-1/8″
2 ea. Wood batts 19½”
2 ea. Wood batts 11″
8 ea. 1¼” screws
8 ea. ¾” screws
1 ea. Grommet
8′ Foil Tape
Note:
You will be getting a panel that will need to be cut to the size listed below depending on which model you have.
The 1″ LP hole and ½” 12 wire hole will need to be drilled into the panel at the measurements listed.
Furrion stove top and oven
Furrion stove top
When using the furnace, the stove top flame should continue to rise from the burners. Without the back of the cabinet closed off the flame may be pulled down into the stove top by the furnace’s air circulation.
To remove the Furrion stove top and oven: Lift up on the back of the folding lid and slide it back so the two tabs in the front pull out of the slots.
Remove the four screws, using a drill/driver, in both sides of the top. On the oven model, open the oven door and remove the two screws, one each side.
Make sure the LP tanks are shut off, and use a 3/4″ wrench to disconnect the LP hose. Then, disconnect the 12-volt wires and remove the stove top and oven.
30RB Stove Top with Oven: Flying Cloud and International
Cut the panel to 24-1/8″ x 19-5/8″ and drill the LP hose hole down 2″ and over 4″ and the 12 volt wire hole up 2″ and over 4 ” like the drawing shows. Cut the two wood batts to 19¼” and install one on each side at the rear of the cabinet, and attach each batt with two 1¼” screws. Insert the LP hose and the 12-volt wires through the holes on the 1/8″ panel, and use four ¾” screws on each side. Next, use foil tape to seal off all corners and sides at the back of the cabinet. Insert the grommet over the LP hose and use two ¾” screws to attach it to the back panel. Measure down from the top of the galley 4¼” on both sides and attach a 16½” wood batt. Install the batt with 1¼” screws, so that the top of the batt is on the measured line. Lay the bottom panel on top of the wood batts and use four ¾” screws to attach the board to the batts. Use foil tape to seal the sides and back of the panels.
30RB Stove Top: Flying Cloud and International
Cut the panel to 24-1/8″ x 3¾” and drill the LP hose hole down 2″ and over 3½” and the 12 volt wire hole down 2″ and over 4 ” like the drawing shows. Cut the two wood batts to 3¼” and install one on each side at the rear of the cabinet, and attach each batt with two 1¼” screws. Insert the LP hose and the 12-volt wires through the holes on the 1/8″ panel, and use four ¾” screws on each side. Next, use foil tape to seal off all corners and sides at the back of the cabinet. Insert the grommet over the LP hose and use two ¾” screws to attach it to the back panel.
28RB Stove Top: Flying Cloud and International
Cut the first panel to 24-1/8″ x 12-1/8″ and drill the LP hose hole down 2″ and over 3½” and the 12 volt wire hole down 2″ and over 4 ” like the drawing shows. Cut the second panel to 24-1/8″ x 16-7/8″ Cut the first two wood batts to 11″ and install one on each side at the rear of the cabinet, and attach each batt with two 1¼” screws. Insert the LP hose and the 12-volt wires through the holes on the 1/8″ panel, and use four ¾” screws on each side. Next, use foil tape to seal off all corners and sides at the back of the cabinet. Insert a grommet over the LP hose and use two ¾” screws to attach it to the back panel. Measure down from the top of the galley 4¼” on both sides and cut the second set of wood batts at 16½” and attach them one on each side.
Install the batt with 1¼” screws, so that the top of the batt is on the measured line. Lay the bottom panel on top of the wood batts and use four ¾” screws to attach the board to the batts. Use foil tape to seal the sides and back of the panels.
28RB Stove Top with Oven: Flying Cloud and International
Cut the panel to 24-1/8″ x 20-1/8″ and drill the LP hose hole down 2″ and over 4″ and the 12 volt wire hole up 2″ and over 12″ like the drawing shows. Cut the two wood batts to 19½” and install one on each side at the rear of the cabinet, and attach each batt with two 1¼” screws. Insert the LP hose and the 12-volt wires through the holes on the 1/8″ panel, and use four ¾” screws on each side. Next, use foil tape to seal off all corners and sides at the back of the cabinet. Insert the grommet over the LP hose and use two ¾” screws to attach it to the back panel.
26U Stove Top and Oven: Flying Cloud
Cut the panel to 24-1/8″ x 20-1/8″ and drill the LP hose hole down 2″ and over 4″ and the 12 volt wire hole up 2″ and over 12″ like the drawing shows. Cut the two wood batts to 19″ and install one on each side at the rear of the cabinet, and attach each batt with two 1¼” screws. Insert the LP hose and the 12-volt wires through the holes on the 1/8″ panel, and use four ¾” screws on each side. Next, use foil tape to seal off all corners and sides at the back of the cabinet. Insert the grommet over the LP hose and use two ¾” screws to attach it to the back panel. Lp hose hole and grommet
26U Stove Top: Flying Cloud
Cut the first panel to 24-1/8″ x 12-1/8″ and drill the LP hose hole down 2″ and over 3½” and the 12 volt wire hole down 2″ and over 4 ” like the drawing shows. Cut the second panel to 24-1/8″ x 17½” Cut the first two wood batts to 11″ and install one on each side at the rear of the cabinet, and attach each batt with two 1¼” screws. Insert the LP hose and the 12-volt wires through the holes on the 1/8″ panel, and use four ¾” screws on each side. Next, use foil tape to seal off all corners and sides at the back of the cabinet. Insert the grommet over the LP hose and use two ¾” screws to attach it to the back panel. Measure down from the top of the galley 4¼” on both sides and cut the second wood batts to 17″ and attach one on each side. Install the batt with 1¼” screws, so that the top of the batt is on the measured line. lay the bottom panel on top of the wood batts and use four ¾” screws to attach the board to the batts. Use foil tape to seal the sides and back of the panels. Lp hose hole and grommet
25RB Stove Top and Oven: Flying Cloud and International
Cut the panel to 24-1/8″ x 19-7/8″ and drill the LP hose hole down 2″ and over 3½” and the 12 volt wire hole up 2″ and over 4″ like the drawing shows. Cut the two wood batts to 19 and attach one on each side at the rear of the cabinet, and attach each batt with two 1¼” screws. Insert the LP hose and the 12-volt wires through the holes on the 1/8″ panel, and use four ¾” screws on each side. Next, use foil tape to seal off all corners and sides at the back of the cabinet. Insert the grommet over the LP hose and use two ¾” screws to attach it to the back panel.
23FB Stove Top with Oven: Flying Cloud and International
Cut the panel to 24-7/8″ x 19-1/8″ and drill the LP hose hole down 2″ and over 4″ and the 12 volt wire hole up 2″ and over 12″ like the drawing shows. Cut the two wood batts to 19½” and attach one on each side at the rear of the cabinet, and attach each batt with two 1¼” screws. Insert the LP hose and the 12-volt wires through the holes on the 1/8″ panel, and use four ¾” screws on each side. Next, use foil tape to seal off all corners and sides at the back of the cabinet. Insert the grommet over the LP hose and use two ¾” screws to attach it to the back panel.
Reinstall the stove top and oven and connect the 12-volt wires. Use a 3/4″ wrench to reconnect the LP hose.
Reinstall the four screws on the stove top and, if it has the oven, reinstall the two screws in the oven front.
An LP drop pressure test will need to be performed since the LP line was disconnected. Use a manometer and connect it to the LP port at the front of the trailer, on the A-frame. Open the LP bottles to pressurize the system and then turn the bottles off. Bleed the propane down to 8″ of water column on your manometer. The system will need to hold the 8″ for a minimum of three minutes.
4 Affected Products
Vehicles
| MAKE | MODEL | YEAR |
| AIRSTREAM | FLYING CLOUD | 2020-2021 |
| AIRSTREAM | INTERNATIONAL | 2020-2021 |
7 Associated Documents
Remedy Instructions and TSB
RCRIT-21V345-2437.pdf 5115.8KB
Recall 573 Report – Amendment 2
RCLRPT-21V345-8836.PDF 213.976KB
Defect Notice 573 Report
RCLRPT-21V345-1648.PDF 213.508KB
Recall Acknowledgement
RCAK-21V345-4791.pdf 694.816KB
Recall 573 Report – Amendment 1
RCLRPT-21V345-1202.PDF 213.623KB
Recall Quarterly Report #2, 2021-4
RCLQRT-21V345-2120.PDF 211.226KB
Recall Quarterly Report #1, 2021-3
RCLQRT-21V345-1962.PDF 211.127KB
Latest Recalls Documents
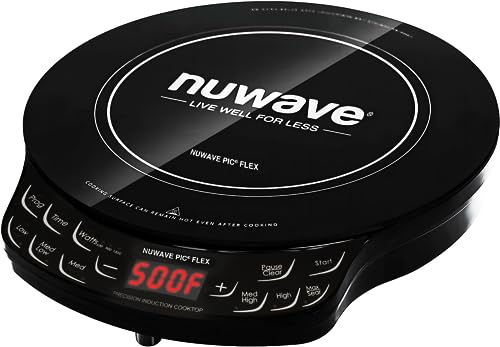
- MAKE ADJUSTMENTS ON-THE-FLY – Want hotter temperature or need to cook it longer? No problem. Simply adjust on-the-fly any time. No need to start over. Flex’s intuitive digital controls are easy to operate, and the response is immediate.
- 81 PRE-PROGRAMMED TEMPS - Select from the 6 convenient preset temperature settings or fine tune your own temperature from 100°F to 500°F in 5°F increments. You can also add or deduct cooking time at any time.
- PRECISE TEMPERATURE CONTROL – With 81 precise temperatures at your fingertips, you can keep delicate sauces warm at 100°F to grilling a juicy steak with serious grill marks at 500°F.
- SHATTER-RESITANT CERAMIC GLASS – The heating surface is heavy-duty shatter-resistant ceramic glass. It was rigorously tested to withstand intense heat without shattering. It is one of the safest cooktops on the market.
- SUPERIOR TECHNOLOGY - The slim design of Flex and its patented insulation technology brings the induction heating coils closer to your cookware than the competition for faster & even heating, ensuring no hot or cold spots for optimal cooking experience.

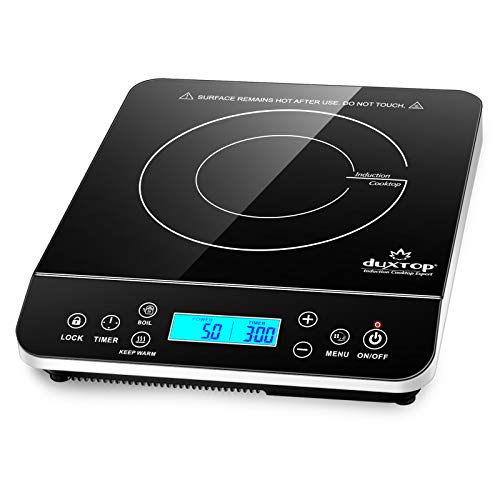
- PORTABLE INDUCTION BURNER: Duxtop induction cooktop uses 110/120 V 15 amp electrical outlet–standard in all North American homes. ETL listed and built to North American electrical standards. It is lightweight and compact for easy handling and storage
- Choose from 20 preset power levels (100 to 1800 W) and 20 preset temperature level settings (100 °F to 460 °F). With an 83% energy efficiency, induction burner is more efficient than traditional gas or electric stoves
- DIGITAL LCD SENSOR: Touch control panel: child safety lock keeps the cooking and timer settings from being accidentally changed once they have been set; fast boil button; keep warm button (for 1-30 minutes at 140 °F); up to 10-hour timer button
- Induction stoves rely on cookware to heat, so it’s essential to choose magnetic bottom cookware with a minimum diameter of 5 inches. Auto-pan detection will shut off automatically after 60 seconds if no cookware, or the incorrect cookware is detected
- Although induction itself is a noiseless process, there may be high pitched sounds from the cookware due to multiple layers of metals sandwiched together. Please allow the induction cooker to cool down before cleaning
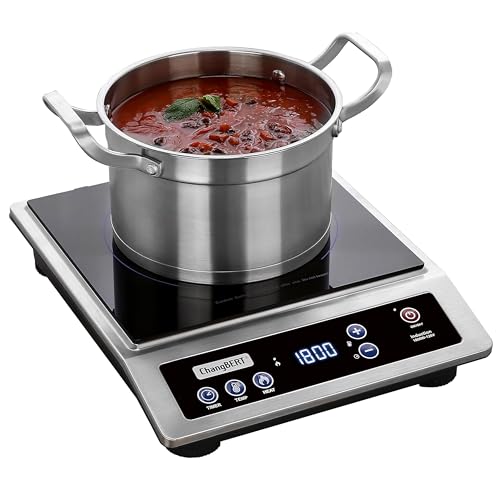
- HIGH EFFICIENCY - ChangBERT Induction cooktop offers 9 preset power levels (200-1800W) and 18 preset temperature settings (120-460℉, 20F per level). With an 83% energy efficiency rating, the induction cooker is more efficient than traditional gas or electric stoves, providing quick heat-up and faster cooking times.
- CONSISTENTLY STABLE HIGH-POWER OUTPUT - Built for constant use, it features continuous-duty circuitry for non-stop cooking. The unique power control technology ensures stable high-power output, reduces the temperature of internal electronics, and facilitates low-noise heat dissipation, providing reliable cooking performance. This dependable performance sets it apart from others.
- LARGE COOKING AREA - Features an expanded magnetic coil design that optimizes the winding structure to enhance the transfer of electromagnetic energy directly to the cookware, significantly improving heating efficiency and ensuring more even heat distribution across the bottom of the cookware.
- NSF CERTIFIED & COMMERCIAL GRADE - UL commercial standard 197, completely ETL & NSF approved. It meets industry durability standards, passing a drop test with an impact of 1.5 ft lbs. Designed for large-volume usage, it is ideal for commercial and professional settings such as restaurants, industrial kitchens, and other catering services.
- EASY TO CONTROL & CLEAN - The control buttons with solid tactile response make operation intuitive and precise.With simple and clear display, the Key-Press-Control Panel provides clear visibility and easy control, even with gloves or wet hands. With no open flame or heating element, food does not burn onto the glass cooktop, making it easy to clean greasy dirt.
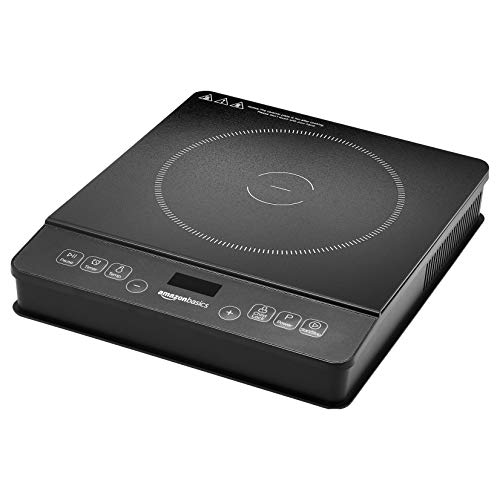
- FLEXIBLE & SPACE-SAVING: This versatile portable induction stovetop allows you to cook meals without a full range, making it the perfect solution for RVs, cabins, studio apartments, and other small spaces where a full kitchen isn't available.
- VERSATILE COOKING: With 8 power levels (300-1800 watts) and temperature range 160-440°F (71-226°C), this cooktop accommodates a wide range of cooking methods: simmering, keeping warm, reheating, pan frying, stir frying, boiling, steaming, roasting, or grilling. Ideal for continuous heating but not recommended for slow or low temperature cooking.
- SMART CONTROL: Convenient pre-set cooking modes and a 3-hour timer make meal planning and execution effortless. The user-friendly LED display features intuitive cooking function controls for seamless meal preparation.
- SAFE OPERATION: Advanced safety features include a child lock, auto-pause function, overheat protection, and voltage warning system.
- EASY MAINTENANCE: The tempered glass surface is durable and allows for effortless cleaning after use.
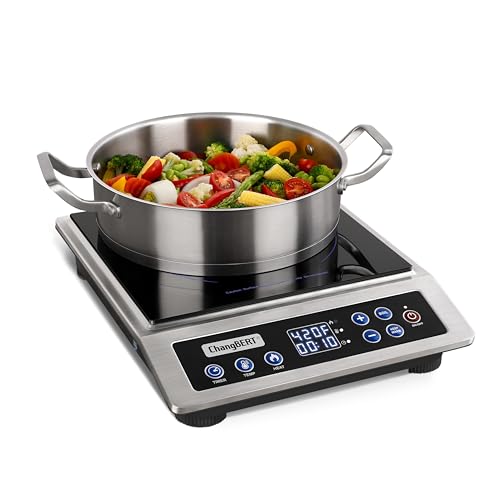
- HIGH EFFICIENTY AND NO HOT KITCHEN - ChangBERT induction cooktop offers 9 preset power levels (200-1800W) and 18 preset temperature settings (120-460℉). transfers energy directly to magnetic cookware, heating the cookware itself rather than the surface for up to 83% energy efficiency. This direct heating method is more efficient than traditional gas or electric stoves, delivering instant response and stable performance, providing quick heat-up under high-demand kitchen environments.
- CONSISTENTLY STABLE HIGH-POWER WITH ONE-CLICK MAX 1800W POWER BUTTON - This induction burner built for constant use, it features continuous-duty circuitry for non-stop cooking, including an upgraded control board with dual IGBT. The unique power control technology with one-click max power button ensures fast and stable high-power output, reduces the temperature of internal electronics, and facilitates low-noise heat dissipation. This dependable performance sets it apart from others.
- LARGE COOKING AREA WITH 8-INCH HEATING COIL ENSURES PRECISE TEMPERATURE CONTROL FOR EVEN COOKING - Features an expanded 8” magnetic coil design that optimizes the winding structure to enhance the transfer of electromagnetic energy directly to the cookware, improving heating efficiency and ensuring more even heat distribution across the bottom of the cookware. This precise temperature control maintains steady heat to handling large cookwares for both professional kitchens and daily cooking.
- NSF CERTIFIED & COMMERCIAL GRADE DURABILITY - UL commercial standard 197, completely ETL & NSF approved. It meets industry durability standards, passing a drop test with an impact of 1.5 ft lbs. This cooker designed for large-volume usage, it is ideal for commercial and professional settings such as restaurants, hotel buffets, food trucks, institutional kitchens and catering services, while also perfect for large-volume usage.
- ENHANCED VERSION FOR BETTER PROFESSIONAL & CONVENIENT COOKING EXPERIENCE - Enhanced version equipped dedicated one-click buttons allow instant access to key functions, reducing steps during busy cooking. The extended 12-hour timer supports long simmering and unattended cooking with confidence. A large dual digital display clearly shows power or temperature and timer at the same time, easy to read in all lighting conditions and angles. Every upgrade delivers smoother operation for daily cooking.
Last update on 2026-06-12 / Affiliate links / Images from Amazon Product Advertising API
This product presentation was made with AAWP plugin.