
July 21, 2021 NHTSA CAMPAIGN NUMBER: 21V548000
Leveling Sprocket Weld Failure
Uncontrolled platform leveling increases the risk of injury and death.
NHTSA Campaign Number: 21V548
Manufacturer Altec Industries, Inc.
Components EQUIPMENT
Potential Number of Units Affected 1,284
Summary
Altec Industries, Inc. (Altec) is recalling certain 2020 AA5X/AN5X, AA5X(E)/AN5X(E), AA6X/AN6X, AA6X(E)/AN6X(E), AN4X-OC/AN4X(E)-OC, AN5X-OC/AN5X(E)-OC, AA/AN67-E100, and AA/AN67(E)-E100 vehicles. The leveling sprocket may have a failed weld between the sprocket and hub assembly.
Remedy
Altec will inspect and replace the damaged sprocket assembly, free of charge. If no damage is observed, a secondary retention kit will be installed to limit rotation of the platform, free of charge. Owner notification letters were mailed on September 15, 2021. Owners may contact Altec’s customer service at 1-877-462-5832. Altec’s number for this recall is CSN 828.
Notes
Owners may also contact the National Highway Traffic Safety Administration Vehicle Safety Hotline at 1-888-327-4236 (TTY 1-800-424-9153), or go to www.nhtsa.gov.
IMPORTANT SAFETY RECALL
This notice applies to your vehicle. See attached serial number list.
NHTSA Safety Recall
No. 21V-548
September 16, 2021
Dear Altec Owner,
This notice is sent to you in accordance with the National Traffic and Motor Vehicle Safety Act, and Canada Motor Vehicle Safety Act.
Altec Industries, Inc. has decided that a defect which relates to motor vehicle safety exists in certain AA/AN and AN-OC series aerial devices built from March 2020 to November 2020. These units may have a leveling sprocket with poor quality weld. Weld failure could cause the platform to tip. If the platform tips with an operator not wearing the required fall protection equipment, the operator could fall from the platform. Death or serious injury can result from a fall from the platform.
In order to determine if your unit is affected by this CSN, compare the serial number of your unit with the list of affected units attached to the notice. Refer to attached notice for the items covered under the warranty policy. The repair can be performed by the customer or you may contact Altec at 1-877-GO-ALTEC (1-877-462-5832) for further assistance. The repair is expected to take up to 51/2 hours to complete.
If you had this repair performed before you received this letter, you may be eligible to receive reimbursement for the cost of obtaining a pre-notification remedy of the problem associated with this recall.
At any time, you may contact Altec at 1-877 GO ALTEC (1-877-462-5832) with your unit’s serial number to determine if there are any other outstanding notices.
If you have sold or retired the unit, please call Altec at 1-877-GO-ALTEC (1-877-462-5832) so the records may be changed.
If you have leased this equipment to another person or company, you are required by Federal Law to forward a copy of this notice to the lessee by first class mail within ten (10) days of the receipt of this notice.
For US owners: after contacting Altec, if you are still not able to have the safety condition remedied without charge and within a reasonable time, you may submit a complaint to: Administrator, National Highway Traffic Safety Administration, 1200 New Jersey Avenue SE, Washington, DC 20590 or call toll-free 1-888-327-4236 (TTY: 1-800-424-9153) or go to https://www.safercar.gov.
For Canadian Owners: if you are still not able to have the safety condition remedied by your dealer within a reasonable time, please contact Altec Customer Service at 1-877-GO-ALTEC (1-877-462-5832).
We are sorry to cause this inconvenience; however, we are taking this action in the interest of your safety and continued satisfaction with Altec products.
Thank you for your immediate attention on this important matter.
SEOCONTENT-START
September 16, 2021
Dear Altec Owner,
This notice is sent to you in accordance with the National Traffic and Motor Vehicle Safety Act, and Canada Motor Vehicle Safety Act.Altec Industries, Inc. has decided that a defect which relates to motor vehicle safety exists in certain AA/AN and AN-OC series aerial devices built from March 2020 to November 2020. These units may have a leveling sprocket with poor quality weld. Weld failure could cause the platform to tip. If the platform tips with an operator not wearing the required fall protection equipment, the operator could fall from the platform. Death or serious injury can result from a fall from the platform.In order to determine if your unit is affected by this CSN, compare the serial number of your unit with the list of affected units attached to the notice. Refer to attached notice for the items covered under the warranty policy. The repair can be performed by the customer or you may contact Altec at 1-877-GO-ALTEC (1-877-462-5832) for further assistance. The repair is expected to take up to 51/2 hours to complete.If you had this repair performed before you received this letter, you may be eligible to receive reimbursement for the cost of obtaining a pre-notification remedy of the problem associated with this recall. At any time, you may contact Altec at 1-877 GO ALTEC (1-877-462-5832) with your unit’s serial number to determine if there are any other outstanding notices.If you have sold or retired the unit, please call Altec at 1-877-GO-ALTEC (1-877-462-5832) so the records may be changed.If you have leased this equipment to another person or company, you are required by Federal Law to forward a copy of this notice to the lessee by first class mail within ten (10) days of the receipt of this notice.For US owners: after contacting Altec, if you are still not able to have the safety condition remedied without charge and within a reasonable time, you may submit a complaint to: Administrator, National Highway Traffic Safety Administration, 1200 New Jersey Avenue SE, Washington, DC 20590 or call toll-free 1-888-327-4236 (TTY: 1-800-424-9153) or go to https://www.safercar.gov. For Canadian Owners: if you are still not able to have the safety condition remedied by your dealer within a reasonable time, please contact Altec Customer Service at 1-877-GO-ALTEC (1-877-462-5832).We are sorry to cause this inconvenience; however, we are taking this action in the interest of your safety and continued satisfaction with Altec products.Thank you for your immediate attention on this important matter.
NHTSA Safety Recall
No. 21V-548
IMPORTANT SAFETY RECALL
This notice applies to your vehicle. See attached serial number list.
210 Inverness Center Parkway Telephone: 205-991-7733
Birmingham, AL 35242 Facsimile: 205-991-9993
www
.altec.com
Page 1 of 7
Altec Industries, Inc.
Midwest Operations
St. Joseph, MO
CSN 828
Customer Service Notice
September 16, 2021
Units Affected: AA/AN and AN-OC series aerial devices built from March 2020 to November 2020 (Verify that your unit serial number is affected by reviewing the attached list in this CSN or by accessing your fleet on connect.altec.com/login)
Elbow Leveling Sprocket Inspection
Altec is committed to providing our customers with safe and reliable products from initial delivery throughout the useful life of the unit.
The leveling sprocket weldment in the elbow of the affected units is purchased from more than one manufacturer. Altec has discovered that the sprocket weldments provided by one supplier may have poor quality welds between the sprockets and the hub. A sprocket can turn freely on the hub if its weld fails, resulting in uncontrolled platform leveling. If the platform tips with an operator not wearing the required fall protection equipment, the operator could fall from the platform. Death or serious injury can result from a fall from the platform.
Altec requires the elbow leveling sprocket weldment to be inspected on each unit to verify the manufacturer and determine whether the sprocket must be repaired or replaced. This must be done no later than 30 days from the receipt of this CSN. Use the Inspection Procedure beginning on page 2.
If the inspection determines that the sprocket was supplied by the manufacturer in question, inspection of the welds is prescribed. Order the specified kit based on the result of the weld inspection, and install it upon receipt.
This inspection and repair are covered under the Altec Warranty Policy and can be performed by Altec, the customer, or the customer’s warranty provider. The sprocket replacement requires a hoist and sling rated for 4,000 pounds, and up to 1,200 pounds of test load for a structural test. Altec will perform the work for free at an Altec facility. If the customer or the customer’s warranty provider performs the work, a warranty claim must be submitted to be reimbursed for the cost of the parts and/or labor. Altec will allow up to $45 for the labor to perform the inspection, up to $45 for the labor to install the sprocket retainer kit, and up to $405 for the labor to replace the sprocket. Altec will allow an additional $90 for the labor to remove and reinstall the hose retainer assembly, if equipped, during the inspection or repair of an AN-OC series unit.
Altec Use Only
Parts Kit
Part No.
Qty
Warranty
Elbow sprocket retainer kit
991370742
1
Yes
Elbow sprocket replacement kit, AA/AN Series
991381820
1
Yes
Elbow sprocket replacement kit, AN-OC Series
991381821
1
Yes
Altec Use Only
Inspection labor
0.5 hr (AA/AN), 1.5 hr (AN-OC)
Repair labor, retainer kit
0.5 hr (AA/AN), 1.5 hr (AN-OC)
Repair labor, sprocket kit
4.5 hr (AA/AN), 5.5 hr (AN-OC)
Account #
010.1093.43151.447.0000.000
Travel
Not included
NHTSA code
16
Prime fail P/N
970346819, 970236795
Doc ref
074900791, 074900798
Page 2 of 7
CSN 828
Call 1-877-GO ALTEC (1-877-462-5832) option 3 to schedule the work to be done by an Altec Mobile
Service technician or option 2 to schedule the work to be done at an Altec facility. Customers are responsible
for the travel costs of an Altec Mobile Service technician if the technician performs the inspection
and/or repair at the owner’s location.
Inspection Procedure
Normal mechanic’s hand tools, a flashlight, mirror, and step ladder or rolling stairs are required for this
inspection. On an AN-OC series unit, the upper boom may need to be unfolded to 70 degrees for the last
part of the inspection. Read and understand all steps of the instructions before beginning the procedure.
Setup
1. Position the unit on a level surface. Apply the
parking brake, and turn off the engine. Remove
the key from the ignition, and secure it following
your employer’s vehicle lockout/tagout procedure.
Chock the wheels.
2. Determine whether the aerial device is an AA series,
AN series, or AN-OC series unit. The model number
is shown on the serial number placard on the side of
the pedestal.
3. Remove the three fasteners along the top edge
of the boom elbow cover (refer to Figure 1), and
allow the cover to hang down. Keep the fasteners
for reuse.
Identifying Supplier Code
4. Locate the leveling sprocket weldment in the boom elbow (refer to Figure 2). Using a flashlight, if
necessary, look for the five-digit supplier code number stamped on the street side of the sprocket on
the spoke opposite from the center mark (refer to Figure 3)
• If the supplier code is 13037 or if it cannot be identified, proceed to step 5.
• If the supplier code is 50605 or 55843, the inspection is complete. Reattach the top edge of the boom
elbow cover to the upper boom using the original fasteners. Put the unit back into service. Complete
the Inspection Sheet at the end of the CSN and return it to Altec.
Figure 2 – Boom Elbow Components
Leveling
Sprocket
Center Mark
Supplier Code Timing Mark
13037
Figure 3 – Sprocket Markings
Upper Boom
Lower Boom
Figure 1 – Opening Boom Elbow Cover
Boom
Elbow
Cover
Cover
Fasteners
Upper Boom
Lower Boom
Page 3 of 7
CSN 828
Checking AN-OC Unit for Hose Retainer
5. For an AN-OC series unit, proceed to step 6. For an AA series or AN series unit, proceed to
step 13.
6. Look into the end of the elbow to determine if the boom is equipped with a hose retainer assembly
attached to the sprocket (refer to Figure 4).
• If the boom has a hose retainer assembly, proceed to step 7.
• If the boom does not have a hose retainer assembly, proceed to step 13.
Removing Hose Retainer on AN-OC Unit
7. Confirm whether there is sufficient overhead clearance to unfold the upper boom to 70 degrees (refer
to Figure 5). If necessary, move the unit to a suitable level surface with adequate vertical clearance.
Apply the parking brake, and chock the wheels.
8. Start the engine, engage the unit’s hydraulic system, and properly set the outriggers.
9. With the lower boom fully stowed, use the lower controls to unfold the upper boom to approximately
70 degrees.
10. Disengage the unit’s
hydraulic system,
and turn off the engine.
11. Remove the four 3/8”
flat head cap screws
attaching the spacer
block to the hose
retainer body, and
remove the spacer
block (refer to Figure
6).
Figure 4 – Hose Retainer
Hose Retainer
Components
70°
Upper Boom
Lower Boom
Figure 5 – Unfolding Upper Boom
Sprocket
Figure 6 – Removing Spacer Block Figure 7 – Removing Hose Retainer Body
Spacer
Block Hose Retainer
Body
3/8” Flat
Head Cap
Screw
5/16” Hex
Head Cap
Screw
Page 4 of 7
CSN 828
12. Remove the two sets of 5/16” fasteners holding the halves of the hose retainer body together, and remove
the hose retainer body (refer to Figure 7). Keep the hose retainer components and fasteners for
reuse.
Inspecting Welds
13. Using a flashlight and a mirror as required, attempt to visually inspect the weld all around the hub on
the street side of the leveling sprocket for any cracks (refer to Figure 8). Repeat this for the weld on
the curb side of the sprocket, looking through the holes in the guard plate (refer to Figure 9).
• If the weld could be fully inspected 360 degrees around the hub on both sides and a hose retainer was
removed from the elbow, proceed to step 19.
• If the weld could be fully inspected 360 degrees around the hub on both sides and a hose retainer was
not removed from the elbow, proceed to step 22.
• If the weld could not be fully inspected 360 degrees around the hub, use a felt tip marker to mark
what portion of each weld was inspected, and proceed to step 14.
Weld
Figure 8 – Inspecting Weld on Street Side of Sprocket
Weld
Weld
Weld
Figure 9 – Inspecting Weld on Curb Side of Sprocket
Guard Plate
(Cut Away
for Visibility)
Guard
Plate
Holes
Weld
Page 5 of 7
CSN 828
Rotating Sprocket for Further Weld Inspection
14. Start the engine, and engage the unit’s hydraulic system. Properly set the outriggers if they have not
already been set. Use the lower controls to unfold the upper boom far enough out of the rest to provide
adequate clearance below the platform so it can be fully tilted without interfering with any unit structures.
15. Using the upper controls, engage the upper control interlock, lift up on the platform tilt control
interlock, and move the platform tilt control to fully tilt the platform. This will rotate the
sprocket in the elbow for further inspection. Disengage the unit’s hydraulic system and turn
off the engine.
16. Using a flashlight and a mirror as required, visually inspect the remaining portions of the
welds around the hub on both sides of the sprocket that could not be seen previously based
on the markings made in step 13.
17. Start the engine, and engage the unit’s hydraulic system. Using the upper controls, engage the upper
control interlock, lift up on the platform tilt control interlock, and move the platform tilt
control to tilt the platform back to the working position.
18. Using the lower controls, ensure the lower boom is stowed. Position the upper boom as described below.
• If a hose retainer was removed from the elbow, unfold the upper boom to approximately 70 degrees.
Disengage the unit’s hydraulic system, turn off the engine, and proceed to step 19.
• If the elbow was not equipped with a hose retainer, stow the upper boom. Retract the outriggers,
disengage the unit’s hydraulic system, turn off the engine, and proceed to step 22.
Installing and Testing Hose Retainer on AN-OC Unit
19. Reinstall the hose retainer assembly using the original fasteners.
20. Start the engine, and engage the unit’s hydraulic system. Operate the upper and lower booms using
the lower controls to check for proper operation of the hose retainer assembly. Make any necessary
corrections.
21. Use the lower controls to stow the booms. Retract the outriggers, disengage the unit’s hydraulic system,
and turn off the engine.
Completion
22. Reattach the top edge of the boom elbow cover to the upper boom using the original fasteners.
23. Review the inspection results from steps 13 and 16.
• If there are no visible weld crack(s) on the sprocket, put the unit back into service. Call 1-877-
GO ALTEC (1-877-462-5832) option 1 to order the Elbow Sprocket Retainer Kit, part number
991370742. Do not complete the Inspection Sheet at the end of the CSN. A separate reply card will
be provided with the kit to document the completion of the CSN. Install the kit upon receipt.
Page 6 of 7
CSN 828
• If there are visible weld crack(s) on the sprocket, take the unit out of service. Call 1-877-GO ALTEC
(1-877-462-5832) option 1 to order the Elbow Sprocket Replacement Kit. This is part number
991381820 for an AA or AN series unit or part number 991381821 for an AN-OC series unit. Do not
complete the Inspection Sheet at the end of the CSN. A separate reply card will be provided with the
kit to document the completion of the CSN. Install the kit upon receipt.
Page 7 of 7
CSN 828
CSN 828 Elbow Leveling Sprocket Inspection Sheet
Company Name: _______________________________________________ Phone____________________________
Service Company Name:_ ________________________________________ Phone:___________________________
Company Contact: _ ________________________________________________________________________________
Company Street Address:_____________________________________________________________________________
City ______________________________________________ State:_________________ ZIP Code:_ _______________
Signature:_ ____________________________________________________
Complete this form and return to Altec to document inspection completion.
Choose one of these options.
• Online through the customer portal – Altec Connect*
Sign in or Register for an account at www.altec.com/altec-connect/
1. Select Equipment
2. Select Altec Product Notices
3. Select Report a Completed APN
• Scan and Email to [email protected]
• FAX to 1-877-659-9929
*Customer performed warranty can be submitted online for reimbursement
through Altec Connect.
To login to your existing
Altec Connect account,
scan here with your
smart phone!
Submission of this form does not order parts or schedule service from Altec.
If the customer or the customer’s warranty provider performs the repair, a warranty claim must be submitted
to be reimbursed for the cost of the parts and/or labor through Altec Connect.
For more information or to schedule the work to be done by an Altec Service technician call:
1-877-GO ALTEC (1-877-462-5832)
Make copies of this form for additional units if needed.
Model Altec Unit Serial Number Date Inspected
*
*
*
*
*
*
*
*
***************************************************************************************
2 Affected Products
Vehicles
| MAKE | MODEL | YEAR |
| ALTEC | AA-CLASS | 2020 |
| ALTEC | AN-CLASS | 2020 |
6 Associated Documents
Defect Notice 573 Report
RCLRPT-21V548-4785.PDF 213.835KB
Recall Acknowledgement
RCAK-21V548-7072.pdf 645.634KB
ISSUED Owner Notification Letter(Part 577)
RCONL-21V548-8586.pdf 1900.107KB
Recall Quarterly Report #2, 2021-4
RCLQRT-21V548-2649.PDF 211.235KB
Recall Quarterly Report #1, 2021-3
RCLQRT-21V548-7799.PDF 211.133KB
Recall Quarterly Report #3, 2022-1
RCLQRT-21V548-3456.PDF 211.316KB
Latest Recalls Documents
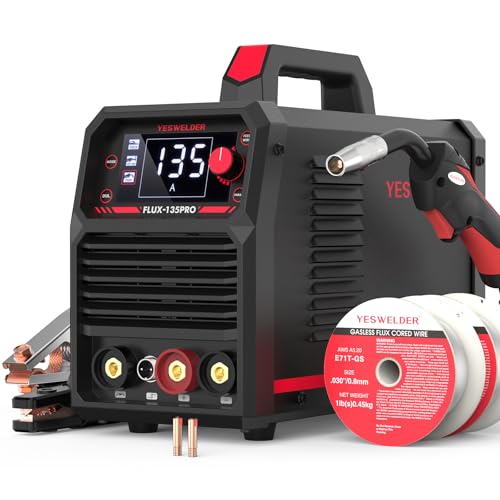
- MULTI PROCESS: Experience the convenience of a high-quality, budget-friendly 3-in-1 welding machine that masterfully handles Gasless Flux Core MIG/Stick/Lift TIG(additional 10-25 lift TIG torch required). This unit caters to a wide range of welding applications and meets your various welding needs.
- WELDING CAPACITY: With a robust 135 Amp output, this welder is capable of tackling mild steel workpieces up to 3/32 inch(2.5mm) thick. It is compatible with 2LB .030’’ and .035’’ welding wire. For Stick Welding, the Hot Start and Arc Force can be adjusted to enhance your welding experience.
- SYNERGIC CONTROL: The wire feeding speed is flexibly adjustable (030": 120-420 in/min;.035'': 120-308 in/min). When adjusting the wire feeding speed, the voltage will be automatically matched to a recommended value, and you can fine tune the voltage between -3V~3V. Ideal for both beginners and seasoned professionals.
- DIGITAL DISPLAY: The advanced digital display revolutionizes the welding interface, offering enhanced clarity and operational efficiency. Monitor the real-time current during welding for precise control.
- LIGHT&PORTABLE: Weighing just 11.4 lbs, this lightweight and compact welder is a breeze to transport, making it the perfect companion for on-the-go welding projects with its carrying handle.

![ARCCAPTAIN 165A MIG Welder 110V/220V [Large LED Display] 4 in 1 Gasless/Gas MIG/Lift TIG/Stick Welding Machine Multiprocess Welder Machine, IGBT Inverter Welder with Synergy, 2T/4T](https://m.media-amazon.com/images/I/51GW2TUAy1L.jpg "CSN828 - Leveling Sprocket Weld Failure - 2020 Altec AA-Class & AN-Class 4")
- 4-IN-1 MIG Welder: The welder machine offers GAS MIG/Flux Core MIG/Lift TIG/ MMA welding modes (Note: WP-17V TIG torch must be purchased separately). It can easily handle welding stainless steel, carbon steel, and even thicker steel materials, meeting diverse welding requirements.
- TECHNICAL UPGRADE: This welding machine features upgraded MCU and IGBT technologies, enabling users to precisely adjust parameters for Synergy MIG (plate thickness, voltage, welding speed), Manual MIG (current, voltage), and MMA (hot start, arc force, etc.) while its dual-voltage design (110V/220V) supports flexible power switching (Caution: Ensure the screen is off and the fan has stopped before changing voltage settings).
- LARGE LED DISPLAY: With an exclusive human-computer interaction LED screen design, this welder provides accurate data display, allowing you to read it more easily and clearly without removing your helmet. This welder also has 2T/4T functions, which can seamlessly switch between continuous welding (4T) for long-term operations and trigger-controlled precision welding (2T) for fine operations, improving efficiency and flexibility.
- HIGH PERFORMANCE: The output current up to 165A, rated duty cycle: 60%, equipped with an upgraded cooling fan, the heat dissipation performance is improved by 30%, and can easily complete various welding tasks. This welder is capable of tackling mild steel workpieces up to 3/16” thick.
- SAFETY PROTECTION: The 165A MIG welder Built-in over-current protection, over-load protection, overheating, and over-voltage function that extend the lifespan of the machine.
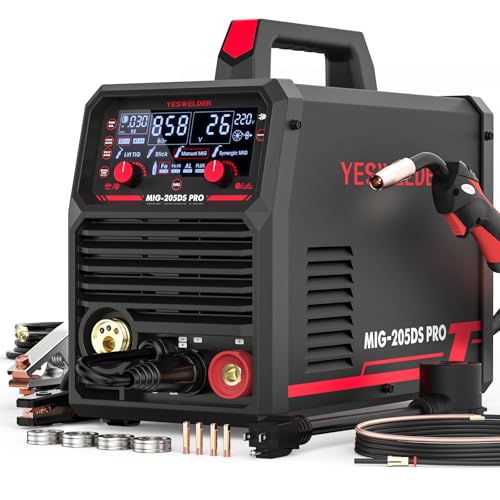
- 5 IN 1 MULTIFUNCTIONAL: The MIG-205DS PRO is capable of Gas MIG/Flux Core MIG/Spool Gun Aluminum MIG/Lift TIG/Stick. (additional lift TIG torch required and spool gun required). This unit caters to a wide range of welding applications and meets your various welding needs.
- WELDING CAPACITY: With a robust 200 Amp output, 110V/220V dual voltage, this welder is in possession of reliable quality and stable performance. It's widely used in various scenarios, including automotive, construction, fabrication and DIY. It's suitable for welding thin and thick materials, such as steel, aluminum, and stainless steel.
- SYNERGIC&MANUAL MIG: The wire feeding speed is flexibly adjustable(Min:58 in/min; Max:858 in/min), when adjusting the wire feeding speed, the voltage will be automatically matched to a recommended value, and you can fine tune the voltage between -3V~3V. Great choice for beginners. You can also manually adjust the wire feeding speed and voltage according to your preferences, which is ideal for seasoned professionals.
- DIGITAL DISPLAY: The advanced digital display revolutionizes the welding interface, offering enhanced clarity and operational efficiency. Monitor the real-time current during welding for precise control.
- SAFETY PRIORITIZED: Our product features comprehensive safeguards, including automatic compensation for voltage fluctuation, robust protections against over-current, over-load, and over-heating, ensuring unparalleled user safety and device longevity.
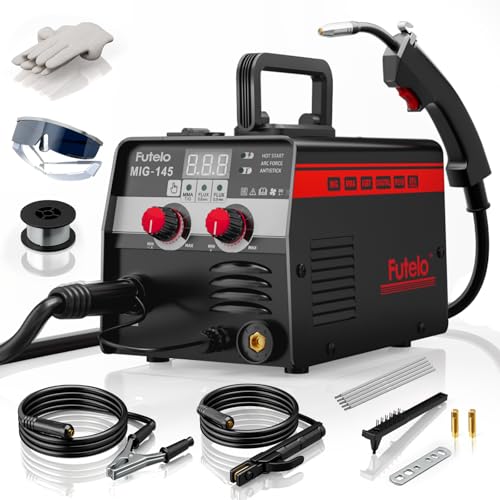
- 【3-IN-1 WELDER】Compact 3 in 1 welder combines MIG welder, Stick, and Lift TIG welding machine functions to tackle a wide range of welding tasks. With 30–145A output and support for carbon and stainless steel (1–5mm), it’s ideal for home DIY, repairs, and outdoor metal work. (NOTE: TIG torch not included—please purchase separately)
- 【COMPACT & PORTABLE】This little welder machine 110V packs big power into just 7.5 lbs. Easy to carry with one hand, it’s perfect for your garage, yard, or job site. Don’t let its small size fool you—this compact welding machine delivers strong, reliable welds wherever you need them
- 【SMART SYNERGIC CONTROL】Perfect for beginners! Just set your wire diameter (.030"/.035") or amperage (30-145A)—the welder machine auto-adjusts voltage and wire speed. It even suggests metal thickness! Start welding like a pro, even if it’s your first time
- 【CLEAR LED DISPLAY】The bright digital screen shows real-time welding amperage and wire diameter, so you can monitor and adjust settings on your mig welder 110V without removing your mask. Intuitive and easy to use, it ensures consistent, high-quality welds—perfect for both experienced welders and weekend DIYers
- 【WHAT YOU WILL GET】Everything you need is in one box! Includes: 1*145A MIG welder 110V, 1*14AK MIG torch, 1* Ground clamp, 1*Electrode holder, 5* 2.5" Welding rods, 1*0.9mm flux core wire, 2* Contact tips, 1* Wrench, 1* Safety goggles, 1*Pair of gloves, 1*Hammer and 1* User manual. Plug it in and start your first project within minutes—no extra purchases required
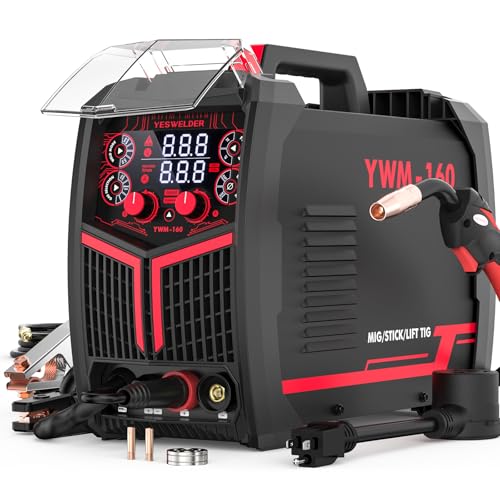
- MULTIFUNCTIONAL: A 4-in-1 welder, capable of Flux Core MIG/Gas MIG/ Stick/Lift TIG (need to purchase extra tig lift torch). This unit caters to a wide range of welding applications and meets your various welding needs.
- WELDING CAPACITY: With a robust 160A output, 110V/220V dual voltage, this welder is in possess of reliable quality and stable performance. It's widely used in various scenarios, including automotive, construction, fabrication and DIY. This Welder can work with 2LB and 10LB spools of .030"(0.8mm) and .035" (0.9mm) solid core wire, flux core wire. It also performs well with most 6010, 6011, 6013 and 7018 rods in Stick Welding mode.
- SMART CONTROL: Smart control refers to Synergic control, when selecting different thicknesses or adjust the amperage, the recommend voltage and wire feeding speed will be automatically switched into. Great choice for beginners.
- MANUAL CONTROL: You can manually adjust the wire feeding speed and voltage according to your preferences, which is ideal for seasoned professionals and DIYers.
- LED DISPLAY: Advanced LED digital display, subverts the traditional visual experience, increases the visual clarity and improves the efficiency of the operation.
This product presentation was made with AAWP plugin.