
August 17, 2021 NHTSA CAMPAIGN NUMBER: 21E075000
Improperly Crimped Lifting Cable
An improperly crimped cable may come out of place during a lifting operation, possibly causing the generator set to fall, increasing the risk of injury.
NHTSA Campaign Number: 21E075
Manufacturer Cummins , Inc.
Components EQUIPMENT
Potential Number of Units Affected 29
Summary
Cummins, Inc. (Cummins) is recalling certain generator sets, model 6RBAB, 10RBAB, 15RBAB, and 8RBAB. The lifting cables may be improperly crimped.
Remedy
Dealers will inspect the lifting cable, and either replace the cable, or install a warning label, free of charge. Owner notification letters were mailed October 8, 2021. Owners may contact Cummins’ customer service at 1-800-286-6467. Cummins number for this recall is 4495.
Notes
Owners may also contact the National Highway Traffic Safety Administration Vehicle Safety Hotline at 1-888-327-4236 (TTY 1-800-424-9153), or go to www.nhtsa.gov.
Technical Service Bulletin
| Technical Service Bulletin: TSB210146 | Released Date: 13-Sep-2021 |
| Safety Campaign #4495 RBAB Lift Cable Crimp Issue | |
Safety Campaign #4495 RBAB Lift Cable Crimp Issue
Warranty Statement
The information in this document authorizes specific changes to the repair practice for failures covered under product warranty coverages.
Contents
Product Affected
RBAB Spec G
Issue
Symptom:
- Lifting cable around the alternator may be improperly crimped and unable to carry its rated weight, which condition may cause the cable to fail during lifting.
Root Cause:
- Cable supplier quality issue with crimping tool.
Verification/Confirmation
If the unit has one of the serial numbers listed below, the unit needs to be inspected for uncrimped cable ferrules. If the cable ferrules do not have a marking on them to show it has been crimped, (see arrows in Figure 1 below) the cable needs to be replaced.
Figure 1, Cable Markings
Table 1, Serial Number
| A210866229 | B210891579 | D210915365 |
| A210866230 | C210891527 | D210915366 |
| A210866231 | C210891528 | D210915367 |
| A210867286 | C210900416 | D210919566 |
| B210875016 | C210902316 | D210919567 |
| B210875018 | C210904096 | D210919600 |
| B210891526 | D210906237 | E210919559 |
| B210891556 | D210906240 | E210919561 |
| B210891576 | D210909137 | E210919562 |
| B210891577 | D210915363 | |
| B210891578 | D210915364 |
If the unit is found to have one of the above serial numbers, follow the below steps in the resolution to inspect and/or replace the cable.
Note: This issue has been resolved by the supplier. New cables and generator sets outside of this serial number list do not have ferrule crimping issues.
Resolution
Warning: Ensure Engine is off and generator set is not connected to a power source to prevent accidental running of the generator set.
Warning: Wear the appropriate PPE to protect worker while performing this repair.
Warning: The generator set is over 90 kg (200 lbs). Use caution when lifting.
Warning: Do not use the lifting eye cable to lift the unit. Use an alternative method.
1. If installed, lift unit out of vehicle using 4 lifting holes on each side. Do not use lifting eye cable
Figure 2, Lifting Unit
2. Remove front enclosure panel.
Figure 3, Front Panel Removed
3. Remove left side enclosure panel and grate.
Figure 4, Side Panels Removed
4. Remove top two small enclosure covers.
Figure 5, Top Panels Removed
5. Inspect the cable ferrules for the marking to see if the unit’s cable is properly crimped. The cable can also be visually inspected for a crimped cable.
Figure 6, Uncrimped vs. Crimped
Note: If cable has no crimp marking, continue to follow the steps below and replace the cable. If cable is marked (and properly crimped), no repair is required. Replace enclosure panel.
Note: To order replacement cable, see ‘Service Instructions’ section below.
6. Remove right side enclosure panel and cut cable tie to slide wire leads through enclosure panel
Figure 7, Right Side Panel Removed
7. Remove only the left side ring terminals in control box. Do not lose the two jumper wires.
Figure 8, Left Side Ring Terminal Disconnect
8. Cut cable ties on alternator output leads.
Figure 9, Remove cable Ties
9. Unplug two blue fast-on connectors.
Figure 10, Unplug fast-on connectors
10. Disconnect brush block connectors.
Figure 11, Disconnect Brush Block Connections
11. Remove chassis ground connections.
Figure 12, Chassis Ground
12. Remove Control box.
Figure 13, Remove Control Box
13. Disconnect hydraulic pump connector.
Figure 14, Disconnect Pump Connection
14. Push coolant temp sensor through control grommet.
Figure 15, Coolant Temperature Sensor
Warning: Confirm unit is still disabled to ensure fan does not accidentally spin
15. Remove fan shroud and fan mounting bolts. Fan and shroud come off together
Warning: Make sure engine driving hydraulic fluid is off and the lines are not pressurized before removing
16. Remove secondary fan bolt.
17. Use puller to remove fan
Figure 18, Fan Puller
Warning: Make sure engine driving hydraulic fluid is off and the lines are not pressurized before removing
18. Remove hydraulic hose.
Figure 19, Remove Hose
19. Remove hose coupler connection on hydraulic pump.
Figure 20, Remove Hose Coupler
20. Remove pump.
Figure 21, Remove Pump
21. Remove the 4 alternator mounting bolts.
Figure 22, Remove Mounting Bolts
Warning: Alternator weighs over 75 lbs. Use caution when lifting.
Warning: Do not use the lifting eye cable to lift the unit. Use an alternate lift method
22. Lift with rated lifting strap and remove alternator from base pan. Do not use lifting eye cable.
Figure 23, Lift Alternator
23. Remove bolt and grommet bracket.
24. Remove brush blocks.
Figure 25, Brush Block Removal
25. Tilt alternator up and set on pump end with shaft pointing up.
26. Remove 4 bolts holding on alternator end.
Figure 26, Alternator Orientation
27. Remove alternator end. Do not cut or strip output wire insulation.
Figure 27, Lift Off Alternator End
28. Slide off old cable.
Figure 28, Remove Old Cable
Installation of New Cable
1. Install new cable
Figure 29, Install New Cable
2. Feed wires through alternator end and line up bolt holes.
Figure 30, Install Alternator End
3. Install 4 mounting bolts with washers to alternator.
4. Make sure all vibration isolators are installed and oriented correctly.
Figure 31, Vibration Isolator
5. Tilt alternator and set on 4 mounting isolators.
6. Reinstall wire grommet bracket. Make sure it is seated completely and flush.
Figure 32, Seated and Flush
7. Reinstall 2 pump bolts by hand first. Then torque to 58 Nm.
Figure 33, Pump Bolt Installation
8. Test fit plastic fan to ensure it spins freely with no interference.
Figure 34, Test Fit Fan for Interference
9. Reinstall brush blocks, ensure bolt C clip is installed.
Figure 35, Brush Block Installation and C-Clip
10. Reinstall hose coupler to pump. Torque to 97 Nm.
Figure 36, Hose Coupler Installation
Warning: Alternator weighs over 34 kg (75 lbs). Use caution when
11. Lift alternator and reinstall alternator in base pan, torque bolts to 46 Nm.
Figure 37, Lift and Install Alternator
12. Reinstall fan, torque to 58 Nm using fan holder
Figure 38, Hose Installation
13. Reinstall fan, torque to 58 Nm using fan holder
Figure 39, Fan Holder
14. Reinstall fan and shroud.
Figure 40, Install Fan and Shroud
15. Push side panel over pump inlet. Do not install panel bolts yet (see step 20).
16. Reinstall coolant temperature sensor through control grommet and connect pump connector.
17. Reinstall control
Figure 41, Install Control Box
18. Push generator output wire leads through side panel.
Figure 42, Output Wire Leads
19. Feed the 7 wire connectors through the side panel. Install wire holder and twist up into opening.
Figure 43, Wires Through Grommet
20. Install side panel bolts.
Figure 44, Side Cover Installation
21. Install wire jumpers to bottom terminal.
Figure 45, Jumper Connections
22. Install chassis ground connections (green jumper, silver strap and white with blue ring terminal).
Figure 46, Ground Connection
23. Install brush blocks (Wire F1 on the left, Wire F2 on the right).
24. Connect two blue fast-on connectors.
25. Run J1 through top current transformer loop.
Figure 47, J1 Through Top CT
26. Run J4 through bottom current transformer loop.
Figure 48, J4 Through Bottom CT
27. Take black wire and J4 and install to second from bottom terminal.
28. Take wires T3, T2, and jumper wire TB1-2 TB1-4 and install to third from bottom terminal.
29. Take orange wire and T1 and install in top terminal
Figure 49, Wire Locations
30. Push wires inside base pan and install 3 cable ties.
Figure 50, Wire Securing
31. Install enclosure make sure mesh grate is behind tab.
Figure 51, Enclosure Tab
32. Reinstall side panel and grate.
33. Reinstall top two enclosure panels.
34. Reinstall front enclosure panel.
Service Instructions
Campaign Filing Instructions:
Fail Code: JSLIML
Account Code: 65
Authorization Code: 4495
Applicable SRT’s:
00-901: 0.7 hours- Administrative time (shop)
99-999: 1.0 hours Inspect cable ferrules
25-3AG: 5.1 hours cable replacement
Parts: Email: cpgf.customer.quality@cummins.com to order a replacement cable. In the email please provide the model and serial number of the unit being repaired, and the attention and address of where to ship the cable.
Travel: If travel to customer site is necessary, travel allowed else follow in-shop repair procedures and claims filing.
Expiration Date: None
Document History
| Date | Details |
| 2021-7-8 | Module Created |
| 2021-9-10 | Non-Product Problem Solving (PPS) |
| 2021-9-13 | Non-Product Problem Solving (PPS) |
Last Modified: 13-Sep-2021
*** IMPORTANT SAFETY RECALL***
NHTSA Recall No. 21E-075
Cummins Campaign #4495
October 8, 2021
Dear Cummins Customer:
This notice is sent to you in accordance with the requirements of the National Traffic and Motor Vehicle Safety Act.
Cummins Inc. has decided that a defect which relates to motor vehicle safety exists in certain 6RBAB, 8RBAB, 10RBAB, 15RBAB generator sets that were manufactured between January 29, 2021 and May 13, 2021.
This notice applies to your 6RBAB, 8RBAB, 10RBAB, or 15RBAB generator set(s) listed in the table on the enclosed Generator Set serial number list.
WHY IS A RECALL BEING CONDUCTED?
The generator sets are equipped with lifting cables to be used during product assembly, installation, service or removal. The ferrule on the genset lifting cable may have been improperly crimped by the supplier. If this condition exists, the lifting cable may pull out of the ferrule during lifting operation, which may cause the genset to fall during assembly, installation, service or removal, possibly resulting in personal injury.
WHAT ARE WE DOING ABOUT THE PROBLEM?
Cummins has released field Safety Campaign #4495 RBAB Lift Cable Crimp Issue to correct this condition by inspecting the lifting cable and, if defective, replacing it with a properly crimped lifting cable. Repair parts are currently available at Cummins Distributors and authorized Warranty Dealers. The repair will be completed free of charge and most applications will require approximately 7 hours to complete.
WHAT SHOULD YOU DO?
If the generator set must be lifted or moved, DO NOT use the lifting cable until it has been inspected as part of this campaign. Instead, use an alternative method for lifting until the lifting cable can be inspected and, if necessary, replaced with a properly crimped lifting cable.
Contact the nearest Cummins Distributor or authorized Warranty Dealer to arrange to have this campaign performed on your generator set. The distributor or dealer will work with you to schedule the best date to complete this repair.
Federal law requires vehicle lessors receiving this recall notice to forward a copy of this notice to the lessee within ten (10) days. Also, it is a violation of Federal law for a dealer to deliver a new vehicle or equipment covered by this recall notice under a sale or lease until the defect has been remedied.
WHO SHOULD YOU CONTACT IF YOU HAVE FURTHER QUESTIONS OR CONCERNS?
If you have questions or concerns about this recall, please contact your local Cummins Distributor or authorized warranty dealer. You may also contact Cummins Care at 1-800CUMMINS (1-800-286-6467) or visit our website at care.cummins.com.
If you have a complaint relative to this recall, you may report it to the following:
Administrator
National Highway Traffic Safety Administration
1200 New Jersey Avenue, SE
Washington, DC 20590
You may also call the toll-free Vehicle Safety Hotline at 1-888-327-4236 (TTY: 1-800-424-9153); or go to https://www.safercar.gov.
If you are no longer the owner of the generator set(s) listed in the table below, please forward this notice to the new owner or provide the new owner’s contact information to Cummins so that we can notify them of this recall.
Cummins is taking this action in the interest of safety and satisfaction with our products. We apologize for any inconvenience and thank you for your attention to this matter.
Sincerely,
Campaign Administrator Cummins Inc.
*** IMPORTANT SAFETY RECALL ***
NHTSA Recall No. 21E-075
Month XX, YYYY
OEM Customer
XXXX Street Address
City, ST 12345-6789
Dear Cummins OEM Customer:
We are writing to inform you that Cummins Inc. has determined that a safety-related defect exists in certain 6RBAB, 8RBAB, 10RBAB, 15RBAB generator sets that were manufactured between January 29, 2021 and May 13, 2021. Cummins has initiated a recall of the subject generator sets. Our records indicate that some of these generator sets have been shipped to you.
A copy of Cummins’ initial Part 573 Defect Notification report is enclosed. This notification was submitted to the National Highway Traffic Safety Administration (NHTSA) on August 17, 2021. As more fully described in the Defect Notification, certain generator sets are equipped with lifting cables to be used during product assembly or installation. The ferrule on the generator set lifting cable may have been improperly crimped by the supplier.
Enclosed is a list of generator set serial numbers for affected generator sets that our records indicate were shipped to your locations. For generator sets that have left your control, we encourage you to make a safety defect determination in accordance with 49 USC 30118 et seq. and, as appropriate, to submit a Defect Notification to NHTSA in accordance with 49 CFR Part 573. Cummins will conduct the recall, including notifying owners pursuant to 49 CFR Part 577, performing the remedy, and submitting quarterly status reports to NHTSA. Cummins is requesting that you provide the associated vehicle model identification, VINs and owner contact information to facilitate owner notification. Please work with your Cummins account team leader to ensure that the requested information is provided to Cummins as soon as possible.
For generator sets that are still in your inventory, please contact your local Cummins Distributor to arrange for this repair. Generator sets can be repaired under TSB210146.
Please note that Federal law prohibits delivery of these generator sets, or vehicles equipped with these generator sets, under a sale or lease until this condition has been remedied.
Cummins apologizes for this inconvenience, but we are initiating this action in the interest of our customers’ safety and satisfaction with our products. Thank you for your assistance.
Please confirm receipt of this communication.
Sincerely,
Account Manager
Enclosures:
1 Affected Product
Equipment
| BRAND | PART NO. | PRODUCTION DATES |
| CUMMINS | GENSET | |
7 Associated Documents
Defect Notice 573 Report
RCLRPT-21E075-7255.PDF 217.178KB
Recall Acknowledgement
RCAK-21E075-1003.pdf 645.749KB
Remedy Instructions and TSB
RCRIT-21E075-6867.pdf 16726.413KB
ISSUED Owner Notification Letter(Part 577)
RCONL-21E075-7670.pdf 110.456KB
Noncompliance Notice 573 Report
RCLRPT-21E075-9733.PDF 217.178KB
Recall Quarterly Report #1, 2021-4
RCLQRT-21E075-6980.PDF 211.117KB
Manufacturer Notices(to Dealers,etc)
RCMN-21E075-9289.pdf 133.339KB
Latest Recalls Documents
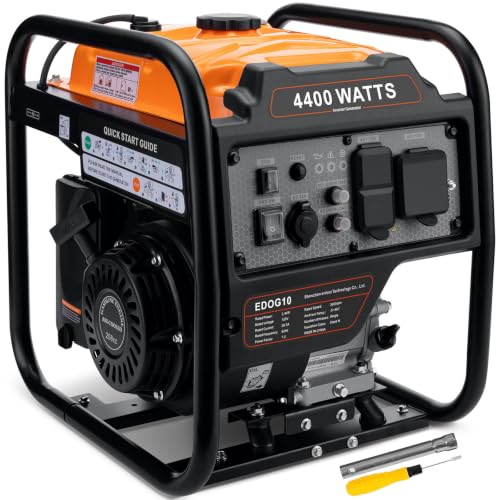
- Powerful Output: 4400 peak watts and 3400 running watts, 2*120V AC ports, 1* 30A RV port, 1*12V DC port, 14 hours runtime at 25% load
- Gas Powered: 2 gallon fuel tank capital
- Features: Inverter technolog, ECO mode, EPA compliment, RV ready, overload protection, low oil shutdown, cold start technology
- Portable Generator: Weight 56lbs, lightweight and easy to move
- Note: All Oxseryn generators are functionally tested in the factory, so there may be a slight smell of gas when you receive it

- 9500 Running Watts and 12500 Peak Watts (Gasoline); 8500 Running Watts, 11200 Peak Watts (Propane); Remote Start with Included Key Fob, Electric and Recoil Start; Up to 12 Hours of Run Time on a 6. 6 Gallon Fuel Tank with Fuel Gauge
- Features Two GFCI 120V 5–20R 20A Standard Household Receptacle, One Transfer Switch Ready 120V L14-30R 30A, and One RV Ready 120/240V 14–50R 50A; All Outlets Have Rubber Covers for Added Safety
- Powered by a Heavy Duty 457cc Westinghouse 4-Stroke OHV Engine Featuring a Long-Lasting Cast Iron Sleeve with Automatic Low Oil Shutdown and Digital Hour Meter. VFT display gives you real time updates with the voltage output, frequency, and lifetime hours
- Plug-and-Play: Comes with a Remote Start Key Fob, 12V Battery Charger, Oil, an Oil Funnel, a Tool Kit, and a User’s Manual to Get You Started Right Out of the Box (Minimal Assembly Required)
- All Westinghouse Portable Generators are Functionally Tested in the Factory and May Contain Minimum Residual Oil and/or Fuel Odor; EPA Compliant; Backed By 3-Year Limited Service, Labor, and Parts Coverage and Nationwide Customer Service Network

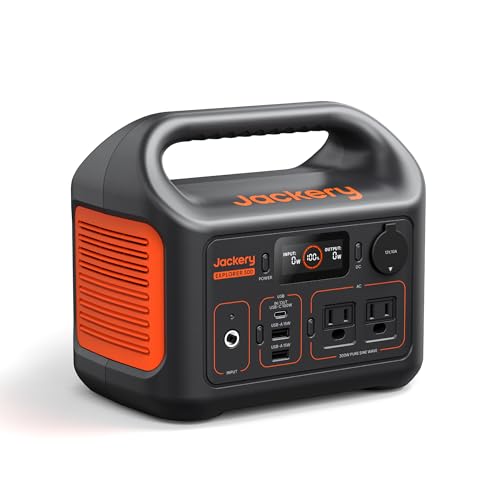
- Ultra-Lightweight: At only 7.5 lbs, the Explorer 300 delivers a robust 292Wh capacity while remaining 17% lighter than the industry average. The sleek, integrated handle makes it effortless to carry on long hikes or pack with your camping gear, providing reliable off-grid power without adding bulk to your load.
- Versatile Power for 6 Devices: Equipped with 2 AC outlets, a 100W USB-C PD port, 2 USB-A ports, and a 120W car port. With a 300W rated output (600W peak surge), it easily handles laptops, drones, and cameras, while also serving as a dependable cpap battery for camping or a robust solar powered generator when paired with panels.
- Built to Last: Upgraded with premium LiFePO4 chemistry, this portable generator delivers over 4,000 charge cycles before reaching 70% capacity. This ensures more than 11 years of reliable service life, making it a sustainable and durable energy partner for a decade of exploration.
- Fast Solar Charging: Perfect for off-grid use, this solar powered generator pairs seamlessly with Jackery panels. Reach 80% capacity in approximately 2.8 hours with a 100W solar panel, or maintain your gear with a portable 40W panel (80% in 7.5 hours), making it an essential part of your hunting essentials.
- WHAT YOU GET: 1* Jackery Explorer 300 Portable Power Station, 1*AC adapter, 1* car charger cable, 1* user guide (𝐒𝐨𝐥𝐚𝐫 𝐏𝐚𝐧𝐞𝐥 𝐍𝐨𝐭 𝐈𝐧𝐜𝐥𝐮𝐝𝐞𝐝.)

- Portable Generator with 60W Solar Panel Included: with a big battery pack, ZeroKor 300W solar powered generator are powerful enough to charge smartphones,tablets,laptops,headphones or other outdoor small camping supplies(Tips:Using electrical appliances over 300W may damage the portable solar generator, especially some devices that are prone to heat or built-in air compressor such as coffee maker,Hair dryer, water pump etc )
- Multiple Charging outlets for camping gear with SOS Flashlight: with 2* 300W Max AC outlets, 1* DC port (9V-12.6V/10A max ), 3* 5V/3A Max USB ports, 1*quick charge USB port (5V/3A 9V/2A Max), Flashlight with reading mode and SOS mode for your outdoor Adventures, our portable solar power station offers a versatile charging solution,allowing you to charge your outdoor smart devices directly from a wall AC outlet
- Multiple Charging Optional, Solar Panel Charger 60W Included: ZeroKor portable power bank generator can be recharged by Home AC outlet, DC5521 13v-23v Solar Panel (Portable Power Station built-in MPPT), 12V Carport. Take the portable solar power bank generator with you on-the-go and never worry about power shortage,the portable AC outlet design makes it more suitable for Tent camping OFF-Grid
- Built in BMS(Battery Management System) : ZeroKor portable power station features short circuit protection, over-current protection, over-voltage protection, overload protection and overheating protection. The built-in cooling fan system will automatically start and stop according to the portable battery pack internal temperature during use. Acting as a portable solar power bank, it accommodates multiple devices simultaneously, making it perfect for indoor and outdoor use
- HIGH CONVERSION EFFICIENCY: ZeroKor solar panels 60W monocrystalline solar cell have a high conversion efficiency of 20.5%, and its performance is better than that of polycrystalline solar panels under the condition of insufficient light

- Gasoline: 5300 Running Watts & 6500 Peak Watts; Propane: 4800 Running Watts & 5800 Peak Watts; 4.7 Gallon Fuel Tank with Fuel Gauge; Up to 14.5 Hours of Run Time with 120/240V Volt Selector Switch
- Features One 5–20R 120V 20V Household Duplex Receptacle, One RV-Ready TT-30R 30A Receptacle, and One Transfer Switch Ready L14-30R 30A Receptacle; All Outlets Have Rubber Covers for Added Safety
- Plug-and-Play: Comes with Oil, an Oil Funnel, Propane Hose, Tool Kit, Wheel Kit, and a User’s Manual to Get You Started Right Out of the Box (Minimal Assembly Required)
- Powered by a 274 CC Westinghouse 4-Stroke OHV Engine Featuring a Long-Lasting Cast Iron Sleeve with Automatic Low Oil and Carbon Monoxide (CO) Shutdown
- All Westinghouse Portable Generators are Functionally Tested in the Factory and May Contain Minimum Residual Oil and/or Fuel Odor; EPA Compliant; Backed By 3-Year Limited Service, Labor, and Parts Coverage and Nationwide Customer Service Network
This product presentation was made with AAWP plugin.