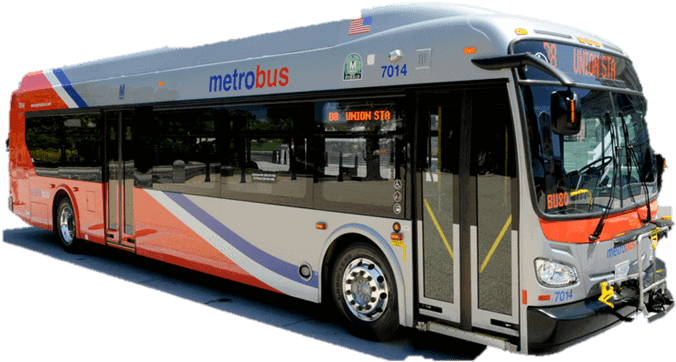
NHTSA ID Number: 10169768
Manufacturer Communication Number: SMB189
Summary
Service Manual Bulletin – Update to high voltage safety procedures, specifically Lockout/Tagout, de-energizing and re-energizing procedures for both battery electric and fuel cell buses.
19 Affected Products
Vehicles
NEW FLYER | XE35 | 2019-2020 |
| NEW FLYER | XE40 | 2013-2020 |
| NEW FLYER | XE60 | 2017-2020 |
| NEW FLYER | XHE40 | 2018-2020 |
| NEW FLYER | XHE60 | 2015, 2020 |
SMB-189
ISSUE DATE: Dec 20 2019
High Voltage Safety – Lockout / Tagout & De-Energizing & Energizing Procedure
This bulletin provides revised lockout / tagout and de-energizing and energizing procedures on your New Flyer vehicles in Three Parts.
Make this Service Bulletin available to service personnel to inform them of changed information.
SEOCONTENT-START
SMB-189 1 of 12
SERVICE MANUAL BULLETIN
This Service Manual Bulletin is prepared by the Publications Department of New Flyer Industries
Canada ULC. Refer to details below.
The New Flyer vehicles described in this manual may be protected by one or more
patents and design applications or registrations in the United States and Canada,
and in other countries. Refer to “Vehicle Patent Information” in this manual.
Copyright © 2019 New Flyer Industries Canada ULC
ISSUE DATE: Dec 20 2019
SMB-189
APPLICABILITY
VEHICLE LENGTH 30ft. 35ft. 40ft. 60ft. ALL
VEHICLE TYPE
Xcelsior® MiDi® Invero®
ALL
Low Floor High Floor
FUEL TYPE
Diesel Diesel/Electric CNG LNG
ALL
Fuel Cell Trolley/Electric Battery/Electric
SUBJECT High Voltage Safety – Lockout / Tagout & De-Energizing & Energizing
Procedure
SECTION TITLE Lockout / Tagout & De-Energizing & Energizing Procedure
DETAILS This bulletin provides revised lockout / tagout and de-energizing and
energizing procedures on your New Flyer vehicles in Three Parts.
Make this Service Bulletin available to service personnel to inform them
of changed information.
2 of 12 SMB-189
SERVICE MANUAL BULLETIN
SMB-189
The New Flyer vehicles described in this manual may be protected by one or more
patents and design applications or registrations in the United States and Canada,
and in other countries. Refer to “Vehicle Patent Information” in this manual.
Copyright © 2019 New Flyer Industries Canada ULC
PART ONE
1. Lockout / Tagout Procedure
for all Battery Electric
Vehicles
The following Lock Out / Tag Out procedure
should be followed when working on
or near the High Voltage components.
☞NOTE:
Use commercially available lock out equipment
and tags and be sure to follow any
local laws or workplace procedures.
1.1. Locking / Tagging Out
1. Set the Master Run switch to the STOPSYSTEM
position.
2. Rotate the 12/24 volt Battery switch to the
OFF position.
3. Lock and tag the switch and retain key.
See “Fig. 1: Locking / Tagging Out” on
page 2.
4. Switch the High Voltage Interlock switch to
the HV OFF position.
5. Lock and tag the switch and retain key.
6. Verify the low voltage and high voltage systems
are de-energized. Refer to De-Energizing
& Energizing Procedures in this
bulletin.
1.1.1. Locks / Tags Removal
1. The locks and tags shall be removed by
the installer of the locks and tags or shall
be removed under her / his supervision.
2. If the installer of the locks and tags is not
available, then her/his supervisor:
a. Ensures that the installer of the locks
and tags is not in the facility.
b. Contacts the installer to inform her/him
that the locks and tags will be removed.
c. Reminds the installer of the lock and
tag removal when she/he resumes
work.
Fig. 1: Locking / Tagging Out
????????
????????????
s145303a.svg
SMB-189 3 of 12
SERVICE MANUAL BULLETIN
SMB-189
The New Flyer vehicles described in this manual may be protected by one or more
patents and design applications or registrations in the United States and Canada,
and in other countries. Refer to “Vehicle Patent Information” in this manual.
Copyright © 2019 New Flyer Industries Canada ULC
PART TWO
2. De-Energizing & Energizing
Procedures for all Battery
Electric Vehicles equipped
with Manual Service
Disconnects (MSD)
NEVER try to connect or disconnect circuit
components such as cables, fuses,
or connectors while there is current
flowing in the circuit.
2.1. De-Energizing Procedure
1. Prepare the work area. Refer to “Service
Preparation” in your New Flyer Service
Manual for information on how to safely
prepare the work area.
2. Ensure the DC high voltage charging
cables are disconnected from the vehicle.
3. Lock Out and Tag Out the Battery Disconnect
and High Voltage Interlock switch.
Refer to 1. “Lockout / Tagout Procedure for
all Battery Electric Vehicles” on page 2 in
this bulletin for procedure.
4. Wear High Voltage Personal Protection
Equipment (PPE). Refer to “PPE Requirements”
in your New Flyer Service Manual
for guidelines.
☞NOTE:
Refer to “Equipment Requirements” in your
New Flyer Service Manual for information
on the type of multimeter required for the
following test.
5. Ensure there is no voltage on the 12/24
VDC battery bus bars. Measure in the
main fusebox between the 24V bus bar
and the ground bar. See “Fig. 2: Low Voltage
Verification” on page 3.
Fig. 2: Low Voltage Verification
????????????
????????????
????????????????????
????????????????????????????????????????
????????????????????????????????????????
????????????????
???????????????? ????????????????????????????????????????
????????????????????????????????????????
????
???????????????????????????????????????? ????????????????????????????????
????????????????????????????????????
????????????????????????
????????????????????
s145301a.svg
4 of 12 SMB-189
SERVICE MANUAL BULLETIN
SMB-189
The New Flyer vehicles described in this manual may be protected by one or more
patents and design applications or registrations in the United States and Canada,
and in other countries. Refer to “Vehicle Patent Information” in this manual.
Copyright © 2019 New Flyer Industries Canada ULC
6. Ensure there is no voltage on the High
Voltage System. Measure in the roofmounted
high voltage fuse box as follows:
a. Measure from the positive bus bar to
the negative bus bar. See “Fig. 3: High
Voltage Verification – 1” on page 4.
b. Measure from the positive bus bar to
the grounded enclosure or roof rack
structure. See “Fig. 4: High Voltage Verification
– 2” on page 5.
c. Measure from the ground bar to the
grounded enclosure or roof rack structure.
See “Fig. 5: High Voltage Verification
– 3” on page 5.
Fig. 3: High Voltage Verification – 1
????????????
????????????
????????????????????
????????????????????????????????????????
????????????????????????????????????????
????????????????
???????????????? ????????????????????????????????????????
????????????????????????????????????????
????
???????????????????????????????????????? ????????????????????????????????
????????????????????????????????????
????????????????????????
????????????????????
????????????????????????????????
????????????????????????????
????????????????????????????????
????????????????????????????
s145302a.svg
SMB-189 5 of 12
SERVICE MANUAL BULLETIN
SMB-189
The New Flyer vehicles described in this manual may be protected by one or more
patents and design applications or registrations in the United States and Canada,
and in other countries. Refer to “Vehicle Patent Information” in this manual.
Copyright © 2019 New Flyer Industries Canada ULC
Fig. 4: High Voltage Verification – 2
Fig. 5: High Voltage Verification – 3
????????????
????????????
????????????????????
????????????????????????????????????????
????????????????????????????????????????
????????????????
???????????????? ????????????????????????????????????????
????????????????????????????????????????
????
???????????????????????????????????????? ????????????????????????????????
????????????????????????????????????
????????????????????????
????????????????????
????????????????????????????????
????????????????????????????
????????????????????????????????
????????????????????????????
s145304a.svg
????????????????????????????????
????????????????????????????
????????????????????????????????
????????????????????????????
????????????
????????????
????????????????????
????????????????????????????????????????
????????????????????????????????????????
????????????????
???????????????? ????????????????????????????????????????
????????????????????????????????????????
????
???????????????????????????????????????? ????????????????????????????????
????????????????????????????????????
????????????????????????
????????????????????
s145305a.svg
6 of 12 SMB-189
SERVICE MANUAL BULLETIN
SMB-189
The New Flyer vehicles described in this manual may be protected by one or more
patents and design applications or registrations in the United States and Canada,
and in other countries. Refer to “Vehicle Patent Information” in this manual.
Copyright © 2019 New Flyer Industries Canada ULC
NEVER remove the ESS Manual Service
Disconnect plug while current is flowing
through it. The High Voltage may
create a long enough ionized gas path,
during circuit interruption, to bridge the
contacts of the switch base and therefore
continue the current flow. This ionized
gas is very hot and can cause
burns, fire and electrical shock.
Using a clamp-on current probe and
DMM, ensure that there is no current
flowing in the cables connecting to the
ESS Manual Service Disconnect plug.
7. Remove all the ESS Manual Service Disconnect
plugs as follows:
a. Press the locking tab and rotate the
MSD lever 45°. See “Fig. 6: Manual
Service Disconnect – 1” on page 6.
Fig. 6: Manual Service Disconnect – 1
b. Press the locking tab and rotate the
MSD lever to the 90° position. See “Fig.
7: Manual Service Disconnect – 2” on
page 7.
c. Remove the Manual Service Disconnects.
See “Fig. 8: Manual Service Disconnect
– 3” on page 7.
d. Install a yellow insulating cover, that is
open circuited in the Manual Service
Disconnect receptacle and lock it in
place.
☞NOTE:
Removing the Manual Service Disconnects
reduces the ESS voltage but each
battery within the ESS remains a high voltage
hazard at 88 volts.
8. Ensure that insulating covers are installed
in all ESS Manual Service Disconnect
receptacle locations.
9. Stow the removed MSDs in a locked location
to which only you have access.
10.Disconnect the high voltage cables at the
HV Junction Box on the side of the ESS.
????????????????????
????????????????
s145311a.svg
SMB-189 7 of 12
SERVICE MANUAL BULLETIN
SMB-189
The New Flyer vehicles described in this manual may be protected by one or more
patents and design applications or registrations in the United States and Canada,
and in other countries. Refer to “Vehicle Patent Information” in this manual.
Copyright © 2019 New Flyer Industries Canada ULC
Fig. 7: Manual Service Disconnect – 2
Fig. 8: Manual Service Disconnect – 3
2.2. Energizing Procedure
Perform a visual check to ensure that all
possible HV compartments are closed and
there is no debris, tools or test equipment
lying on HV terminations before energizing
the vehicle.
DO NOT touch cable terminations until
checking to ensure there is no voltage
between any of these cables and with
respect to vehicle chassis.
While connecting HV cables continuously
monitor, with the DMM, for the
inadvertent appearance of HV. If HV
appears troubleshoot why the HV
appeared and resolve before proceeding.
1. Using insulated tools, reconnect all high
voltage cables.
☞NOTE:
For the following devices, use a phase
rotation meter to ensure correct cable
sequences:
❒ Air Compressor
❒ ESS Heat Exchanger
❒ HVAC Unit
2. Reinstall high voltage junction box covers.
3. Install the ESS Manual Service Disconnect
plugs.
4. Close all HV access panels, doors, enclosures.
5. Remove the lockout / tagout from the 12/24
volt Battery Disconnect switch and turn the
switch to the ON position.
6. Remove the lock/tag from the High Voltage
Interlock switch and set the switch to the
HV ON position.
7. Set the Master Run switch to the DAY-RUN
or NIGHT-RUN position.
8. Remove “Safety Barricade” with warning
lights and “Danger High Voltage” signs
around the vehicle perimeter.
????????????????????
????????????????
s145312a.svg
????????????????????????????????????????????????????????
s145313a.svg
8 of 12 SMB-189
SERVICE MANUAL BULLETIN
SMB-189
The New Flyer vehicles described in this manual may be protected by one or more
patents and design applications or registrations in the United States and Canada,
and in other countries. Refer to “Vehicle Patent Information” in this manual.
Copyright © 2019 New Flyer Industries Canada ULC
PART THREE
3. De-Energizing & Energizing
Procedures for all Battery
Electric Vehicles without
Manual Service Disconnects
(MSD)
NEVER try to connect or disconnect circuit
components such as cables, fuses,
or connectors while there is current
flowing in the circuit.
3.1. De-Energizing Procedure
1. Prepare the work area. Refer to “Service
Preparation” in your New Flyer Service
Manual for information information on how
to safely prepare the work area.
2. Ensure the DC high voltage charging
cables are disconnected from the vehicle.
3. Lock out and Tag Out the Battery Disconnect
and High Voltage Interlock switch.
Refer to 1. “Lockout / Tagout Procedure for
all Battery Electric Vehicles” on page 2 in
this bulletin for procedure.
4. Wear High Voltage Personal Protection
Equipment (PPE). Refer to “PPE Requirements”
in your New Flyer Service Manual
for guidelines.
☞NOTE:
Refer to “Equipment Requirements” in your
New Flyer Service Manual for information
on the type of multimeter required for the
following test.
5. Ensure there is no voltage on the 12/24
VDC battery bus bars. Measure in the
main fusebox between the 24V bus bar
and the ground bar. See “Fig. 9: Low Voltage
Verification” on page 8.
6. Ensure there is no voltage on the High
Voltage System. Measure in the roofmounted
high voltage fuse box.
a. Measure from the positive bus bar to
the negative bus bar. See “Fig. 10: High
Voltage Verification – 1” on page 9.
b. Measure from the positive bus bar to
the grounded enclosure or roof rack
structure. See “Fig. 11: High Voltage
Verification – 2” on page 9.
c. Measure from the ground bar to the
grounded enclosure or roof rack structure.
See “Fig. 12: High Voltage Verification
– 3” on page 10.
Fig. 9: Low Voltage Verification
????????????
????????????
????????????????????
????????????????????????????????????????
????????????????????????????????????????
????????????????
???????????????? ????????????????????????????????????????
????????????????????????????????????????
????
???????????????????????????????????????? ????????????????????????????????
????????????????????????????????????
????????????????????????
????????????????????
s145301a.svg
SMB-189 9 of 12
SERVICE MANUAL BULLETIN
SMB-189
The New Flyer vehicles described in this manual may be protected by one or more
patents and design applications or registrations in the United States and Canada,
and in other countries. Refer to “Vehicle Patent Information” in this manual.
Copyright © 2019 New Flyer Industries Canada ULC
Fig. 10: High Voltage Verification – 1
Fig. 11: High Voltage Verification – 2
????????????
????????????
????????????????????
????????????????????????????????????????
????????????????????????????????????????
????????????????
???????????????? ????????????????????????????????????????
????????????????????????????????????????
????
???????????????????????????????????????? ????????????????????????????????
????????????????????????????????????
????????????????????????
????????????????????
????????????????????????????????
????????????????????????????
????????????????????????????????
????????????????????????????
s145302a.svg
????????????
????????????
????????????????????
????????????????????????????????????????
????????????????????????????????????????
????????????????
???????????????? ????????????????????????????????????????
????????????????????????????????????????
????
???????????????????????????????????????? ????????????????????????????????
????????????????????????????????????
????????????????????????
????????????????????
????????????????????????????????
????????????????????????????
????????????????????????????????
????????????????????????????
s145304a.svg
10 of 12 SMB-189
SERVICE MANUAL BULLETIN
SMB-189
The New Flyer vehicles described in this manual may be protected by one or more
patents and design applications or registrations in the United States and Canada,
and in other countries. Refer to “Vehicle Patent Information” in this manual.
Copyright © 2019 New Flyer Industries Canada ULC
Fig. 12: High Voltage Verification – 3
7. Using a clamp-on current probe and DMM,
ensure that there is no current flowing in
the mid-string cable or cables inside the
ESS enclosure.
☞NOTE:
The battery strings inside the ESS have a
mid-string cable identified with a label.
Removing this cable as a service disconnect
will reduce the voltage approximately
in half. Each battery remains at a high voltage
of 88V so continued caution is
required.
8. Disconnect the mid-string cable for all battery
strings located inside the ESS compartment.
See “Fig. 13: Mid-String Cable”
on page 11.
9. Remove the cable connectors as follows:
a. Pull tab #1 up. See “Fig. 14: Release
Connector Tab #1” on page 11.
b. Using an insulated flat-bladed screw
driver, press on tab #2 and release tab.
See “Fig. 15: Release Connector Tab
#2” on page 11.
c. Pull the high voltage connector off the
battery pack.
10.Cover the connector on the cable with a
locking cover to prevent it from being reinstalled
until after the service work is complete.
See “Fig. 16: Locking Cable Cover”
on page 11.
Removing the mid-string cable will
reduce the high voltage risk but not
eliminate it. Continue to use caution
while disconnecting any other cables
from the batteries or while working on
any other components within the ESS.
11.Repeat this procedure to disconnect the
most positive and most negative cable in
the battery string (or strings) located in the
ESS.
????????????????????????????????
????????????????????????????
????????????????????????????????
????????????????????????????
????????????
????????????
????????????????????
????????????????????????????????????????
????????????????????????????????????????
????????????????
???????????????? ????????????????????????????????????????
????????????????????????????????????????
????
???????????????????????????????????????? ????????????????????????????????
????????????????????????????????????
????????????????????????
????????????????????
s145305a.svg
SMB-189 11 of 12
SERVICE MANUAL BULLETIN
SMB-189
The New Flyer vehicles described in this manual may be protected by one or more
patents and design applications or registrations in the United States and Canada,
and in other countries. Refer to “Vehicle Patent Information” in this manual.
Copyright © 2019 New Flyer Industries Canada ULC
Fig. 13: Mid-String Cable
Fig. 14: Release Connector Tab #1
Fig. 15: Release Connector Tab #2
Fig. 16: Locking Cable Cover
s145307a.svg
???????????????????? ????????????????????
s145309a.svg
????????????????????????????????????
????????????????????????????????????
????????????????????????????????????????????
???????????????????? ???????????? ????
s145308a.svg
s145410a.svg
12 of 12 SMB-189
SERVICE MANUAL BULLETIN
SMB-189
The New Flyer vehicles described in this manual may be protected by one or more
patents and design applications or registrations in the United States and Canada,
and in other countries. Refer to “Vehicle Patent Information” in this manual.
Copyright © 2019 New Flyer Industries Canada ULC
3.2. Energizing Procedure
Perform a visual check to ensure that all
possible HV compartments are closed and
there is no debris, tools or test equipment
lying on HV terminations before energizing
the vehicle.
DO NOT touch cable terminations until
checking to ensure there is no voltage
between any of these cables and with
respect to vehicle chassis.
While connecting HV cables continuously
monitor, with the DMM, for the
inadvertent appearance of HV. If HV
appears troubleshoot why the HV
appeared and resolve before proceeding.
1. Using insulated tools, reconnect all high
voltage cables.
☞NOTE:
For the following devices, use a phase
rotation meter to ensure correct cable
sequences:
❒ Air Compressor
❒ ESS Heat Exchanger
❒ HVAC Unit
2. Reinstall high voltage junction box covers.
3. Close all HV access panels, doors, enclosures.
4. Remove the lockout/tagout from the 12/24
volt Battery Disconnect switch and turn the
switch to the ON position.
5. Remove the lock/tag from the High Voltage
Interlock switch and set the switch to the
HV ON position.
6. Set the Master Run switch to the DAY-RUN
or NIGHT-RUN position.
7. Remove “Safety Barricade” with warning
lights and “Danger High Voltage” signs
around the vehicle perimeter.
SMB189
Lockout / Tagout